Resonance: A Plague Tale Legacy Steam Deck Best Settings Guide (2026)
Resonance: A Plague Tale Legacy is exactly the kind of game that makes me love and hate handheld gaming at the same time. It looks absolutely gorgeous, but after spending time tweaking it on Steam Deck, I quickly realized that trying to force a high frame rate is simply not worth it.
Asobo Studio has built another demanding adventure filled with detailed environments, atmospheric lighting, dense vegetation, and, of course, those terrifyingly large rat swarms. The game can push the Steam Deck hard, especially in outdoor areas where the CPU and GPU suddenly have much more work to do.
The good news? Resonance can still be a very enjoyable Steam Deck game if you approach the settings with realistic expectations.
For me, the sweet spot is a properly locked 30 FPS, with image quality prioritized over unnecessary ultra settings. With a few smart compromises, Sophia’s journey across Minotaur’s Island still looks surprisingly impressive on the small 800p screen.
My Steam Deck Target: Stable 30 FPS Over Everything Else
I know some players immediately start looking for a 40 FPS or even 60 FPS configuration. Personally, I wouldn’t recommend making that your priority here.

This is a cinematic, visually demanding AAA game. During quiet interiors, you may see frame rates comfortably above 30 FPS, but the important moments are the ones that matter: combat, large outdoor environments, rat swarms, and areas with lots of AI activity.
That’s where the Deck starts showing its limits.
A stable 30 FPS feels much better to me than a game constantly jumping between 30, 37, and 45 FPS. Consistency is king on Steam Deck, especially in a game where you’re moving the camera constantly.
My Recommended Graphics Preset
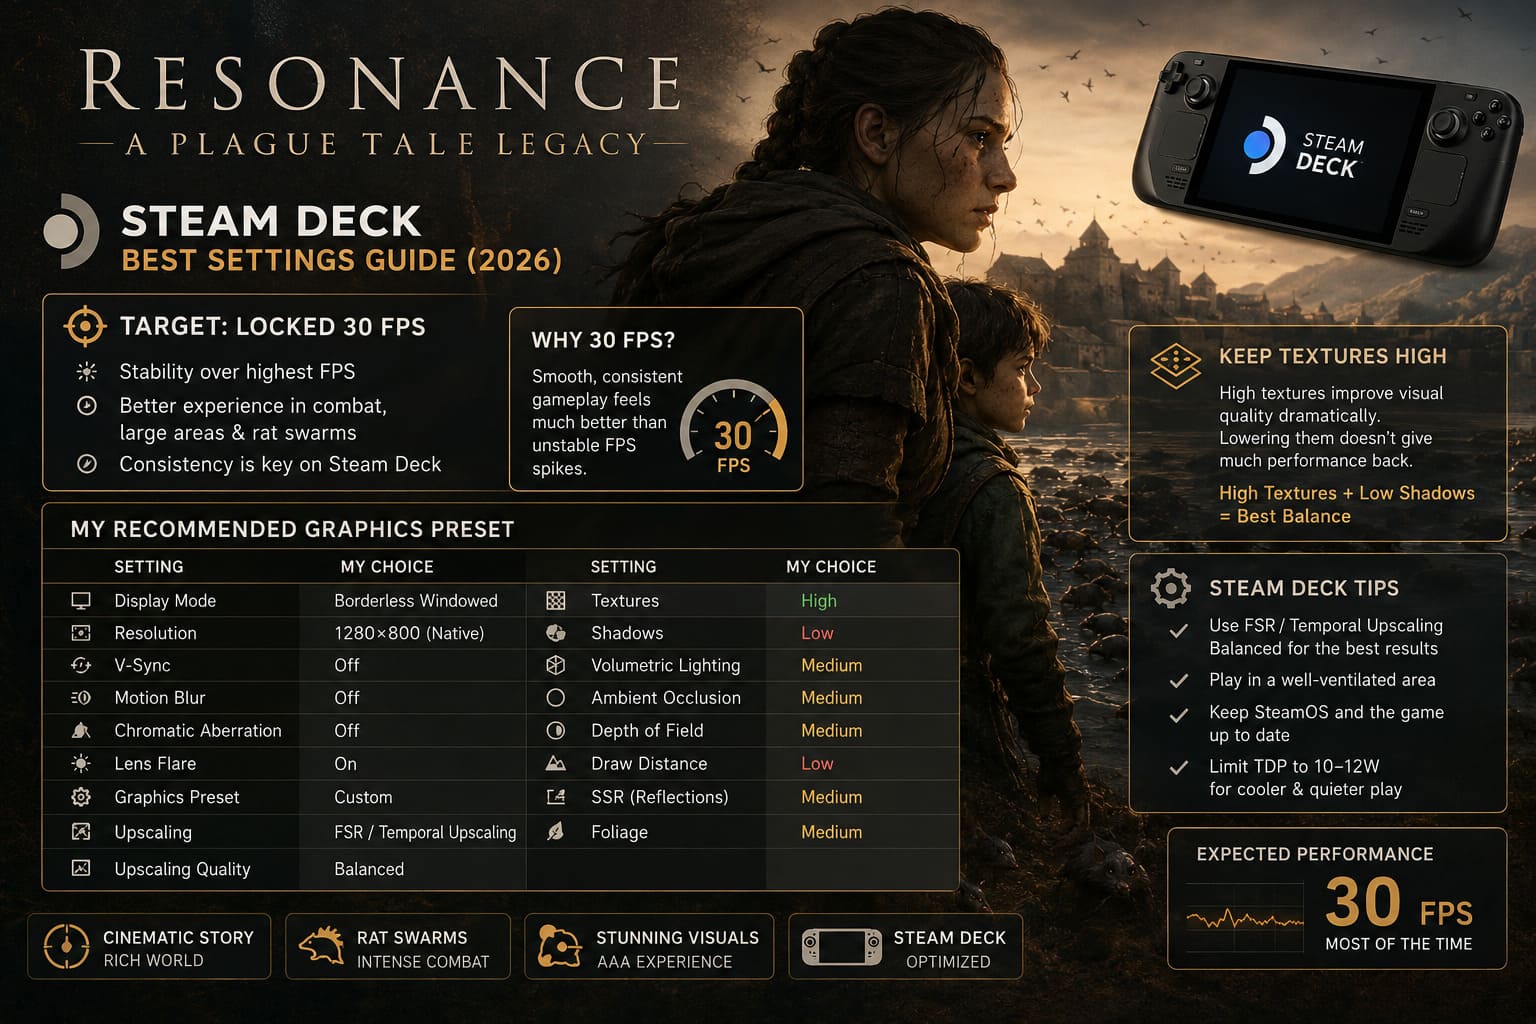
| Setting | My Choice | Why |
|---|---|---|
| Display Mode | Borderless Windowed | Convenient with SteamOS |
| Resolution | 1280×800 | Native Deck resolution |
| V-Sync | Off | Let the Deck handle frame limiting |
| Motion Blur | Off | Cleaner image during movement |
| Chromatic Aberration | Off | Sharper overall presentation |
| Lens Flare | On | Small visual touch with little impact |
| Graphics Preset | Custom | Gives better control |
| Upscaling | FSR / Temporal Upscaling | Essential for performance |
| Upscaling Quality | Balanced | Best compromise for 800p |
| Textures | High | Excellent visual improvement |
| Shadows | Low | One of the easiest performance wins |
| Volumetric Lighting | Medium | Keeps the atmosphere intact |
| Ambient Occlusion | Medium | Better depth without going overboard |
| Depth of Field | Medium | Good cinematic presentation |
| Draw Distance | Low | Helps in large outdoor areas |
| SSR | Medium | Keeps reflections looking convincing |
| Foliage | Medium | Good balance for island environments |
Don’t Be Afraid of High Texture Quality
One setting I particularly recommend keeping high is Texture Quality.
At first glance, dropping everything to Low seems like the obvious Steam Deck solution. In practice, that’s not always the best approach. Textures have a huge influence on how a game feels visually, especially when you’re playing on a relatively small screen.
The Deck’s unified memory setup is capable of handling high-quality textures reasonably well, while reducing textures doesn’t necessarily give you the kind of performance improvement you might expect.
So I’d rather sacrifice shadow quality than make character clothing, environments, and surfaces look muddy.
High textures + lower shadows is one of my favorite compromises in demanding Steam Deck games, and it works particularly well here.
FSR Balanced Is the Real Performance Saver
This is probably the most important part of the entire setup.
Running a modern AAA game at native 1280×800 with aggressive graphics settings is simply too much to ask from the Deck in demanding scenes. That’s where upscaling becomes extremely useful.
I prefer Balanced rather than going all the way down to Performance.
Performance mode can certainly provide extra frames, but the image becomes noticeably softer. With Balanced reconstruction, the game still retains a reasonable amount of detail while giving the GPU considerably more breathing room.
On the Deck’s screen, this is a very important distinction. I would rather have a slightly reduced internal resolution with good reconstruction than native resolution accompanied by constant frame-time spikes.
And honestly, once you’re playing rather than staring at screenshots, a consistent 30 FPS is much more noticeable than a minor difference in pixel clarity.
The Settings I Would Sacrifice First
If your particular Steam Deck is struggling, don’t randomly turn everything down. There is a better order.
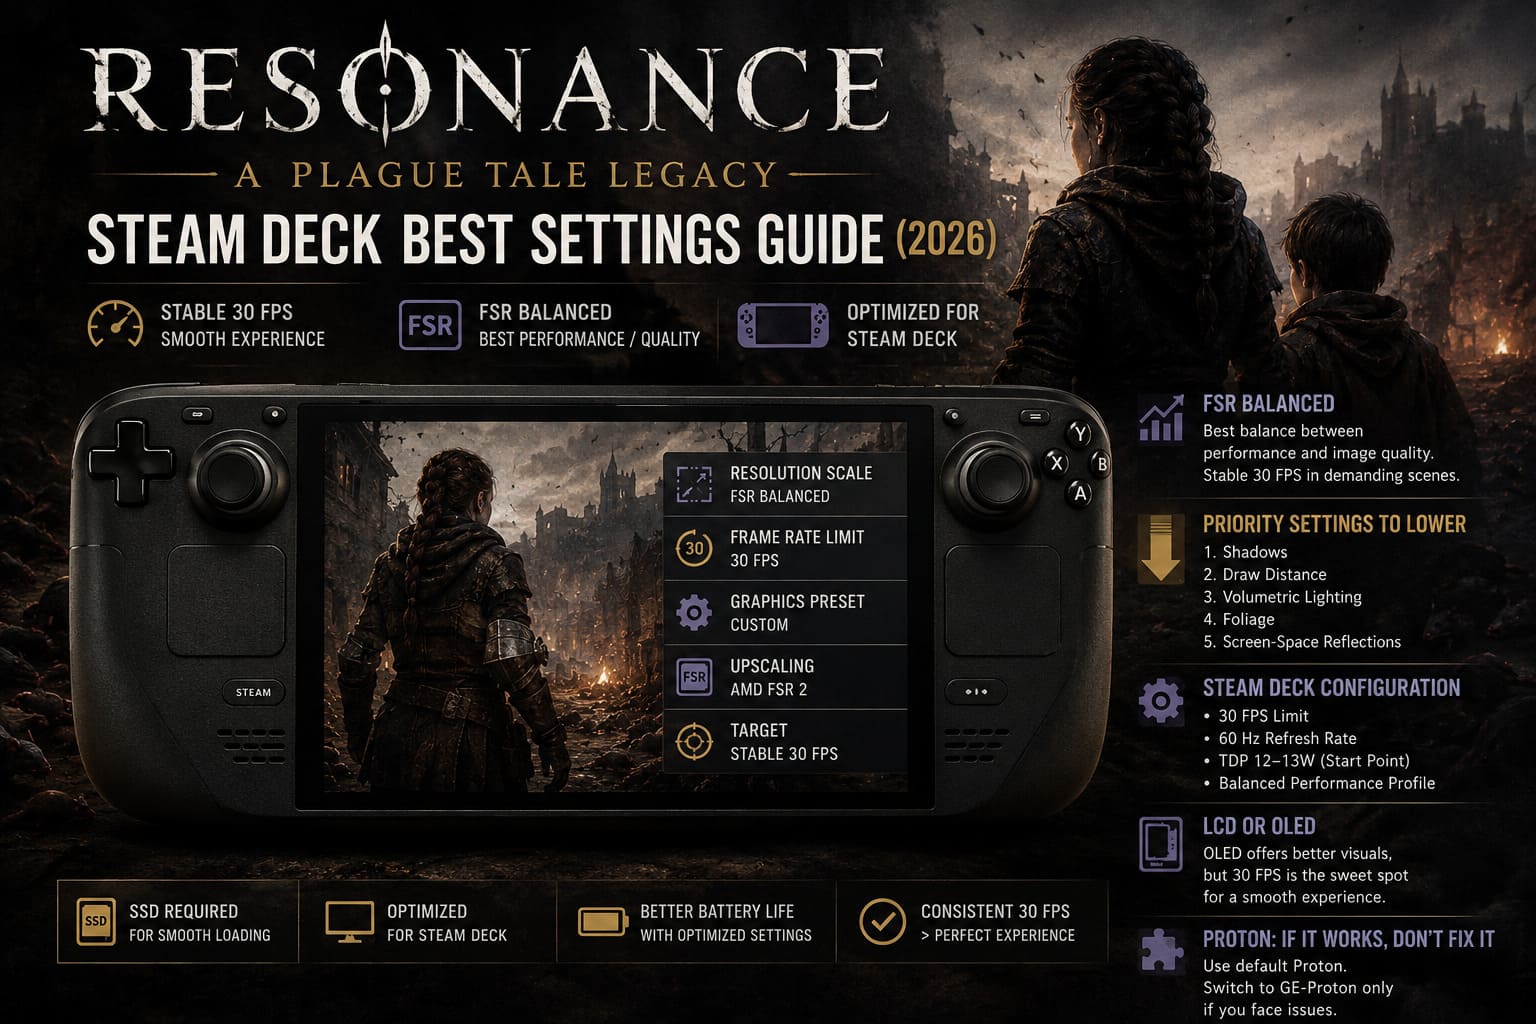
I’d start with:
- Shadows
- Draw Distance
- Volumetric Lighting
- Foliage
- Screen-Space Reflections
These settings can have a much more noticeable performance impact than some of the cosmetic options.
Meanwhile, I would keep textures relatively high and leave smaller visual effects alone unless you really need the extra performance.
That’s one of the biggest mistakes I see with Steam Deck optimization guides: making the entire game look like a PS3 title just to gain a few frames.
The Deck is capable of delivering a much better-looking experience than that.
Steam Deck Performance Settings
After adjusting the game itself, I would also configure SteamOS.
For my preferred setup, I’d start with a 30 FPS frame-rate limit and match the display refresh behavior accordingly.
If you’re using a Steam Deck OLED, there is more flexibility because of its display characteristics, but I still wouldn’t assume that 40 FPS is going to be maintained everywhere. Interior locations may feel great at 40 FPS, while demanding outdoor sequences can bring the system back down.
That’s why I personally prefer building the entire setup around 30 FPS.
What I’d Use
| Steam Deck Option | Recommended Setting |
|---|---|
| Frame Rate Limit | 30 FPS |
| Refresh Rate | 60 Hz for 30 FPS |
| TDP | Around 12–13W as a starting point |
| Manual GPU Clock | Auto |
| Performance Profile | Balanced/optimized for the game |
The important word here is starting point. Every Deck behaves slightly differently depending on temperatures, ambient conditions, game updates, and the exact scene you’re playing.
I wouldn’t obsess over hitting a particular TDP number if the game already maintains a stable frame rate.
LCD vs OLED: Is There a Big Difference?
The Steam Deck OLED is obviously the nicer device for this kind of game. The display makes dark environments look fantastic, and the improved screen characteristics make atmospheric games like Resonance particularly appealing.
But don’t expect the OLED model to magically turn the game into a 60 FPS experience.
The underlying hardware is still relatively close to the original Deck platform. The OLED model can offer some efficiency advantages, but Resonance remains a demanding AAA game.
If you’re using the LCD Deck, I’d have absolutely no problem locking the game to 30 FPS and enjoying it that way. In fact, I’d recommend it.
What About GE-Proton?
If the game is behaving normally, I wouldn’t immediately start changing compatibility layers.
My philosophy with Steam Deck is simple: if it works, don’t fix it.
Start with the default Proton configuration. If you encounter crashes, unusual shader compilation behavior, asset-loading stutters, or unexplained compatibility problems, then experimenting with a newer GE-Proton release can make sense.
To try another Proton version:
Steam Library → Resonance → Properties → Compatibility → Force a specific Steam Play compatibility tool
Then choose the version you want to test.
But I wouldn’t install GE-Proton purely because a guide told you that it’s “faster.” Compatibility layers aren’t magic performance switches, and sometimes changing them can introduce a different problem while solving the original one.
Should You Use Frame Generation?
This is where things get interesting.
Community frame-generation solutions have become increasingly popular among Steam Deck users because they can make a 30 FPS base game look considerably smoother.
If you already have a reliable 30 FPS frame rate, frame generation can potentially make camera movement and traversal feel much more fluid.
However, I wouldn’t use it to disguise an unstable 20–25 FPS base.
Frame generation works best when the underlying frame rate is already solid.
If the game is bouncing all over the place, adding generated frames doesn’t magically fix the fundamental problem. It can also introduce artifacts, ghosting, or additional input latency.
For a story-driven adventure like Resonance, I’d personally play the game natively at a stable 30 FPS first. If you find the motion too sluggish, then experiment with frame generation.
What Performance Should You Actually Expect?
This is where I think it’s important to be realistic.
Don’t buy or configure Resonance expecting a locked 60 FPS experience on Steam Deck. That’s simply not the target I’d choose for a game this ambitious.
With the settings above, my goal would be:
- 30 FPS as the main target
- Higher frame rates in lighter indoor scenes
- Occasional dips in especially demanding outdoor sequences
- More demanding rat encounters potentially becoming the toughest sections
- Better consistency after shaders and assets have been cached
The exact result can change considerably depending on the game’s patches and driver/Proton updates, so I wouldn’t treat any single benchmark as permanent.
Resonance: A Plague Tale Legacy PS5 vs Xbox Series X Performance Comparison
Battery Life: Don’t Chase the Last Frame
Another reason I like the 30 FPS approach is battery consumption.
A Steam Deck running a demanding AAA game at unrestricted performance is going to work hard. The fans spin faster, the APU consumes more power, and the battery disappears much quicker.
Limiting the game gives the hardware an actual target.
If the Deck doesn’t need to render 45 or 50 frames every second, it doesn’t have to constantly chase them.
That can mean lower power consumption, less heat, and a quieter handheld, which is exactly what I want when playing a long story-driven adventure.
I’d much rather play for a longer session at a comfortable 30 FPS than squeeze out a few extra frames and spend the whole time listening to the fan.
Resonance: A Plague Tale Legacy – Complete Character Progression and Skills Walkthrough
My Final Resonance Steam Deck Setup
After looking at the game as a whole, I think the best Steam Deck philosophy is pretty straightforward: don’t fight the hardware.
Resonance: A Plague Tale Legacy is designed to be visually impressive. Trying to force every setting to High while demanding 40–60 FPS isn’t going to make the experience better.
Instead, keep the settings that matter visually and cut the expensive options that don’t add enough to justify their performance cost.
For me, that means High textures, Medium volumetrics, Medium foliage, Medium ambient occlusion, Low shadows, Low draw distance, and FSR Balanced, combined with a 30 FPS cap.
The result isn’t technically the highest possible quality, but that’s not the point.
The point is that Sophia’s journey still looks like a modern AAA game while feeling stable enough to actually enjoy on a handheld.
And that’s ultimately what I want from a Steam Deck optimization guide. I don’t want the lowest possible graphics settings. I want the best-looking version of the game that the hardware can realistically sustain.
For Resonance, 30 FPS is the sweet spot I’d choose.
It gives the game room to breathe, keeps the visuals impressive, and makes the Steam Deck feel like the portable console it was meant to be.