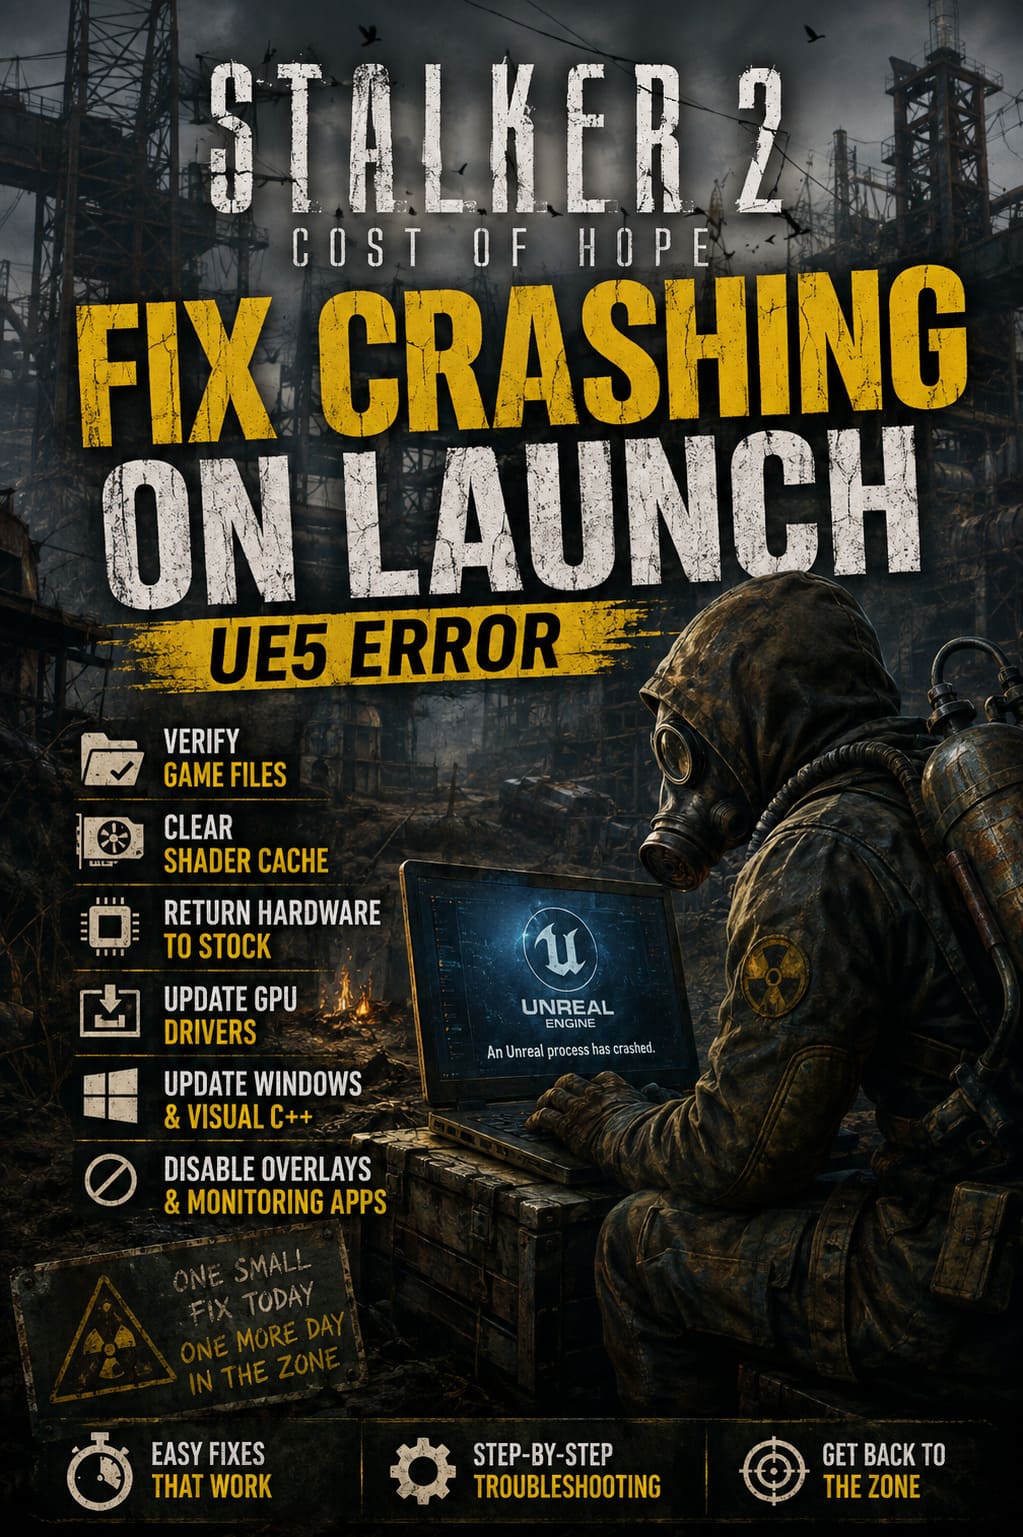
How to Fix STALKER 2 Cost of Hope Crashing on Launch UE5 Error
If there is one thing that can kill the mood faster than stepping into an anomaly with half a magazine left, it is watching STALKER 2: Cost of Hope crash before the main menu even appears. After spending plenty of time with demanding PC games built on Unreal Engine, I have learned that launch crashes are rarely caused by one magical setting. They are usually the result of several small things colliding at exactly the wrong moment: damaged files, stale shader data, unstable hardware settings, drivers, overlays, or a Windows component that decided today was the perfect day to break.
The situation is especially frustrating with Cost of Hope, which arrives alongside major technical changes and an updated Unreal Engine 5 foundation. UE5 can produce spectacular lighting, detailed environments, advanced physics, and some seriously impressive atmospheric effects, but it also puts much more pressure on the CPU, GPU, memory, and shader compilation process. If you are getting a black screen, an instant desktop crash, or the dreaded “An Unreal Process Has Crashed” message, don’t immediately assume your PC is too weak.
In my experience, the smarter approach is to work through the potential causes in order. Start with the easy fixes, then move toward the more technical ones. Here is how I would troubleshoot STALKER 2 Cost of Hope crashing on launch.
Mortal Shell 2 Weapon Guide: How to Get Shotgun Early and Tarstones Upgrade Guide
Why Is STALKER 2 Cost of Hope Crashing at Startup?
A fresh expansion or major game update can completely change how a previously stable installation behaves. New engine components, modified assets, shader libraries, configuration files, and updated dependencies all have to work together before you even reach the title screen.
That is why a game can run perfectly one day and suddenly refuse to start after an update. The problem might not be your graphics settings at all. A corrupted shader cache or one damaged executable can be enough to stop Unreal Engine before it finishes initializing.
The most common causes include:
- Corrupted or missing game files
- Outdated or damaged GPU shader caches
- Graphics driver problems
- Unstable CPU or RAM settings
- Aggressive motherboard performance profiles
- Conflicting overlays and monitoring software
- Broken Microsoft Visual C++ components
- Windows or DirectX compatibility issues
Don’t try to fix everything simultaneously. Change one thing at a time and test the game after each major step. That makes it much easier to identify what actually solved the problem.
Step 1: Verify Your STALKER 2 Game Files
This is the first thing I would do, especially after installing a large expansion or update.
Large games can occasionally end up with damaged or incomplete files following an interrupted download, disk error, launcher problem, or update that did not apply correctly. You might not notice anything wrong until Unreal Engine attempts to load a particular asset during startup.
For Steam Users
If you are playing through Steam, open your library and find STALKER 2. Right-click the game, choose Properties, then open Installed Files. Select Verify integrity of game files and let Steam complete the process.
For Epic Games and GOG Users
If you use another PC storefront, look for the equivalent Verify, Repair, or Scan and Repair option. The exact wording differs between launchers, but the goal is the same: compare your local installation against the official files and replace anything that is missing or corrupted.
This sounds almost too basic, but it has fixed countless launch problems for me across different games. It is also one of the safest troubleshooting steps because you are not changing hardware settings or deleting personal saves.
Step 2: Clear the GPU Shader Cache
If STALKER 2 Cost of Hope reaches a black screen, shows the initial splash sequence, and then crashes, I would put shader cache corruption high on the suspect list.
Unreal Engine relies heavily on shaders, and modern games can generate a huge amount of temporary graphics data. After a substantial update, old shader information may no longer match the game’s current files. Instead of gracefully rebuilding everything, the engine can sometimes fall over during initialization.
NVIDIA GPUs
Open NVIDIA Control Panel and navigate to Manage 3D Settings. Look for Shader Cache Size and make sure it is not being restricted unnecessarily. If your current configuration is causing problems, using Unlimited can give the game more room for shader data.
After changing the setting, restart Windows.
You can also clear old NVIDIA shader cache files manually. Press Windows + R, enter %localappdata%, and look for NVIDIA cache folders such as DXCache. Remove the temporary cache contents rather than randomly deleting unrelated folders.
The next launch may take longer than usual because the game has to rebuild shader data. That is normal. Don’t panic if the first startup after clearing the cache feels slower.
AMD Radeon GPUs
For Radeon hardware, open AMD Software: Adrenalin Edition and look through the graphics settings for the shader cache reset option. Reset the cache and restart the computer before launching the game again.
A clean shader compilation can make a surprisingly large difference when a game crashes during its earliest rendering stages.
Step 3: Return CPU and RAM Settings to Stock
This is the fix I would pay particular attention to if your computer has a high-end processor or manually tuned memory.
A PC can appear completely stable during everyday use and still crash in a demanding game. Unreal Engine can create very different workloads from benchmarks or older games, particularly during asset processing and shader compilation.
If you have enabled CPU overclocking, undervolting, aggressive motherboard enhancement modes, or manually tuned memory profiles, temporarily return the system to conservative stock settings.
Motherboards sometimes enable automatic performance features that push a processor harder than the manufacturer’s baseline specifications. Those settings may work for months, but a demanding UE5 title can expose instability that other software never managed to trigger.
You don’t necessarily need to permanently abandon your performance profile. The point is to test the game at stock settings. If Cost of Hope suddenly launches normally, you have learned something important: the crash may be related to system stability rather than the game installation itself.
Step 4: Repair the Main Game Executable
If verifying the installation does not solve the problem, there is another approach worth considering: forcing your launcher to replace the primary game executable.
Navigate to the game’s installation directory and locate the shipping executable, commonly named something similar to stalker2_win64_shipping.exe.
I would not start deleting random files from the installation folder. Instead, if you specifically suspect the executable is damaged, remove only that file and immediately run the launcher’s file verification process again. The launcher should detect that the executable is missing and download a clean replacement.
This can be useful when ordinary verification somehow fails to correct a damaged core file.
There is an important caveat, though: make sure the game is completely closed and use the official launcher verification process afterward. Don’t experiment with unrelated binaries or configuration files just because they happen to be nearby.
Step 5: Update Your GPU Drivers
UE5 games are extremely dependent on the graphics driver stack. A driver that behaves perfectly in older games can still have problems with a new engine build.
Check for the latest driver available for your NVIDIA or AMD graphics card. If the manufacturer has released a newer game-ready or stability-focused driver, installing it is worth trying before going deeper into Windows troubleshooting.
I also recommend avoiding unnecessary driver experimentation. You don’t need five different driver utilities running in the background. Install the appropriate official package, restart Windows, and test the game again.
If the crashes began immediately after a driver update, however, the situation is different. In that case, a clean driver installation or reverting to a previously stable version may be worth testing.
Step 6: Update Windows and Microsoft Visual C++
A modern PC game depends on far more than its own installation folder.
Make sure Windows is fully updated and that your DirectX-related system components are functioning normally. You should also repair or reinstall the current Microsoft Visual C++ Redistributable packages required by modern Windows games.
This is particularly relevant if you recently performed a Windows reinstall, removed old runtime packages, or have experienced other applications failing to start.
A missing runtime can produce an immediate crash with very little useful information on screen. Sometimes the only clue is that the game simply disappears.
Step 7: Turn Off Overlays and Monitoring Applications
This is another fix that sounds boring until it works.
Software such as GPU monitoring tools, frame-rate counters, RGB utilities, recording applications, communication overlays, and hardware monitoring programs can hook into a game’s rendering pipeline. Most of the time they work without any trouble. Occasionally, a major game update changes something and the previously harmless combination becomes unstable.
For troubleshooting, temporarily disable:
- Steam or launcher overlays
- Discord overlay
- RivaTuner Statistics Server
- GPU monitoring overlays
- Third-party recording tools
- Aggressive RGB or peripheral management utilities
You don’t have to uninstall anything. Close the programs, restart the game, and see whether the launch behavior changes.
If the game suddenly starts working, re-enable your applications one by one until you identify the offender.
Quick STALKER 2 Cost of Hope Crash Checklist
| Problem | First Fix to Try | Why It Helps |
|---|---|---|
| Instant crash after launching | Verify game files | Replaces damaged or missing data |
| Black screen before menu | Clear shader cache | Forces fresh shader compilation |
| Unreal crash on powerful PC | Return CPU/RAM to stock | Removes possible hardware instability |
| Game executable error | Replace executable through verification | Restores a clean core binary |
| Crash after driver update | Clean or revert GPU driver | Removes driver-related conflicts |
| Game closes with no message | Disable overlays | Prevents third-party injection conflicts |
| Missing runtime error | Repair Visual C++ | Restores required Windows components |
What I Would Try First
If I were sitting at my own PC with STALKER 2 Cost of Hope refusing to launch, I wouldn’t immediately start changing BIOS settings or deleting configuration files. My first pass would be verify the game files, clear the GPU shader cache, restart Windows, and disable every overlay I don’t absolutely need.
If that failed, I’d update the GPU driver and check Windows components. Only after those steps would I investigate CPU, RAM, or motherboard performance settings.
That order matters. It keeps troubleshooting relatively safe and gives you useful information after every test. There is little value in changing ten settings at once and then having no idea which one actually fixed the crash.
Final Thoughts
There is nothing more annoying than preparing to return to the Zone only to be thrown straight back onto the Windows desktop. With a large Unreal Engine 5 game such as STALKER 2: Cost of Hope, launch crashes can come from several different layers of the PC rather than one obvious bug.
The good news is that most of the fixes are straightforward. Verify the installation, rebuild shader caches, update drivers and Windows, disable overlays, and test your hardware at stock settings before reaching for more drastic solutions.
I’ve spent enough time troubleshooting PC games to know that the most complicated-looking crash is often fixed by something surprisingly simple. Start with the boring solutions. They work more often than you’d think.
Once Cost of Hope finally reaches the main menu without crashing, the technical headache is over. Then you can get back to the part that actually matters: exploring the Zone, managing ammunition, listening for anomalies, and wondering why you decided to walk into that abandoned building in the first place.