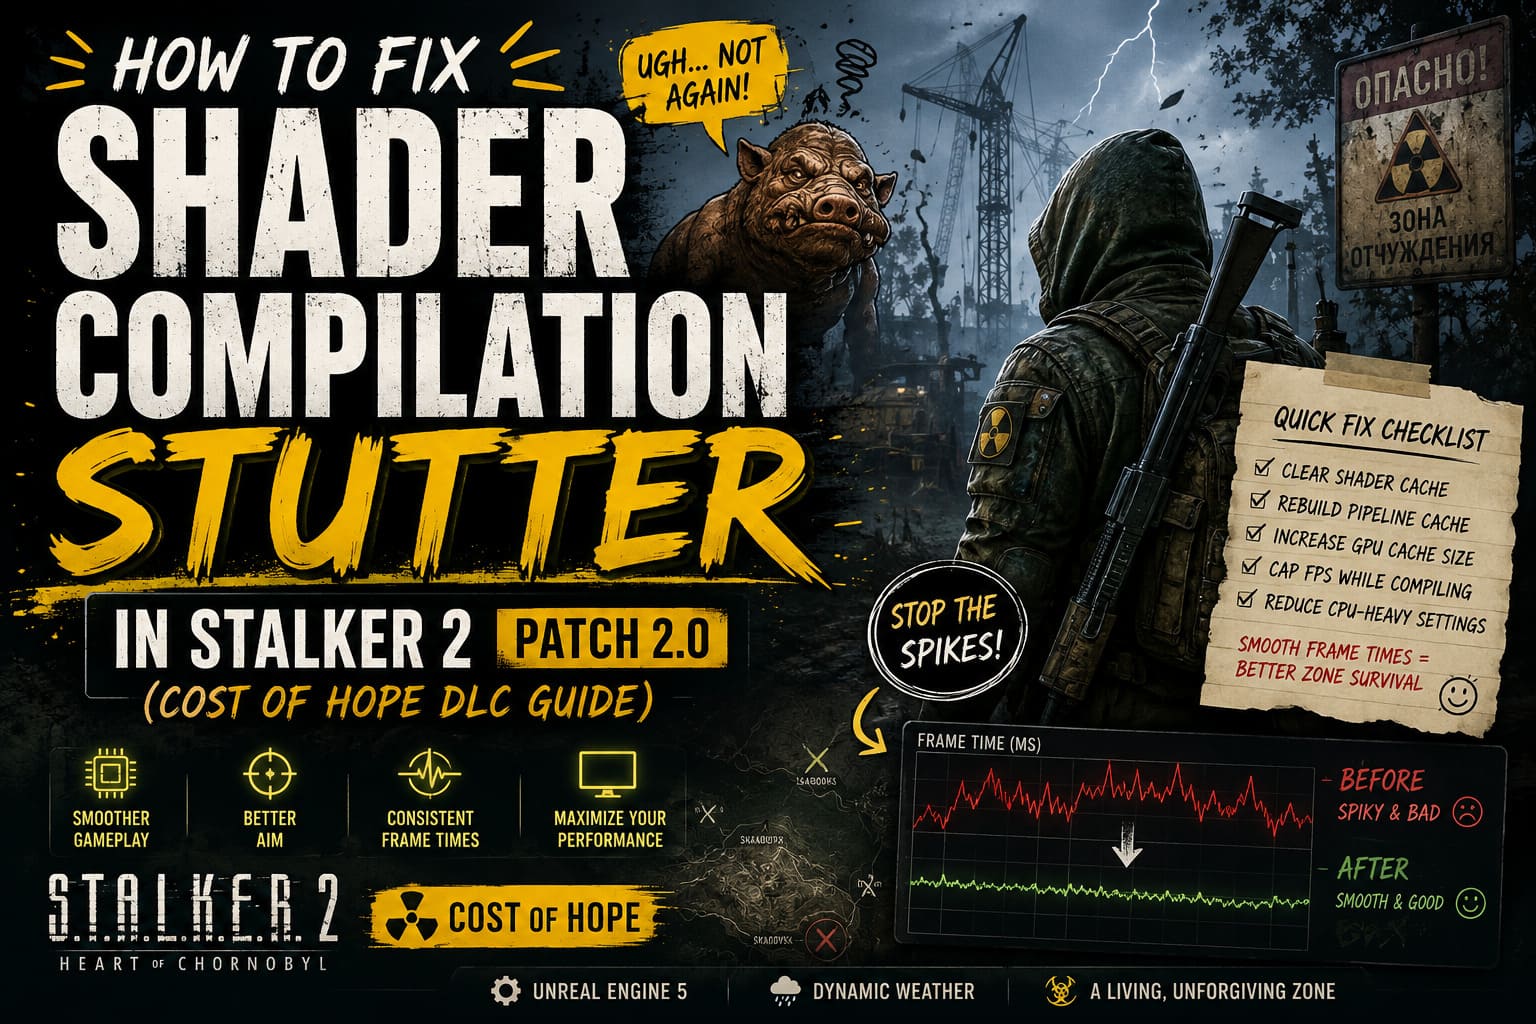
How to Fix Shader Compilation Stutter in STALKER 2 Patch 2.0 (Cost of Hope DLC Guide)
There is a particular kind of PC stutter that drives me completely insane. It is not the usual “my GPU is too weak” problem, and it does not necessarily disappear just because you own an expensive graphics card. You are walking through the Zone in STALKER 2: Heart of Chornobyl, everything looks smooth, you turn a corner, an anomaly appears, an NPC walks into view, or you enter a new location—and suddenly the game freezes for a fraction of a second. Then it catches up. A few seconds later, it happens again.
That is exactly the sort of behavior many PC players associate with shader compilation stutter. The arrival of the Cost of Hope expansion and Patch 2.0 makes the problem particularly frustrating because the game is pushing a huge amount of detailed geometry, lighting, effects, environmental simulation, and character rendering through Unreal Engine 5. Even a powerful PC can experience ugly frame-time spikes when the game encounters something it has not prepared in its shader pipeline yet.
I have played enough demanding PC games to know that chasing a perfect average FPS number is often the wrong approach. A game running at 80 FPS can feel considerably worse than one locked around 60 if the frame-time graph looks like a mountain range. With STALKER 2, consistent frame delivery matters enormously, especially when you are exploring the open Zone and the engine is constantly loading new assets. The good news is that there are several things worth trying before you start blaming your CPU, GPU, or entire PC.
How to Fix STALKER 2 Cost of Hope Crashing on Launch UE5 Error
Why STALKER 2 Patch 2.0 Can Stutter During Shader Compilation
Shader compilation is one of those technical processes most players never think about until it goes wrong. In simple terms, the game needs to prepare graphical instructions so your hardware knows how to render particular materials, lighting effects, surfaces, characters, particles, and other visual elements. Depending on the game and engine, some of that work can happen before gameplay while other shaders may be processed when new content is encountered.
That becomes noticeable in a game like STALKER 2. The Zone is not a collection of small disconnected arenas. You are constantly moving between different environments, weather conditions, interiors, settlements, vegetation, enemies, anomalies, weapons, and lighting situations. When new combinations of graphical effects are encountered, the resulting CPU workload can briefly create a nasty frame-time spike.
Patch 2.0 and Cost of Hope also make this more complicated because new or modified assets can invalidate parts of an existing cache. A cache that worked perfectly before a major update may no longer be useful in exactly the same way afterward. That is why one of my first troubleshooting steps after a major graphical update is always a clean cache rebuild rather than immediately lowering every graphical setting.
Before Changing Anything: Check What Kind of Stutter You Have
Not every performance problem in STALKER 2 is shader compilation stutter. If your GPU is sitting at 99% usage and your FPS is consistently low, you probably have a graphics workload problem. If your GPU usage repeatedly drops while one or more CPU cores spike during the hitch, the situation looks different. Shader-related stutter is usually characterized by short, repeatable frame-time spikes when specific assets or effects appear for the first time.
| Symptom | Likely Cause | What to Try First |
|---|---|---|
| Stutter when entering new areas | Shader or asset compilation | Clear shader caches |
| Huge FPS drops everywhere | GPU or CPU limitation | Lower demanding settings |
| Stutter after installing a major patch | Outdated cache data | Rebuild caches |
| Periodic hitching during exploration | Streaming or CPU workload | Reduce CPU-heavy settings |
| Long initial compilation/loading | Shader preparation | Let compilation finish |
Method 1: Clear the Windows DirectX Shader Cache
This is probably the first thing I would try after installing a major STALKER 2 update. Windows maintains shader data that can be reused by games and graphics drivers, but old or incompatible cache entries can sometimes become more trouble than they are worth after a substantial patch. Clearing the cache does not damage your game installation; it simply means the required shader data has to be generated again.
- Close STALKER 2 completely.
- Exit Steam or whichever launcher you use.
- Press Windows + I to open Windows Settings.
- Go to System > Storage > Temporary Files.
- Allow Windows to calculate the temporary files.
- Select DirectX Shader Cache.
- Remove the selected files and restart your PC.
Afterward, do not panic if the first launch feels slower than normal. That is expected. The system and game may need to rebuild data that you just removed. Personally, I would rather endure one slower startup than spend an entire evening wondering why a previously smooth game suddenly developed random hitching after an update.
Method 2: Rebuild the STALKER 2 Pipeline Cache
If clearing the Windows cache does not help, the next logical step is looking at the game’s own cached pipeline data. Major updates can make older cached information less useful, and a corrupted cache can produce strange behavior that looks much worse than a simple FPS limitation.
Press Windows + R, enter %localappdata%, and look for the STALKER 2 folder. From there, check the game’s Saved directory for pipeline cache data, including files using the .upipelinecache extension. Delete the relevant cache file, then start the game again and give it time to rebuild its data.
Steam users should also be aware that Steam maintains shader cache data separately. The STALKER 2 Steam application ID is 1643320, so the associated shader cache can be found under the Steam installation’s steamapps\shadercache\1643320 directory. If you decide to clear it, close Steam first and understand that the next launch may involve additional shader preparation.
Method 3: Increase the GPU Shader Cache Size
This is one of those settings that many players never touch because, under normal circumstances, the driver handles it automatically. For a large Unreal Engine 5 game, however, giving the driver more room for compiled shader data can be useful. The idea is simple: if the cache is constantly being cleared or replaced because it has insufficient space, the GPU may have to redo work it has already performed.
NVIDIA Graphics Cards
Open the NVIDIA Control Panel, go to Manage 3D Settings, and locate Shader Cache Size. If the option is available in your driver version, consider increasing it from the default setting to a larger value such as 10 GB, or choose Unlimited if you have plenty of free storage and prefer maximum cache capacity.
I would not blindly choose Unlimited on a drive that is already almost full. Shader caches can consume storage, and SSD space is not something I like wasting without a reason. Keep a reasonable amount of free space on the drive and monitor whether the change actually improves frame-time consistency.
AMD Radeon Graphics Cards
For AMD users, open AMD Software: Adrenalin Edition and check the graphics settings for the shader cache controls available with your current driver. AMD’s driver management is somewhat different from NVIDIA’s, so the exact wording and available options can change between Adrenalin releases.
If the game suddenly began stuttering after a driver or game update, resetting the shader cache through the Radeon software can also be worth trying. Again, the first run afterward may not be the smoothest because the cache has to be rebuilt.
Method 4: Be Careful With STALKER 2 Launch Arguments
This is where I would slow down. You will find plenty of launch options posted in forums and social media that supposedly “fix” Unreal Engine 5 stutter. Some can help particular configurations, but they are not magic commands and should not be treated as universal solutions. An argument that changes engine behavior can just as easily create instability, longer loading times, or another performance problem.
If you are experimenting with launch parameters, change one thing at a time and keep a record of what you changed. Do not throw ten different commands into Steam and then assume the game is fixed because the next session happened to run better. That makes troubleshooting almost impossible.
The same rule applies to community-posted parameters such as shader compilation or thread-management commands. If a particular option has not been documented for your exact STALKER 2 version, treat it as an experiment rather than a guaranteed fix. Patch 2.0 can change engine behavior, which means an old tweak can become useless or even counterproductive.
Method 5: Cap Your FPS While the Game Settles
This is a surprisingly practical trick. If the game is preparing shaders or dealing with heavy CPU-side work, running completely uncapped can create additional pressure on the system. A temporary frame-rate cap can make the entire process feel less chaotic, particularly during initial loading and shader preparation.
Before loading your save, open the display settings and set the frame-rate limit to something sensible, such as 60 FPS. If your hardware struggles badly, even 30 FPS can be useful during troubleshooting. Let the game complete its initial preparation, load into the Zone, and then test your normal settings again.
I would not permanently recommend 30 FPS to someone with a PC capable of running STALKER 2 smoothly at 60 or higher. The point is simply to reduce variables while the game finishes its initial work. Once the shader cache has been rebuilt, remove the temporary cap and see whether the stutter has actually improved.
Method 6: Reduce the Settings That Hammer the CPU
One mistake I see constantly in PC troubleshooting is lowering every graphical setting equally. That is rarely the best approach. If your problem is a CPU-side bottleneck, dropping texture quality from Ultra to Medium might accomplish almost nothing while reducing settings that affect simulation, shadows, foliage, or character rendering can produce a much bigger improvement.
- Hair Quality: Try Medium if crowded settlements produce severe spikes.
- Shadow Quality: Reduce it from Epic if CPU or frame-time spikes remain high.
- Volumetric Effects: Lowering fog-related quality can help stabilize demanding scenes.
- View Distance: Reduce it if the CPU struggles while streaming large areas.
Do not assume you need to run everything on Low. STALKER 2 loses a lot of its visual character when you destroy the settings that make the Zone look dense and atmospheric. I prefer finding the two or three settings responsible for the biggest performance hit and leaving everything else alone.
Should You Enable Hardware-Accelerated GPU Scheduling?
Hardware-Accelerated GPU Scheduling (HAGS) is another setting worth testing, particularly if you are troubleshooting a modern Windows gaming setup. It changes how certain GPU scheduling responsibilities are handled, but the results can vary depending on your hardware, driver version, and game.
Because of that, I would not describe HAGS as a guaranteed STALKER 2 shader-stutter fix. Enable it, reboot, test the same area, and compare frame times. If the game feels worse, switch it back. The goal is measurable improvement, not collecting every popular Windows gaming tweak and hoping they somehow stack together.
My Recommended Order of Attack
If I were troubleshooting a fresh installation of STALKER 2 Patch 2.0 on my own PC, I would keep the process simple. First I would update Windows and the GPU driver, then clear the DirectX shader cache and restart the machine. After that I would allow the game to rebuild its own cache, test a consistent 60 FPS cap, and only then start changing individual graphics settings.
If the stutter continued, I would monitor GPU usage, CPU usage, VRAM, RAM and frame times rather than guessing. That information tells you much more than the average FPS counter. Do not start changing launch arguments until you know what problem you are actually trying to solve.
Final Thoughts on STALKER 2 Patch 2.0 Stutter
STALKER 2 is the kind of game where performance problems are especially noticeable because the atmosphere depends so heavily on uninterrupted exploration. When the frame rate suddenly catches on an invisible hook every time you enter a new area, the immersion disappears instantly. That is why shader compilation stutter can feel more annoying than a consistently lower frame rate.
The most sensible approach is to treat the problem like PC troubleshooting rather than hunting for a single secret setting. Clear old shader data, rebuild the pipeline cache, give your GPU enough cache storage, test a temporary FPS limit, and reduce CPU-heavy settings only where necessary. If one change works, keep it. If it does nothing, undo it and move on.
Patch 2.0 and Cost of Hope give STALKER 2 an even heavier technical workload, but that does not automatically mean your expensive gaming PC is suddenly inadequate. Sometimes the problem is simply stale cache data, a driver interaction, or an engine workload that needs time to settle. With a little patience and proper testing, you can usually turn those brutal frame-time spikes into something far less noticeable and get back to what actually matters: wandering into the Zone, hearing something move in the darkness, and immediately regretting going there alone.