Zombie Army 4: Dead War Full Campaign Walkthrough – 100% Completion Guide (All Collectibles & Upgrades)
Zombie Army 4: Dead War is at its best when everything goes completely wrong.
You start with a rifle, a few rounds, and what looks like a manageable group of undead soldiers. Then the screaming starts. A suicide zombie comes charging around the corner. An armored brute smashes through a doorway. Something much larger moves in the distance. Suddenly, the carefully planned sniper position you were so proud of five seconds ago is surrounded by half a city block of dead Nazis.
That chaos is a huge part of why I like Zombie Army 4.
Rebellion never tries to make the campaign feel clean or predictable. The levels are packed with strange little discoveries, optional encounters, hidden rooms, collectibles, and environmental secrets that reward players who are willing to slow down instead of constantly sprinting toward the next objective.
And if you’re chasing 100% completion, you absolutely need to slow down.
This walkthrough is built around a complete campaign run, covering the collectibles, Weapon Upgrade Kits, Heroic Actions, and the important exploration points across all nine core missions. If you’re the kind of player who wants to finish a game once and actually feel like you’ve seen everything it has to offer, this is the roadmap I’d use.
What Counts Toward 100% Completion in Zombie Army 4?
Before getting into individual missions, it helps to understand what you’re actually hunting for.
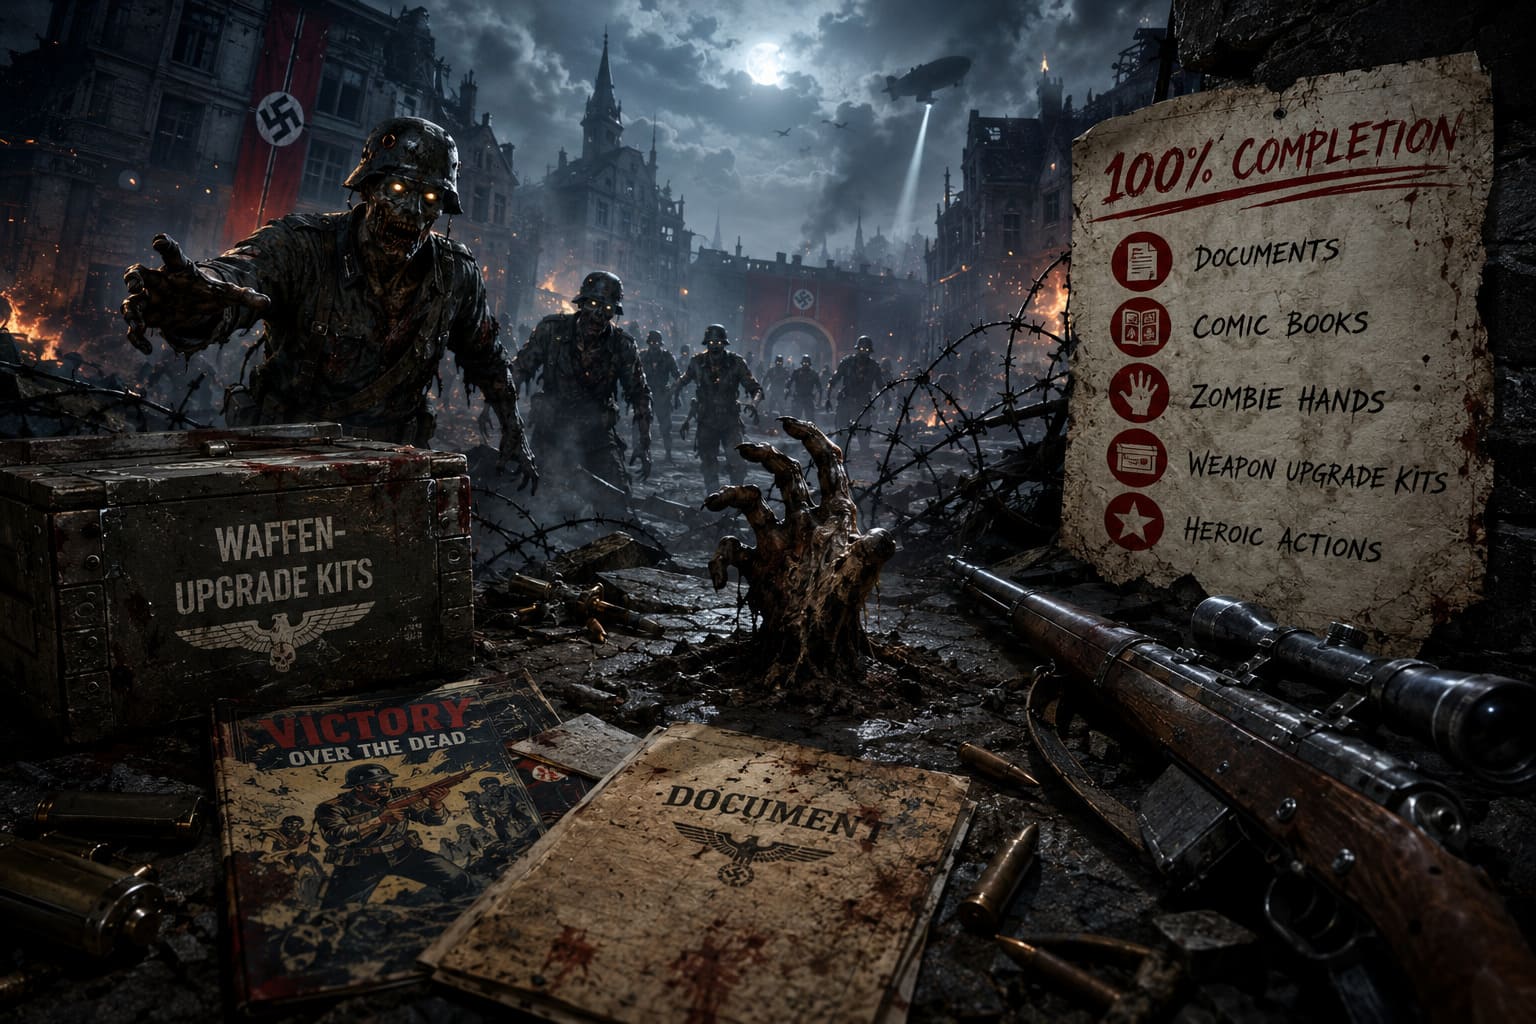
The campaign hides several different types of collectibles and optional objectives throughout its environments. Some are obvious once you know where to look. Others are tucked into corners that are very easy to ignore when a horde is trying to tear your face off.
| Collectible / Objective | What It Is | Why It Matters |
|---|---|---|
| Documents | Lore items scattered throughout missions | Expand the story and world-building |
| Comic Books | Hidden comic pages | Collectible progression |
| Zombie Hands | Crawling severed hands that must be shot | Easy to miss during combat |
| Weapon Upgrade Kits | Upgrade materials hidden or earned during missions | Improve your weapons |
| Heroic Actions | Optional rescue or combat events | Provide additional rewards and completion progress |
The Zombie Hands deserve special attention. They’re small, move quickly, and don’t exactly stand around waiting for you to find them. In several locations, listening is almost as useful as looking. Scratching noises, strange movement, or distant laughter can give away their position.
The same goes for some of the upgrade kits. If you simply follow the objective marker from beginning to end, you can easily finish a chapter without ever seeing them.
My Best Advice for a 100% Run
Don’t treat this like a speedrun.
After clearing a major combat encounter, take a few seconds to scan the environment. Check desks. Check shelves. Look behind crates. Look above you.
That last one is especially important.
Zombie Army 4 loves putting collectibles on roofs, beams, railings, wires, scaffolding, and other places your eyes naturally ignore while you’re focused on the ground.
And if you’re playing co-op, communicate. One player can cover an entrance while another searches the room. It makes collectible hunting dramatically less frustrating.
Mission 1: Dead Ahead
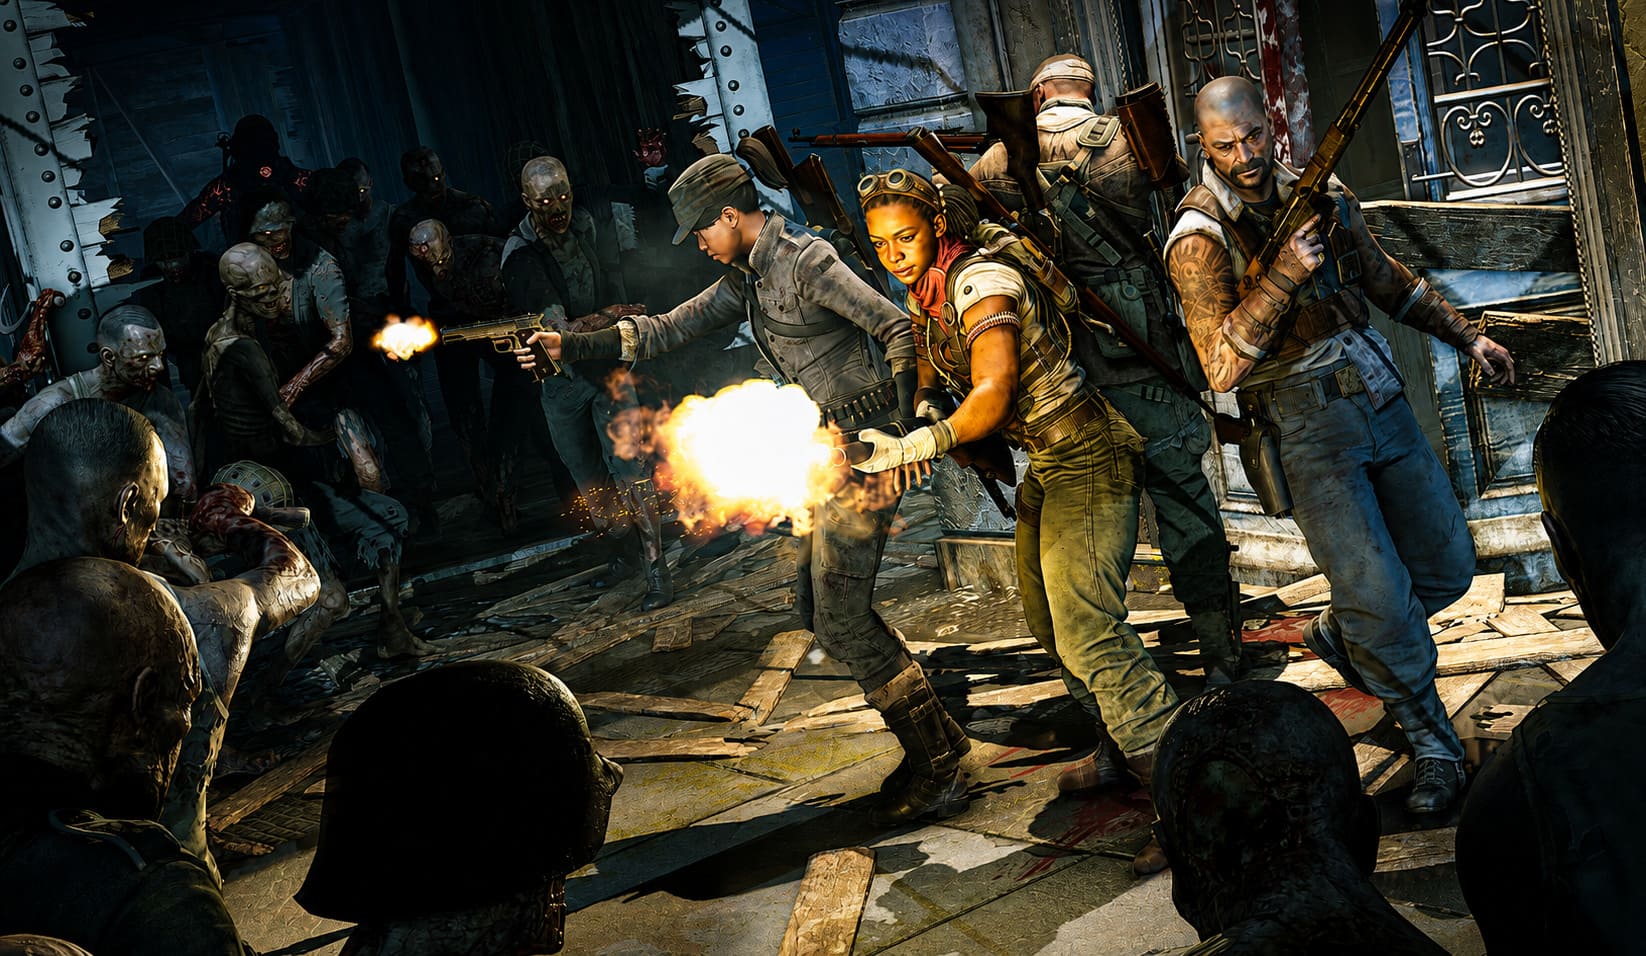
The campaign opens in a derailed train station in Milan, and it’s a pretty good introduction to what Zombie Army 4 is going to throw at you. The spaces are relatively straightforward, but the game is already encouraging you to look beyond the obvious route.
Chapter 1: Reporting In
After leaving the opening safe room, move through the station and start clearing the basic undead. Don’t rush through the upper areas.
Document 1
Head toward the infirmary on the upper floor after leaving the starting safe room.
The document is sitting on a desk close to the medical supplies. It’s not particularly well hidden, but the first wave of enemies can make it easy to run straight past.
Comic Book 1
Continue through the station until you reach the office area shortly before the path drops down toward the main tracks.
Search the desks inside the office. The comic page is lying on a table.
This is one of those collectibles where a quick glance isn’t enough. Walk into the room and actually check the furniture.
Zombie Hand 1
Once you’re outside on the train tracks, look upward.
A stationary passenger train has the hand crawling along its roof. Line up the shot and take it out.
It’s a good early lesson for the rest of the campaign: always check elevated surfaces.
Weapon Upgrade Kit 1
Near the tracks, search the mailroom and surrounding maintenance rooms.
You’ll find a locked area that requires the appropriate interaction to access. The upgrade kit is sitting on a workbench inside.
If you’re already thinking about weapon upgrades, this is worth grabbing early rather than leaving it behind.
Chapter 2: Locomotive No. 9
The train yard gets more dangerous here, with tougher enemies and more open combat spaces.
That also makes it easier to lose track of collectibles.
Document 2
Enter the main workshop and climb the metal stairs to the supervisor’s office.
The document is sitting on a filing cabinet.
Comic Book 2
Search underneath the wooden scaffolding near the rear portion of the train yard.
The comic is resting on a wooden crate tucked away from the main route.
Zombie Hand 2
Look toward the large central crane.
One of the high horizontal metal beams has a zombie hand moving across it. Because of the height, you’ll probably notice it only after deliberately scanning the overhead structures.
Weapon Upgrade Kit 2
After dealing with the main horde around the locomotive, search the far-right side of the yard.
There’s a tool shed containing the upgrade kit on a shelf.
Don’t leave the area immediately after the fight. This is exactly the kind of post-combat cleanup that makes a 100% run much easier.
Chapter 3: Off the Rails
The final section of Dead Ahead pushes you toward the station perimeter and gives you one last opportunity to clean up the area.
Document 3
Inside the passenger waiting terminal, check the rows of benches.
The document is sitting on an overturned suitcase.
Comic Book 3
Enter the radio transmission room and search behind the main radio equipment.
The comic is lying on the floor behind the equipment rack.
Zombie Hand 3
Move toward the broken window and look outside.
The hand is running along the top of the barbed-wire fence.
This is another elevated collectible, so don’t waste time staring at ground level.
Weapon Upgrade Kit 3
The final upgrade kit for Dead Ahead is awarded after completing the last major defense sequence, where you protect the track switch mechanism against incoming enemies, including suicide bombers.
Once the event is complete, the reward is registered automatically.
Mission 2: Death Canal
Death Canal is where the campaign starts getting much more atmospheric.
Venice’s flooded streets, narrow alleys, old buildings, and dark waterways create a completely different combat rhythm. It’s also a mission where the environment is constantly competing with the undead for your attention.
Chapter 1: Carnage Canal
Document 1
After crossing the first stone bridge, look for the open-air café on the left.
The document is on a round table underneath an umbrella.
Comic Book 1
Follow the narrow alley leading away from the canal.
Look for an alcove hidden behind several stacks of empty wine barrels. The comic is inside.
Zombie Hand 1
Look across the canal toward the wooden docks.
The hand is moving around a pile of fishing nets and crates.
You may need to wait for it to move into a clean line of sight.
Weapon Upgrade Kit 1
After surviving the opening ambush, search the surrounding area for a glowing red sigil.
Break it to open access to a hidden room.
The upgrade kit is sitting on an altar inside.
Chapter 2: Ghosts and Gondolas
This section sends you through old Venetian buildings and plazas, with plenty of vertical space.
Document 2
Enter the multi-story building being used as a makeshift sniper position.
On the second floor, check the kitchen counter.
The document is waiting there.
Comic Book 2
Head outside onto the terrace overlooking the main plaza.
Check the wooden bench beside the potted plant.
Zombie Hand 2
Look upward.
The clotheslines stretching between the residential buildings aren’t just decoration. A zombie hand is crawling along one of them.
It’s a fun collectible, mostly because you can easily miss it while fighting below.
Weapon Upgrade Kit 2
In the back alley, you’ll find an optional target-shooting puzzle.
Complete it by shooting the hidden plush dolls in the correct sequence. Once the puzzle is solved, the metal cage opens and gives you the upgrade kit.
This is one of the reasons I recommend exploring instead of treating optional areas as filler. Some of the best rewards are attached to these little distractions.
Chapter 3: Shadows in the Swamp
The campaign moves out toward foggy marshland, and visibility becomes a problem.
Document 3
Near the beginning of the swamp trail, enter the wooden shack.
The document is beside a kerosene lamp.
Comic Book 3
Deep in the swamp, look for an abandoned wooden boat stuck in the mud.
The comic is sitting on the captain’s seat.
Zombie Hand 3
Check the dead trees stretching over the water.
A hand is crawling along one of the thicker branches.
The fog can make this one annoying to spot, so take your time.
Weapon Upgrade Kit 3
This upgrade is connected to a Heroic Action.
You need to protect a survivor trapped on top of a stone structure while armored enemies attack.
Clear the enemies quickly enough to keep the survivor alive and complete the Heroic Action. The upgrade kit is awarded afterward.
Chapter 4: Gates of Hell
The final Death Canal chapter brings the occult elements to the forefront.
Document 4
Inside the generator room powering the defensive systems, search the control panel.
The document is sitting on top.
Comic Book 4
Near the bridge entrance, search underneath the stone archway.
The comic is tucked into the area below.
Zombie Hand 4
During the main portal arena section, scan the stone walls.
The hand moves vertically along the brickwork.
Weapon Upgrade Kit 4
During the final stand, defeat the elite officer zombie and obtain the key it drops.
Use the key to open the heavy safe inside the commander’s bunker.
The upgrade kit is inside.
Mission 3: Meat Locker
Meat Locker changes the mood again.
The frozen Nazi facility is full of sterile corridors, laboratories, industrial storage areas, and unpleasant hints about exactly what the enemy has been doing underground.
It’s one of my favorite types of Zombie Army 4 level design because the environment actually feels like part of the horror rather than simply being a backdrop.

Chapter 1: The Hunt for Dr. Schweiger
Document 1
At the snowy entrance, enter the guard checkpoint.
The document is on the main desk.
Comic Book 1
Find the locker room used by the facility’s soldiers.
Search the open lockers, particularly the one containing old uniforms.
Zombie Hand 1
Outside, look toward the spotlight towers.
The hand is crawling around the rim of a large light fixture.
Weapon Upgrade Kit 1
Search for a broken vent grate in the main hallway.
Crawl through the vent shaft and follow it to the hidden cache containing the upgrade kit.
This is exactly the sort of secret room you can miss if you never look at the environment for alternate routes.
Chapter 2: Dark Room
Now the campaign gets considerably more claustrophobic.
Document 2
Inside the primary dissection laboratory, check the surgical tray.
The document is sitting on it.
Comic Book 2
Go into the archives section behind the projector room.
The comic is resting on a bookshelf.
Zombie Hand 2
Enter the green-lit chemical storage room and look at the exposed pipes running along the ceiling.
The hand is moving across the plumbing.
Weapon Upgrade Kit 2
Search the laboratory desks for a keycard.
Use it to open the locked armory farther down the corridor. The upgrade kit is inside.
Chapter 3: Break Room
The name is misleading. There isn’t much of a break happening here.
Document 3
Enter the communal mess hall.
The document is sitting on a dining table.
Comic Book 3
In the main cold-storage vault, search behind the stacks of frozen meat crates.
The comic is tucked away behind them.
Zombie Hand 3
Watch the conveyor belt system.
A severed hand is riding along the belt and repeatedly passing through the room.
This one is actually easier to grab if you don’t shoot immediately. Watch its route for a moment, then take the shot when it comes around.
Weapon Upgrade Kit 3
During the generator defense sequence, keep the machine’s health above 50 percent.
Successfully completing the defense unlocks a secure wall locker containing the upgrade kit.
Chapter 4: Schweiger’s Revenge
The facility’s final stretch mixes heavy combat with a much more open industrial environment.
Document 4
Find the final observation booth overlooking the missile silo.
The document is inside.
Comic Book 4
Look beneath the main rocket platform.
The comic is sitting on the metal scaffolding.
Zombie Hand 4
Look toward the overhead crane tracks.
A hand is moving rapidly along the steel rail.
Weapon Upgrade Kit 4
Before leaving the level, enter the final safe room.
The upgrade kit is sitting openly on the main supply table.
This is one of the easier upgrades in the campaign, so don’t overthink it.
Mission 4: Zombie Zoo
Zombie Zoo is exactly as ridiculous as the title suggests, and I mean that as a compliment.
Mutated wildlife, undead zoo personnel, enclosed exhibits, and increasingly strange environments make this one of the campaign’s more memorable locations.
Chapter 1: Trouble at the Zoo
Document 1
At the main entrance, search the ticket booth.
The document is beside the cash register.
Comic Book 1
Enter the souvenir shop and check the shelves behind the stuffed animal display.
The comic is there.
Zombie Hand 1
At the empty bear enclosure, look at the heavy iron gates.
The hand is crawling along the top bars.
Weapon Upgrade Kit 1
Find the maintenance tunnel beneath the reptile house.
The kit is sitting on an electrical junction box.
Chapter 2: Welcome to the Jungle
The tropical exhibits provide plenty of cover, but they also give the collectibles plenty of places to hide.
Document 2
Look for the wooden bench along the tropical conservatory path.
The document is sitting on it.
Comic Book 2
Near the artificial waterfall, search behind the large fern.
The comic is hidden there.
Zombie Hand 2
Look at the mesh covering the aviary.
A zombie hand is crawling upside down across the wire.
Weapon Upgrade Kit 2
A Heroic Action is required here.
Find the allied scout trapped inside the metal birdcage and protect them while dealing with the surrounding screamers.
Complete the rescue successfully to receive the upgrade kit.
Chapter 3: Don’t Tap the Glass
The aquatic exhibits are probably the last place I’d want to fight an undead horde, but apparently that’s exactly where we’re going.
Document 3
Enter the laboratory monitoring room overlooking the shark tank.
The document is on the desk.
Comic Book 3
In the underwater viewing tunnel, check underneath the bench.
Zombie Hand 3
Look inside the empty cracked display tank on the left.
The hand is moving along the inside of the glass.
Weapon Upgrade Kit 3
Enter the power room and solve the fuse puzzle.
Restoring auxiliary power opens the storage vault containing the upgrade kit.
Chapter 4: Planetarium Assault
The final Zoo chapter moves beneath a huge planetarium dome.
Document 4
Search the central control room.
The document is on the console desk.
Comic Book 4
Check the outer seating area of the planetarium theater.
The comic is tucked around the rim.
Zombie Hand 4
Look upward at the enormous solar-system model.
The hand is crawling along the outer ring representing Saturn.
Weapon Upgrade Kit 4
Complete the final boss-defense sequence and destroy the undead shadow core.
The upgrade kit is awarded for completing the encounter.
Mission 5: Rotten Coast
Rotten Coast trades the zoo’s strange atmosphere for a foggy coastal setting filled with fishing villages, wrecked boats, ancient ruins, and plenty of places for zombies to hide.
The fog makes the collectibles more difficult to spot, so this is another mission where rushing is a bad idea.
Chapter 1: Shipwreck Rest
Document 1
Search the half-sunken wooden trawler.
Inside the captain’s wheelhouse, you’ll find the document.
Comic Book 1
On the cliffs, look for the first intact fishing cabin.
The comic is on its porch.
Zombie Hand 1
Look toward the wooden pier pylons.
A hand is jumping between the tops of the posts.
Weapon Upgrade Kit 1
Find the locked boathouse.
Around the dock are three hidden target bottles. Shoot all three to unlock the automated door and access the upgrade kit.
Chapter 2: Village of Darkness
The village is packed with enemies, which makes it tempting to simply push forward.
Don’t.
Document 2
Enter the village church.
The document is on the main altar table.
Comic Book 2
Climb into the church belfry.
The comic is on a wooden crate beside a sniper-rifle spawn.
Zombie Hand 2
At the cemetery, scan the top of the surrounding stone wall.
The hand runs along the upper ridge.
Weapon Upgrade Kit 2
Defend the village elder’s house during the major siege.
If you successfully hold the position, the upgrade kit becomes available inside the cellar.
Chapter 3: Trouble in the Hills
The terrain becomes much more vertical as you climb through the rocky ruins.
Document 3
Search the military tent near the archaeological dig.
The document is inside.
Comic Book 3
Look for the small stone crypt hidden among the ancient ruins.
The comic is inside.
Zombie Hand 3
Check the wooden scaffolding around the excavation pit.
The hand climbs up and down the structure.
Weapon Upgrade Kit 3
Complete the Heroic Action by killing the executioners before they can finish off the resistance fighter tied to the wooden post.
This is one of those moments where a good sniper rifle becomes more than a weapon. It becomes the solution to the entire problem.
Chapter 4: The Heist
The final Rotten Coast chapter shifts toward a fortified safehouse.
Document 4
Enter the fortified armory.
The document is on the main counter.
Comic Book 4
Go upstairs to the master bedroom and search beneath the broken floorboard.
Zombie Hand 4
Look at the exhaust fan on the roof.
The hand is spinning around on one of the blades.
Weapon Upgrade Kit 4
Inside the main vaults, look for a hidden panel.
Pull the secret lever disguised as a wall sconce to reveal the upgrade kit.
Mission 6: Molten Nightmare
Now things get properly infernal.
Molten Nightmare drops the campaign into an ash-covered Italian settlement surrounded by lava, burning structures, and occult machinery.
It’s also one of those missions where environmental hazards can be just as dangerous as the undead.
Chapter 1: Come Hell or High Water
Document 1
Enter the first abandoned house.
The document is sitting on top of an old piano.
Comic Book 1
Under the crumbling stone bridge, check the stone ledge above the magma stream.
The comic is there.
Zombie Hand 1
Watch the burning debris floating down the lava river.
One of the wooden pieces has a zombie hand riding on it.
Weapon Upgrade Kit 1
Enter the ruined tavern and search the basement.
A breakable brick wall conceals the upgrade kit. Use an explosive grenade or a sufficiently powerful melee attack to break through.
Chapter 2: Hell On Earth
The burning town becomes increasingly unstable as you push deeper.
Document 2
Search the tactical command outpost.
The document is on the metal desk.
Comic Book 2
Look inside the emergency medical tent.
The comic is on a metal folding chair.
Zombie Hand 2
Look up at the fire escapes attached to the buildings.
The hand is climbing one of the iron ladders.
Weapon Upgrade Kit 2
Complete the rooftop target challenge.
Five hidden stone gargoyles are positioned around the surrounding buildings. Destroy all five to receive the upgrade.
Chapter 3: Straying from the Path
This chapter sends you along narrow trails overlooking volcanic vents.
Document 3
Search the supply crate near the radio station on the ridge.
The document is inside.
Comic Book 3
Find the dark cave alcove near the edge of the map.
The comic is hidden inside.
Zombie Hand 3
Look at the cliffs above the trail.
A hand is climbing the vertical rock face.
Weapon Upgrade Kit 3
Complete the Heroic Action by rescuing survivors trapped by an armored fire-demon zombie.
Clear the area quickly enough to save them and the upgrade kit is awarded.
Chapter 4: The Final Hell Tower
The final section revolves around an enormous occult machine.
Document 4
Inside the primary control hub, search the crate near the entrance.
The document is on top.
Comic Book 4
Look high inside the tower structure.
The comic is sitting on a structural beam, so use your scope to scan the upper areas.
Zombie Hand 4
At the massive drill assembly, check the rotating machinery.
The hand is crawling around the main gear.
Weapon Upgrade Kit 4
Complete the final extraction sequence and destroy the Hell Tower’s cooling valves.
The upgrade kit is awarded automatically after the successful sequence.
Mission 7: All Roads Lead to Hell
The campaign is now approaching its endgame.
The scenery shifts toward war-torn Rome, and the atmosphere becomes noticeably more desperate. You’re no longer simply trying to survive another outbreak. You’re fighting your way toward the heart of Hitler’s undead war machine.
Chapter 1: Reaching the City
Document 1
Search the abandoned military truck near the highway entrance barrier.
The document is inside.
Comic Book 1
Look for the newsstand near the ruined city bus.
The comic is on the kiosk.
Zombie Hand 1
Look above the road.
The hand is running along the top of an overhead traffic sign.
Weapon Upgrade Kit 1
Drop into the maintenance trench beneath the main road.
Follow the yellow electrical cables to a stash box containing the upgrade kit.
Chapter 2: War Room
The resistance command bunker gives you a brief change of pace before the next major push.
Document 2
Inside the main briefing room, search the strategy table.
The document is on top.
Comic Book 2
Go behind the sleeping quarters into the storage locker room.
The comic is hidden inside.
Zombie Hand 2
Check the ventilation shaft.
A hand is moving behind the pipes and iron grating.
Weapon Upgrade Kit 2
Solve the terminal override puzzle.
The required number sequence is displayed across the whiteboards around the room. Enter the correct sequence to unlock the upgrade.
Chapter 3: All Roads Lead to Rome
This is where the campaign really starts throwing bodies at you.
Document 3
Search the ancient amphitheater grounds.
The document is positioned at the base of a stone pillar.
Comic Book 3
Inside the historical exhibition hall, search the broken marble sarcophagus.
The comic is tucked inside.
Zombie Hand 3
Look along the tops of the broken stone columns.
The hand jumps between them.
Weapon Upgrade Kit 3
Complete the Heroic Action by rescuing the isolated resistance sniper trapped on a balcony.
You’ll need to eliminate the incoming suicide grunts before they overwhelm the position.
Chapter 4: Hit the Road
The final push toward the defensive line is relatively direct, but there are still four collectibles to clean up.
Document 4
Search the guard outpost beside the final perimeter gate.
The document is inside the booth.
Comic Book 4
Enter the heavy artillery emplacement bunker.
The comic is on a stack of sandbags.
Zombie Hand 4
Search the crashed armored vehicle.
The hand is crawling around the rim of the rear tire.
Weapon Upgrade Kit 4
Before ending the chapter, check the safe-room terminal box.
The final upgrade kit is inside.
Mission 8: Hell Base
Hell Base is where the campaign stops pretending that we’re dealing with anything resembling normal military science.
Occult machinery, undead factories, industrial production lines, and a giant airship all come together in one of the game’s strangest environments.
And honestly, that’s exactly what I want from Zombie Army.
Chapter 1: Not in Kansas Anymore
Document 1
Search the entrance checkpoint building.
The document is on a steel tray table.
Comic Book 1
In the first open courtyard, check behind the occult ritual altar.
Zombie Hand 1
Look for the glowing green pipes running along the walls.
A hand is crawling across the top pipe.
Weapon Upgrade Kit 1
Search for the doorway covered by red vines.
Shoot the explosive barrel nearby to clear the obstruction and reveal the room containing the upgrade.
Chapter 2: War Machines
This chapter is essentially an undead weapons factory, which sounds ridiculous until you actually walk through it.
Then it somehow makes perfect sense.
Document 2
Enter the assembly-line control room.
The document is on the desk beside the blueprint layouts.
Comic Book 2
Search behind the steel armor crates on the factory floor.
The comic is tucked behind them.
Zombie Hand 2
Look toward the overhead mechanical rail system.
A hand is hanging from one of the moving hooks.
You’ll need to time your shot carefully.
Weapon Upgrade Kit 2
Complete the weapon-testing challenge.
Use the mounted machine gun and score more than 500 points within the time limit.
It’s a simple challenge, but don’t waste ammunition before the target sequence begins.
Chapter 3: Let’s Get Out of Here
The facility is collapsing, and the game responds by sending even more enemies at you.
Naturally.
Document 3
Search the control-panel desk beside the pressure-release valves.
The document is there.
Comic Book 3
Look for the open ventilation duct near the ceiling.
Climb the nearby crates to reach it.
Zombie Hand 3
Check the wire fencing beside the main walkway.
The hand is running along the upper mesh.
Weapon Upgrade Kit 3
Complete the Heroic Action involving the lead engineer.
Protect the engineer while they attempt to override the door mechanics.
Once the action succeeds, the upgrade is yours.
Chapter 4: Steal the Airship
Yes, you’re stealing an airship.
At this point, you’ve earned it.
Document 4
Enter the hangar observation deck.
The document is on a high desk.
Comic Book 4
Search the boarding ramp leading into the airship.
The comic is sitting on the platform.
Zombie Hand 4
Look at the giant propellers.
One of the stationary blades has a hand moving along its edge.
Weapon Upgrade Kit 4
Enter the airship bridge.
The upgrade kit is sitting on the main control desk before you trigger the final cinematic sequence.
Grab it before moving on.
Mission 9: Hell Machine
Everything has been building toward this.
Hell Machine is the final core campaign mission, and unlike the previous maps, it focuses on a massive boss encounter rather than a long series of chapters.
The arena is huge, the enemy pressure is relentless, and the game expects you to use everything you’ve learned.
Chapter 1: Hitler’s Welcome
Document 1
Before entering the main arena, search the preparation safe room.
The document is on a stack of ammunition crates beside the weapon upgrade station.
Comic Book 1
On the approach to the arena, check behind the ruined concrete fortification pillars on the far-left side.
The comic is hidden there.
Zombie Hand 1
Before dropping into the main pit, look toward the spotlight tower framing the entrance.
The hand is moving around the circular metal railing.
Weapon Upgrade Kit 1
Before triggering the boss encounter, move toward the far-right side of the initial defensive perimeter.
The upgrade kit is inside an open green military crate.
And yes, I strongly recommend grabbing this before starting the fight. There is absolutely no reason to make the final encounter harder than it needs to be.
How to Defeat the Hell Machine
The Hell Machine is less about blindly dumping ammunition into a giant target and more about understanding its weak points.
The most important rule is simple:
Don’t waste your best ammunition on armored sections that aren’t vulnerable.
Focus your fire on the glowing weak points around the machine’s treads and undercarriage.
High-caliber sniper ammunition is excellent when you have a clean angle, while explosive weapons such as the Panzerfaust can help strip away heavier armor.
The fight becomes significantly more manageable once you stop treating the machine as one giant health bar.
Phase 1: Break the Armor
Look for the glowing blue weak points.
Concentrate fire there rather than spreading damage across the machine.
If you’re playing co-op, coordinate your targets. Two players shooting completely different sections of the machine can make the fight drag on unnecessarily.
Phase 2: Deal With the Reinforcements
Once the armor begins to break apart, the arena becomes much more dangerous.
Elite machine-gunners and flamethrower enemies appear around the boss.
Don’t tunnel vision on the Hell Machine.
That’s one of the easiest ways to lose the fight.
Clear the immediate threats, reposition, then return to the boss.
Phase 3: Destroy the Core
Once enough armor has been removed, the vulnerable core becomes the priority.
This is where heavy weapons become particularly useful.
Save some of your strongest ammunition for this stage rather than spending everything during the opening minutes.
The Final Hitler Encounter
Defeating the Hell Machine isn’t quite the end.
Hitler himself remains.
The final encounter throws additional enemies into the arena while you deal with Hitler and his forces. Your upgraded secondary weapons can make this considerably easier, especially if you’ve been collecting the upgrade kits throughout the campaign.
Environmental traps are also useful.
Don’t stand in the middle of the arena and try to win a straight shooting contest. Keep moving, create distance when necessary, and use the environment to control the enemy flow.
Once Hitler is finally defeated and his fate is sealed, you’ve reached the end of the base campaign.
But if you’re chasing 100%, don’t assume the job is done simply because the credits are rolling.
100% Completion Checklist
A proper completion run isn’t just about reaching the final boss.
You want to make sure you’ve actually collected everything and completed the optional objectives along the way.
Here’s the basic checklist I recommend keeping in mind:
| Goal | What to Do |
|---|---|
| Documents | Search desks, tables, offices, terminals, and military areas |
| Comic Books | Check hidden rooms, crates, benches, shelves, and unusual corners |
| Zombie Hands | Scan roofs, wires, walls, pipes, railings, machinery, and other elevated surfaces |
| Weapon Upgrade Kits | Explore side rooms and complete optional challenges |
| Heroic Actions | Rescue NPCs and complete the required combat objectives |
| Mission Completion | Finish every core campaign mission |
| Final Boss | Defeat the Hell Machine and Hitler |
The biggest mistake is assuming every collectible is directly beside the main path.
It isn’t.
Zombie Army 4 is built around environmental exploration. The game frequently places something interesting just far enough away from the objective that a player focused purely on progression will never see it.
Zombie Army 4: Dead War Character Tier List (2026 Meta Guide)
Tips for a Cleaner 100% Run
1. Explore After Major Fights
This is probably the single most useful habit.
Don’t search for collectibles while twenty zombies are attacking you.
Clear the arena first. Then search.
You’ll be faster overall, and you won’t accidentally overlook something because you’re trying to reload a rifle while a suicide zombie is screaming in your ear.
2. Look Up
I can’t stress this enough.
A surprising number of Zombie Hands are positioned above normal eye level.
- Roofs
- Crane beams
- Electrical wires
- Pipes
- Fences
- Scaffolding
- Railings
- Signs
- Mechanical structures
- Tree branches
If something looks like a place a hand could crawl across, check it.
3. Listen
Some Zombie Hands are easier to locate by sound than sight.
If you hear scratching, strange movement, or something that sounds completely out of place, stop and investigate.
The game occasionally gives you an audio clue before the visual one.
4. Don’t Ignore Optional Challenges
The shooting puzzles and Heroic Actions aren’t just distractions.
Several upgrade rewards are tied directly to these optional encounters.
If you’re going for 100%, treat every unusual interaction as potentially important.
5. Upgrade Your Weapons Regularly
The upgrade kits aren’t there just to make your gun look better.
They can improve magazines, scopes, elemental effects, and other weapon characteristics that become increasingly useful as the campaign gets nastier.
A well-upgraded rifle can turn a difficult encounter into a manageable one.
6. Use Chapter Select for Cleanup
Missed something?
Don’t restart the entire campaign.
Use Chapter Select to return to the relevant section and collect whatever you skipped.
This is particularly useful if you finish the story first and decide afterward that you want to clean up the remaining collectibles.
Zombie Army 4 Friend Invite Not Working? 2026 Multiplayer Fix Guide
My Verdict on the Campaign’s 100% Grind
I’ll be honest: Zombie Army 4 isn’t a game where I’d recommend obsessively checking a collectible list during your very first five minutes.
That can suck the fun out of it.
The campaign is much more enjoyable when you let the environments breathe a little. Explore naturally. Search suspicious rooms. Shoot strange things. Follow paths that look like they might lead somewhere.
Then use a walkthrough like this afterward to clean up the handful of items you missed.
That’s the sweet spot.
The actual collectible hunting isn’t particularly difficult once you know where things are. The challenge is remembering to look everywhere while the game is throwing an absurd number of zombies at you.
And that’s what makes the 100% run surprisingly satisfying.
You aren’t just checking boxes. You’re learning the maps.
You start recognizing which buildings have hidden rooms, which rooftops deserve a quick scope scan, which optional encounters are likely to hide an upgrade, and where the game likes to put its nastier surprises.
And when the final boss finally goes down, you’ll know you didn’t just survive Zombie Army 4.
You cleaned it out.
Final Thoughts
Zombie Army 4: Dead War understands something a lot of co-op shooters forget: shooting zombies is only half the fun.
The other half is the ridiculous journey between firefights.
One minute you’re carefully lining up a sniper shot across a Venetian canal. The next you’re fighting through a frozen Nazi laboratory. Then you’re running through a zoo, crossing a volcanic town, storming Rome, stealing an occult Zeppelin, and finally facing a gigantic undead war machine.
It’s completely over the top.
That’s the point.
For a 100% completion run, patience matters more than raw aim. Search every room after clearing it. Check high places. Listen for Zombie Hands. Complete Heroic Actions instead of ignoring them. And don’t walk past strange environmental interactions just because the next objective is already flashing on your screen.
The reward isn’t just a completed checklist.
You end up seeing the campaign the way Rebellion intended it to be seen — as a collection of interconnected combat arenas, hidden secrets, bizarre set pieces, and little details that are easy to miss when you’re sprinting toward the next horde.
And when the final boss finally goes down, you’ll know you didn’t just survive Zombie Army 4.
You cleaned it out.