Echoes of Mystralia Spellcrafting Guide: How to Craft Your Own Spells
There are plenty of action RPGs that let you collect spells. Echoes of Mystralia takes a much more interesting route: it lets you build them.
That difference becomes obvious pretty quickly. Instead of opening a menu and picking “Fireball II” or “Lightning Strike III,” you are essentially assembling your own magic from individual Memories. Change the Form, alter the elemental core, add behavior modifiers, then stack utility effects around the outside. The result can be a simple attack that gets the job done—or a completely ridiculous spell that makes a boss fight look much easier than it has any right to be.
I think this is easily one of the strongest ideas in the game. The spellcrafting system encourages experimentation without making every combination feel like homework. You can make something that fits your playstyle, test it, notice that it is terrible, and then rebuild it five minutes later.
If you’re just getting started, though, the system can look a little confusing.
So here is my Echoes of Mystralia spellcrafting guide, with the basics explained in plain English, plus the combinations I would personally prioritize when building a strong loadout.
How Spellcrafting Works in Echoes of Mystralia
The first thing to understand is that every custom spell is built around a modular grid. Your Memories are placed into specific positions, and those positions matter.
You aren’t simply collecting powerful Memories and throwing them together. The location of a Memory determines what role it plays in the spell.
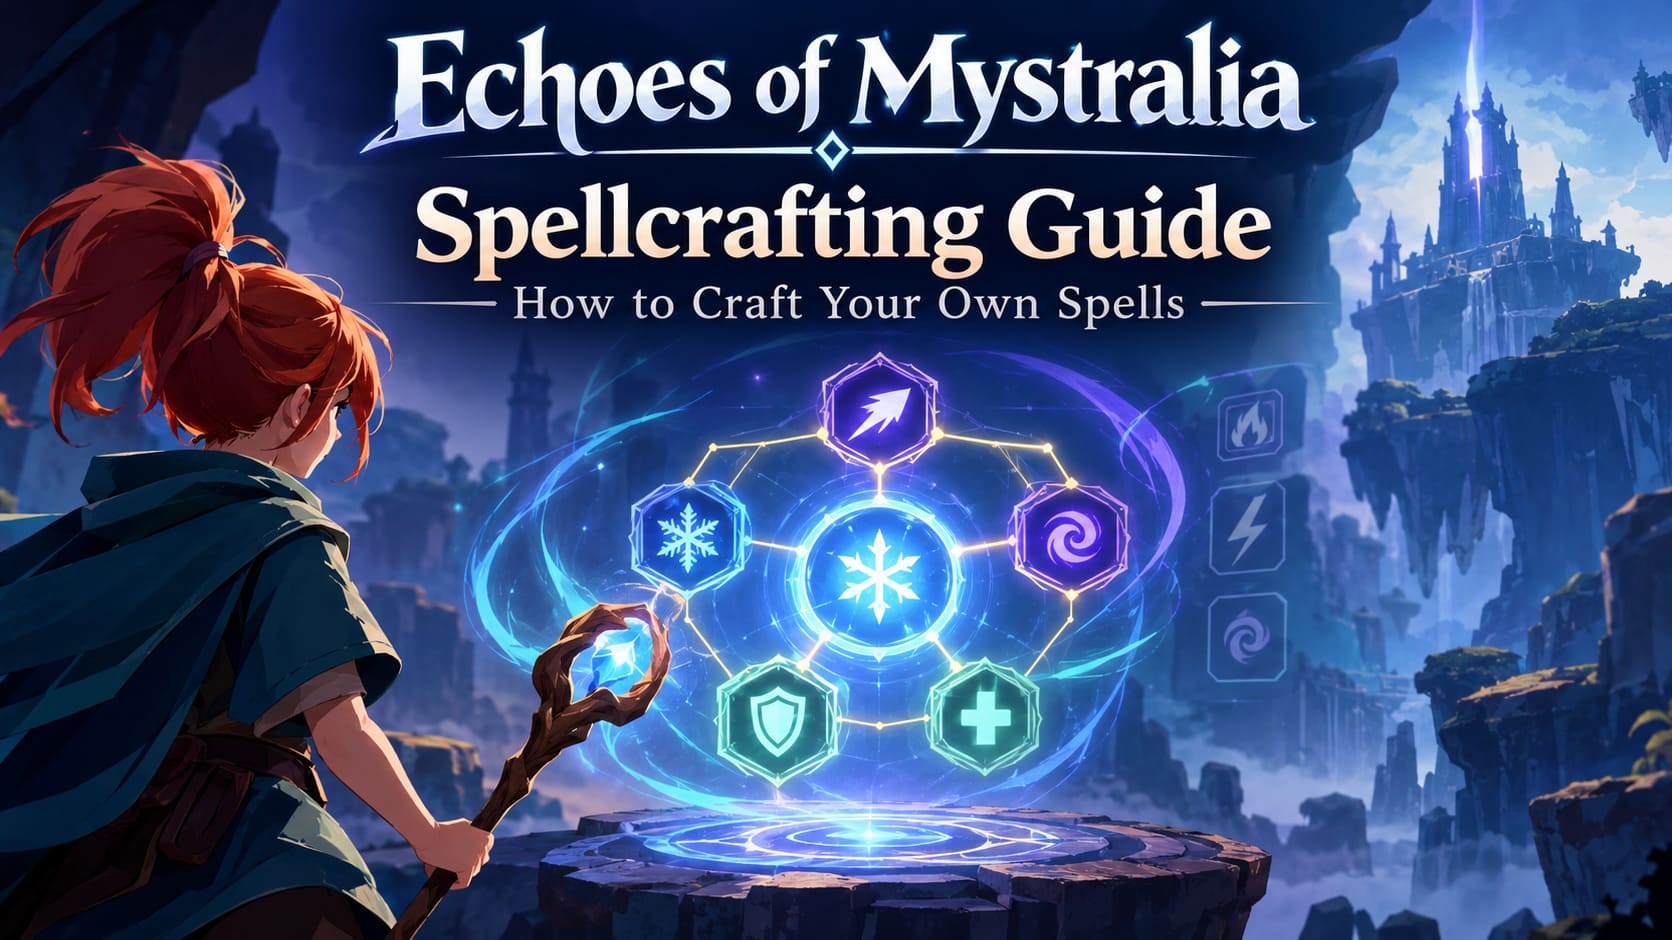
| Spell Layer | Main Purpose | What It Changes |
|---|---|---|
| Spell Form | Defines the attack | Projectile, Nova, Arc, etc. |
| Center Modifier | Establishes the core behavior | Element and primary effect |
| Adjacent Modifiers | Adds combat properties | Tracking, freezing, charging, amplification |
| Outer Modifiers | Adds utility | Shields, healing, cooldown reduction |
Once you start thinking about the grid this way, spellcrafting becomes much easier.
1. Choose Your Spell Form First
The Spell Form is the foundation of the entire spell.
It determines how your magic actually leaves Mazarim. A Projectile can send an orb toward a target, while a Nova turns the spell into an area-of-effect attack around you. An Arc gives you a more direct attack pattern.
This choice matters more than it initially appears.
For example, I wouldn’t build the same type of spell around a close-range Nova as I would around a long-range Arc. Even if both have access to the same elemental Memories, they serve completely different purposes.
My advice: pick the Form based on the fight you expect to have, not simply because its description has the biggest damage number.
2. The Center Slot Defines the Identity
After selecting the Form, you can start building its actual identity through the Center Modifier.
This is where your elemental Memory becomes particularly important. Ice, Lightning, and other elemental options can dramatically change how the spell behaves.
Think of the Center slot as answering one question:
“What is this spell supposed to do?”

An Ice-centered spell naturally lends itself to control and defensive play. Lightning is much more attractive when you’re trying to clear enemies quickly. The best part is that you can build around the same Form in completely different ways.
That flexibility is what keeps the system interesting.
3. Adjacent Memories Add Personality
The Adjacent Modifiers are where a basic spell starts becoming something special.
These Memories influence how your attack behaves after it has been created. Effects such as Chill, Charge, Persist, and Amplify can turn a straightforward attack into something designed for a very specific combat scenario.
- Chill is useful when you need more control over enemy movement.
- Persist can keep an effect active after the initial cast.
- Charge rewards you for building up an attack.
- Amplify is the obvious choice when your goal is raw damage.
This is also the point where I recommend resisting the temptation to stack every offensive modifier you own.
A spell that theoretically deals enormous damage isn’t very useful if it empties your mana before you can finish a fight.
4. Outer Modifiers Are Your Safety Net
The outer part of the grid is where things get more interesting for survivability.
This layer can include effects such as Barrier, Leech, and Hasten. These don’t necessarily change the visual identity of your attack, but they can completely change how comfortable the build feels.
Barrier can provide additional protection, Leech can help sustain your health, and Hasten can reduce downtime between casts.
Personally, I think this is where many new players underestimate the system.
A little less damage in exchange for healing or cooldown reduction can be worth far more than another flashy damage modifier—especially during longer roguelite runs.
Memories Are the Real Building Blocks
Once you understand the grid, the next question is obvious: where do all these effects come from?
The answer is Memories.

These items are essentially the components you use to construct your spells. During Early Access, there are more than 110 unique Memories to experiment with, which gives the system plenty of room for experimentation.
Memories come in different rarity levels:
- Common
- Rare
- Legendary
Higher rarity generally means stronger numerical effects. But don’t automatically throw away a lower-rarity Memory just because something shinier appeared in your inventory.
A Common Memory that fits your build can be more useful than a Legendary one that doesn’t.
You can acquire Memories while exploring areas, completing Rift encounters, and defeating powerful Guardians. That’s where the roguelite structure starts feeding back into the spell system.
You experiment, die, keep your long-term progression, find new Memories, and then try another build.
That’s a pretty addictive loop.
What Happens to Your Spells When You Die?
This is important if you’re coming from a traditional action RPG.
Your active run-based spell setup can be reset when you die, but your permanent progression isn’t simply erased. The Lotus system at the Azimuth Temple gives you a way to keep progressing between attempts.
So don’t be afraid to experiment.
One of the worst things you can do in a game with a system like this is spend an entire run protecting a build you already suspect is bad because you don’t want to “waste” the attempt.
Test things.
Break things.
Find out why they break.
That’s where Echoes of Mystralia becomes fun.
My Favorite Spellcrafting Builds
There are plenty of combinations you can make, but two archetypes immediately stand out to me.
One is built around control and survival. The other is about turning enemies into a collection of rapidly disappearing health bars.
Ice Nova Control Build
Recommended setup:
| Slot | Memory |
|---|---|
| Form | Nova |
| Center | Expand + Ice |
| Adjacent | Chill + Persist |
| Outer | Barrier + Leech |
This is the build I’d recommend to players who are still learning the game.
The basic idea is simple: control the room before the room can control you.
Nova gives you area coverage, while the Ice element adds the control you want from the build. Expand makes the effective area larger, Chill helps keep enemies under control, and Persist lets the effect remain relevant after the initial cast.
Then you have Barrier and Leech on the outside.
That’s the part I really like.
You’re not just freezing enemies. You’re turning repeated damage into additional survivability.
It won’t necessarily produce the biggest screenshot-worthy damage number, but during a chaotic encounter, being able to slow enemies while generating protection and sustain can be incredibly valuable.
Best for: beginners, crowded rooms, defensive players, and difficult encounters where positioning matters.
Lightning Arc Build for Fast Clears
If you don’t care about playing cautiously and would rather turn every room into a speedrun, I’d look toward Lightning.
Recommended setup:
| Slot | Memory |
|---|---|
| Form | Arc |
| Center | Chain + Lightning |
| Adjacent | Charge + Amplify |
| Outer | Hasten + Hasten |
This is the aggressive option.
The Arc Form gives the spell a direct attack pattern, while Chain lets the Lightning effect spread between enemies. Charge and Amplify push the damage potential higher, particularly when you’re able to maintain the attack against tougher targets.
And then there is Hasten.
Cooldown reduction is one of those effects that can feel boring when you read the description but becomes incredibly noticeable when you actually play with it.
Less waiting means more casting.
More casting means more damage.
It also makes the combat rhythm feel considerably smoother.
I wouldn’t call this the safest build, though. You’re sacrificing some defensive utility for speed and offensive pressure. If you get surrounded or make a positioning mistake, you won’t have the same safety net as the Ice setup.
Best for: experienced players, fast map clearing, aggressive combat, and players who enjoy maximizing damage output.
The Biggest Spellcrafting Mistakes to Avoid
After experimenting with custom builds, there are a few traps I’d avoid.
Don’t Chase Damage at Any Cost
A giant damage number doesn’t matter if you have no mana left.
Mana management is part of your build, not an afterthought. Keep at least one efficient spell available alongside your expensive nuke.
Don’t Ignore the Training Dummy
The Azimuth Temple’s training area is one of the most useful places in the game.
Use it.
Test the spell.
Look at its damage.
Check how wide the attack actually is.
See how quickly it consumes your resources.
A description can tell you what a Memory is supposed to do. The dummy tells you whether the finished spell actually works.
Build Around the Region
Different enemies can make certain elemental choices less attractive.
If you’re entering an area where your usual element isn’t performing well, don’t stubbornly stick with it.
Use your loadout slots.
Having dedicated Ice, Lightning, and Fire configurations is far more convenient than rebuilding your entire spell every time you encounter a bad matchup.
Echoes of Mystralia 2-Player Co-Op Guide: How to Setup, Play, and Master Spellcrafting Together
Why Hasten Is So Good
If there is one Memory effect I’d tell new players to keep an eye out for, it’s Hasten.
Cooldown reduction doesn’t sound as exciting as a giant explosion or chain lightning. In practice, though, it can have a huge effect on your overall DPS and combat flow.
It becomes especially valuable on spells that already have strong effects but suffer from downtime.
That said, I wouldn’t blindly fill every outer slot with Hasten.
The right balance depends on the build.
If you’re constantly taking damage, Barrier or Leech may provide more practical value. If your spell already has excellent uptime, another defensive effect could be the better choice.
That’s the real strength of the system: there isn’t one universal answer.
Final Thoughts
The spellcrafting system is probably the part of Echoes of Mystralia I’d spend the most time with.
Not because every possible combination is automatically brilliant, but because the game gives you enough control to make experimentation meaningful. You can start with a basic elemental attack and gradually turn it into something that completely changes how you approach combat.
My personal recommendation is to begin with a safe Ice control build, learn how the grid works, and then start pushing toward something faster and more aggressive like the Lightning Arc setup.
And don’t be afraid to make terrible spells.
Honestly, some of the most useful discoveries come from combinations that look ridiculous on paper.
That’s the fun of spellcrafting. You’re not just finding the best spell.
You’re building one.