Ultimate Star Wars Zero Company Scoundrel Build and Class Guide (2026)
If you have played enough tactical RPGs, you eventually learn that the most dangerous character on the battlefield is not always the one wearing the heaviest armor. Sometimes it is the lunatic with a scattergun who suddenly appears behind an elite enemy, deletes half their health bar, and disappears before anyone has time to react. That is basically the Scoundrel in Star Wars Zero Company, and after spending time with different tactical playstyles, I can honestly say this is one of the classes I would pick when I want a mission to feel unpredictable.
Star Wars Zero Company takes a lot of familiar ideas from games such as XCOM and mixes them with the Star Wars universe, but its action-point system gives encounters their own rhythm. Every operative has three action points to spend, which makes positioning, attacks, abilities, and movement much more fluid than in a traditional turn-based strategy game. The Scoundrel takes particularly good advantage of that freedom.
This Star Wars Zero Company Scoundrel build is designed around aggressive flanking, critical hits, close-range damage, and having an escape plan when things inevitably go wrong. Because permanent death makes careless positioning especially painful, the goal isn’t simply to make the biggest damage number possible. You want a character who can get into trouble, eliminate a priority target, and still have a realistic way out.
Ultimate Star Wars Zero Company Soldier Build and Class Guide
What Makes the Scoundrel So Good?
The easiest way to understand the Scoundrel is to forget the idea of treating them like a conventional damage dealer. They are not supposed to stand in the middle of a firefight trading shots with heavily armored enemies. That is what your tougher frontline characters are for.
The Scoundrel is essentially a hit-and-run specialist.
While other operatives establish firing lines, hold objectives, or lock down corridors, your Scoundrel should be looking at the battlefield from a different perspective. Where is the exposed enemy? Which target has already committed to fighting your squad? Is there a path around the side that gets you behind cover and within shotgun range?
Those questions matter more than simply asking which enemy has the lowest health.
The class becomes especially nasty when you combine its mobility with flank-based critical bonuses. A well-positioned Scoundrel can turn what looks like a difficult encounter into a quick assassination mission.
And yes, there is a catch.
The Scoundrel is fragile.
I have played enough tactical games to know that high-mobility characters often tempt you into doing something stupid. You see an opportunity, rush forward, score the kill, and then realize that three enemies have line of sight on the square where you are standing. In a game where losing an operative can have permanent consequences, that is not a trade I like making.
My Recommended Scoundrel Build
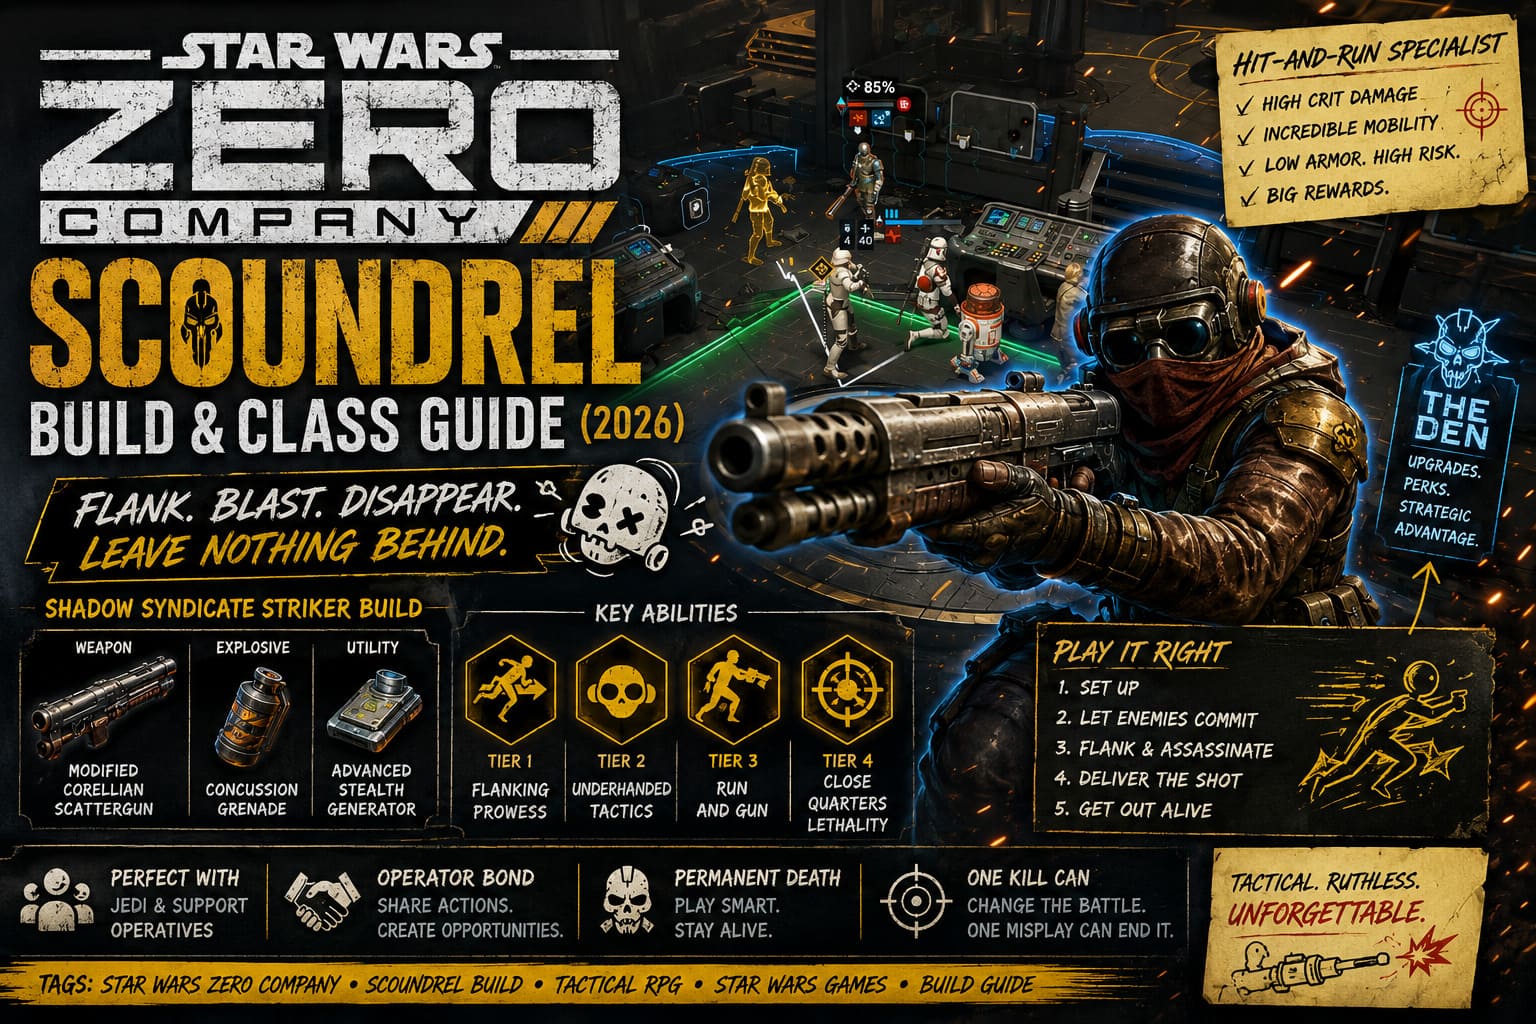
For my preferred setup, I would build the Scoundrel around what I would call the Shadow Syndicate Striker concept. The idea is simple: maximize close-range burst damage while investing enough into mobility and defensive utility to make aggressive plays survivable.
| Category | Recommended Choice | Why It Works |
|---|---|---|
| Primary Weapon | Modified Corellian Scattergun | Massive close-range burst and strong critical potential |
| Explosive | Concussion Grenade / Impact Bomb | Clears cover and creates new attack opportunities |
| Utility | Advanced Stealth Generator | Helps reposition without eating unnecessary overwatch fire |
| Tier 1 | Flanking Prowess | Improves mobility and rewards attacks from exposed angles |
| Tier 2 | Underhanded Tactics | Removes debuffs and improves survivability |
| Tier 3 | Run and Gun | Lets you cross the battlefield and still attack |
| Tier 4 | Close Quarters Lethality | Turns close-range attacks into devastating armor-piercing hits |
The important thing here is that the individual abilities are not nearly as impressive as the way they work together. You are building a chain: move into position, exploit the flank, hit hard, then get out.
Weapon Choice: Modified Corellian Scattergun
If you are building the Scoundrel for close-range assassination, the Modified Corellian Scattergun makes a lot of sense.
The weapon’s real strength is not just raw damage. It fits perfectly into the class’s intended combat distance. Once you are close enough to exploit the Scoundrel’s bonuses, the scattergun becomes extremely threatening against priority targets.
I generally prefer weapons that give a class a clear identity, and this one does exactly that. You are not trying to turn the Scoundrel into a mediocre long-range shooter. You are accepting the risk of fighting up close because the reward is an enormous burst of damage.
That is much more satisfying to me.
For your secondary option, a Concussion Grenade or Impact Bomb gives the class something it otherwise lacks: a way to influence the battlefield before committing to the attack. If an enemy is hiding behind an annoying defensive position, throwing an explosive first can be much smarter than blindly running toward them.
Tier 1: Pick Flanking Prowess
My first choice is Flanking Prowess.
This is the ability that establishes the entire philosophy of the build. The Scoundrel already wants to move around enemies, and Flanking Prowess makes that behavior even more rewarding.
The additional movement advantage is useful, but the real attraction is the critical-hit bonus when attacking from a properly exposed or flanked position.
This is why I would avoid playing the Scoundrel like a standard soldier. If you are repeatedly attacking enemies from the front, you are leaving one of the class’s biggest strengths unused.
Think of the battlefield as a puzzle. Your frontline squadmates create the problem; your Scoundrel finds the ridiculous angle that solves it.
Tier 2: Underhanded Tactics
At Tier 2, I prefer Underhanded Tactics.
There are plenty of situations where offensive abilities look more exciting on paper, but tactical games tend to punish players who ignore defensive utility. Underhanded Tactics gives the Scoundrel a valuable safety valve by removing problematic debuffs while also improving their ability to avoid incoming attacks.
This becomes especially important after an aggressive move.
You might successfully reach an enemy position, eliminate your target, and then discover that your Scoundrel is suddenly suffering from a nasty status effect. Rather than accepting that your great offensive turn has turned into a disaster, Underhanded Tactics gives you another tool for stabilizing the situation.
For me, that reliability is worth more than another flashy damage option.
Tier 3: Run and Gun
This is where the build really starts feeling unfair.
Run and Gun is the ability that turns the Scoundrel from a mobile fighter into a genuine battlefield predator. Spending two action points to make a significant movement and still being able to fire afterward completely changes how you approach enemy formations.
Normally, tactical games force you to choose between moving a long distance and attacking. Run and Gun effectively says, ‘Why not both?’
That opens up some fantastic plays.
You can begin behind your squad, move around the enemy formation, reach an exposed target, fire the scattergun, and potentially still have options depending on your remaining actions and squad synergies.
It also makes the Scoundrel much better at reacting to opportunities. If an enemy suddenly becomes vulnerable halfway through the fight, you are not necessarily forced to wait until the next turn.
Tier 4: Close Quarters Lethality
For the final part of the build, I would take Close Quarters Lethality.
This is the ability that gives the whole setup its teeth against armored targets.
When you’re operating within close range, the Scoundrel can turn critical hits into extremely dangerous armor-piercing attacks. That is exactly what you want when the battlefield starts filling with enemies that would otherwise require several attacks to bring down.
Heavy droids and armored cultists are much less intimidating when your shotgun doesn’t care nearly as much about their protection.
The important thing is to remember that the ability encourages a specific style. Get close when you have a reason to get close. Don’t interpret an armor-piercing ability as permission to stand in the open.
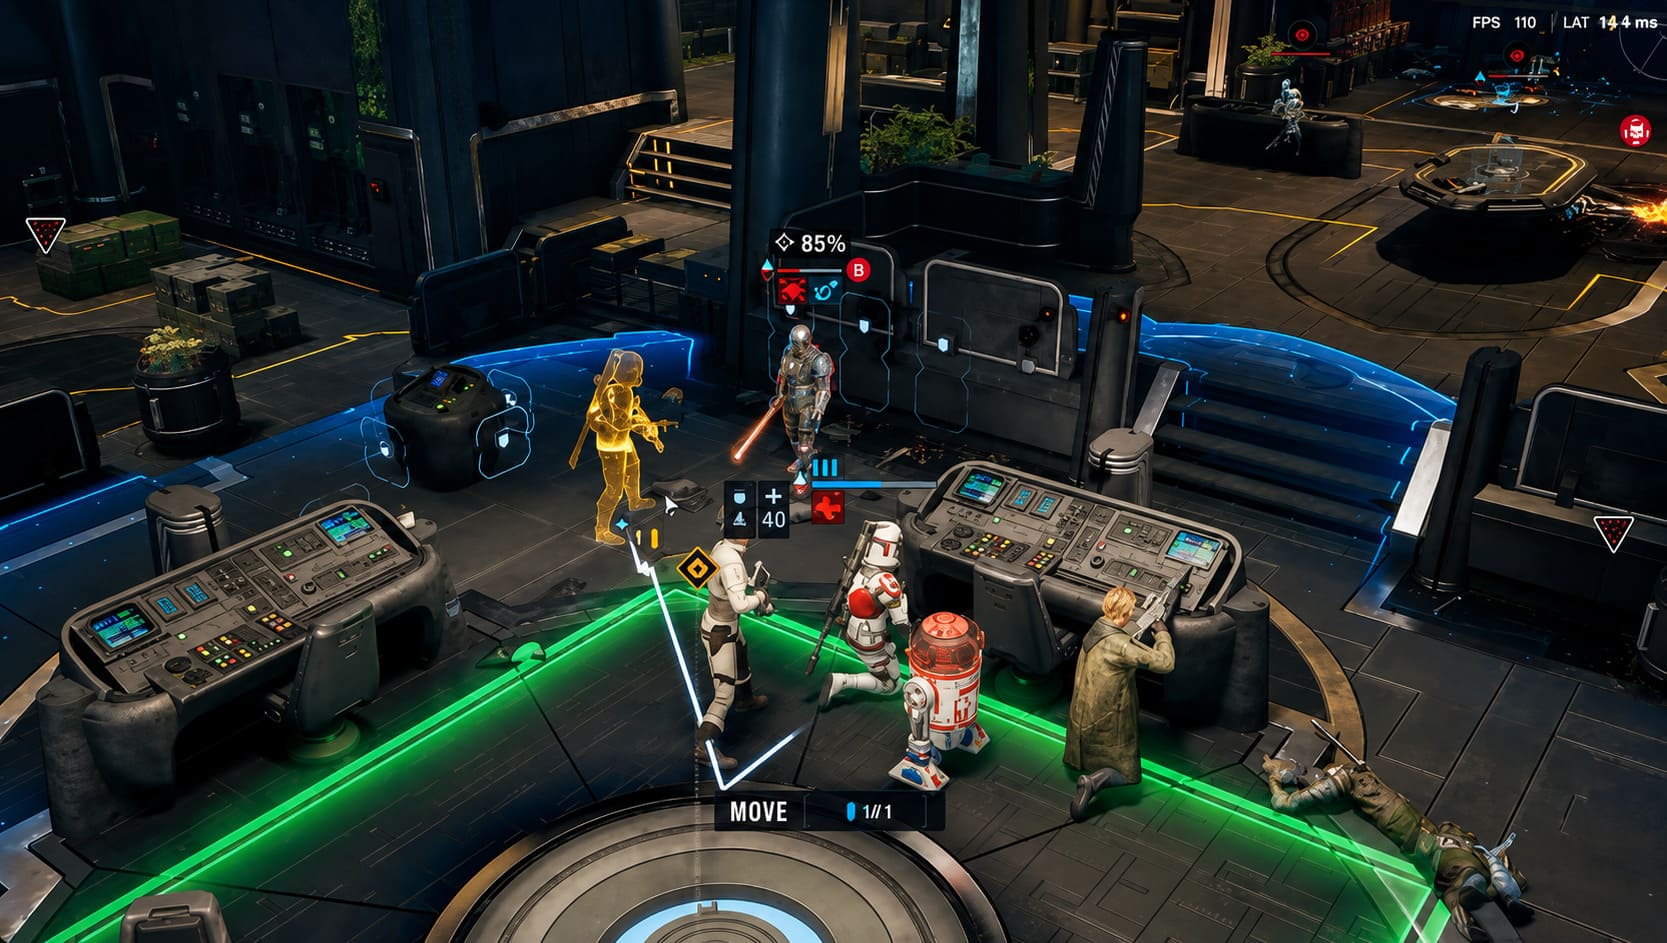
How I Would Actually Play the Scoundrel
The biggest mistake I would avoid is rushing forward on turn one simply because you can.
I know the temptation. You see a high-value enemy, calculate the damage, and think you can pull off an amazing opening attack. Sometimes you can. But tactical games are full of situations where the first successful attack is actually the beginning of your problems.
1. Set Up First
Use your initial actions to move toward the outside of the battlefield rather than directly into the center. Full cover should be your best friend.
If an enemy overwatch lane blocks the route, don’t stubbornly run through it just because the target looks tempting. Use stealth, squad support, or another tactical solution to create a safer path.
2. Wait for the Battlefield to Open
Let your frontline characters make first contact.
This does two things. First, enemies become committed to fighting your main squad. Second, their positions become easier to read because their attention is no longer focused entirely on your Scoundrel.
That is your invitation.
3. Execute the Flank
Once a priority enemy is exposed, activate Run and Gun and move into the flank.
This is where Flanking Prowess and your scattergun begin working together. You are not looking for a random target; you are looking for the target that gives you the highest chance of turning your movement into a decisive kill.
4. Take the Shot
At close range, unleash the scattergun.
Against the right target, this is where the build can feel almost ridiculous. A well-prepared Scoundrel can erase an enemy that would otherwise require several members of the squad to deal with.
5. Don’t Forget the Exit
This is probably the most important part of the entire guide.
A kill is not automatically a successful turn.
If your Scoundrel eliminates a dangerous enemy but ends the turn standing in the middle of five hostile units, you have created a problem for yourself.
Use remaining movement, defensive abilities, stealth, cover, or squad synergies to get back into a safer position whenever possible.
Best Squad Synergies
The Scoundrel becomes considerably better when the rest of the squad helps create opportunities rather than competing for the same role.
A Force-sensitive operative or Padawan is an excellent partner because enemies can potentially be pulled or displaced from defensive positions. Instead of forcing your Scoundrel to make a dangerous movement around a fortified enemy, you can sometimes bring the enemy closer to the kill zone.
The Operator Bond system is also worth paying attention to. Repeatedly deploying the same characters together can create useful tactical relationships, and action-point sharing can make the Scoundrel’s hit-and-run routine much more effective.
I especially like squad compositions where the Scoundrel is not required to solve every problem alone. Give the frontline characters the job of absorbing attention, let support characters manipulate the battlefield, and then allow the Scoundrel to deliver the finishing blow.
That division of responsibilities makes the entire squad feel more cohesive.
Don’t Ignore The Den
Between missions, I would also spend some time checking the upgrades available at The Den.
Permanent improvements that weaken enemy deployments or reduce enemy defenses may not feel as exciting as a new combat ability, but they have a cumulative effect over an entire campaign. Anything that makes armored enemies easier to crack indirectly increases the value of your Scoundrel’s burst damage.
This is one of those systems that is easy to ignore when you’re focused on the next mission. I wouldn’t.
Small strategic advantages eventually become huge ones.
Final Thoughts
The Scoundrel is one of those classes that rewards players who enjoy making their own opportunities rather than simply following the obvious attack path. It is fast, aggressive, slightly reckless by nature, and incredibly satisfying when everything lines up.
After playing plenty of tactical games, I tend to value consistency more than flashy builds, and that is why I like this approach. The Shadow Syndicate Striker isn’t designed around gambling every turn. It is designed around creating a favorable situation and then exploiting it brutally.
The key is discipline. Stay in cover, watch enemy vision, respect overwatch, choose your flank carefully, and always think about where your Scoundrel will finish the turn.
When you get it right, the class feels less like a traditional soldier and more like a Star Wars gunslinger who wandered into a tactical RPG and decided that the rules were optional.
And honestly, that is exactly how I want a Scoundrel to feel.