Beast of Reincarnation Beginners Guide: Essential Combat Tips, Builds, and Mechanics to Master the Blight
When I first heard that Game Freak was making a hardcore action RPG instead of another creature-collecting adventure, I honestly didn’t know what to expect. After spending time with Beast of Reincarnation, one thing became obvious almost immediately: this isn’t a game you can brute-force with fast button presses and blind aggression.
The world is beautiful, mysterious, and incredibly hostile. Every encounter asks you to pay attention, every boss punishes impatience, and even basic enemies can overwhelm you if you ignore the combat systems. It reminded me of the feeling I had during my first hours with Sekiro—not because it’s a copy, but because the game constantly rewards precision instead of panic.
If you’re about to begin your journey through the Blight, these are the mechanics, habits, and strategies that made the biggest difference for me.
Learn the Enemy UI Before Learning Fancy Combos
One mistake I see many new players making is focusing entirely on damage numbers.
Yes, reducing enemy health matters, but that’s rarely the fastest way to win fights.
Almost every opponent has two important gauges displayed above them.
| Meter | Why It Matters |
|---|---|
| Health | Defeating the enemy still requires reducing this to zero. |
| Stagger Gauge | Filling it completely leaves enemies vulnerable to devastating executions. |
The Stagger system is easily one of the most satisfying mechanics in the game.
Once the gauge fills, smaller enemies can disappear instantly through an execution animation, while larger monsters become exposed to massive burst damage. Better yet, those execution animations often provide a short period of invulnerability, which can save you when multiple enemies surround you.
Instead of asking yourself:
“How do I deal more damage?”
Start asking:
“How do I stagger this enemy faster?”
That mindset completely changes combat.
Parrying Is More Valuable Than Dodging
I usually play action RPGs as a dodge-first player.
That approach worked…until Beast of Reincarnation convinced me otherwise.
Dodging certainly has its place, but the game clearly wants you to master its parry timing.
A successful parry doesn’t simply block damage.
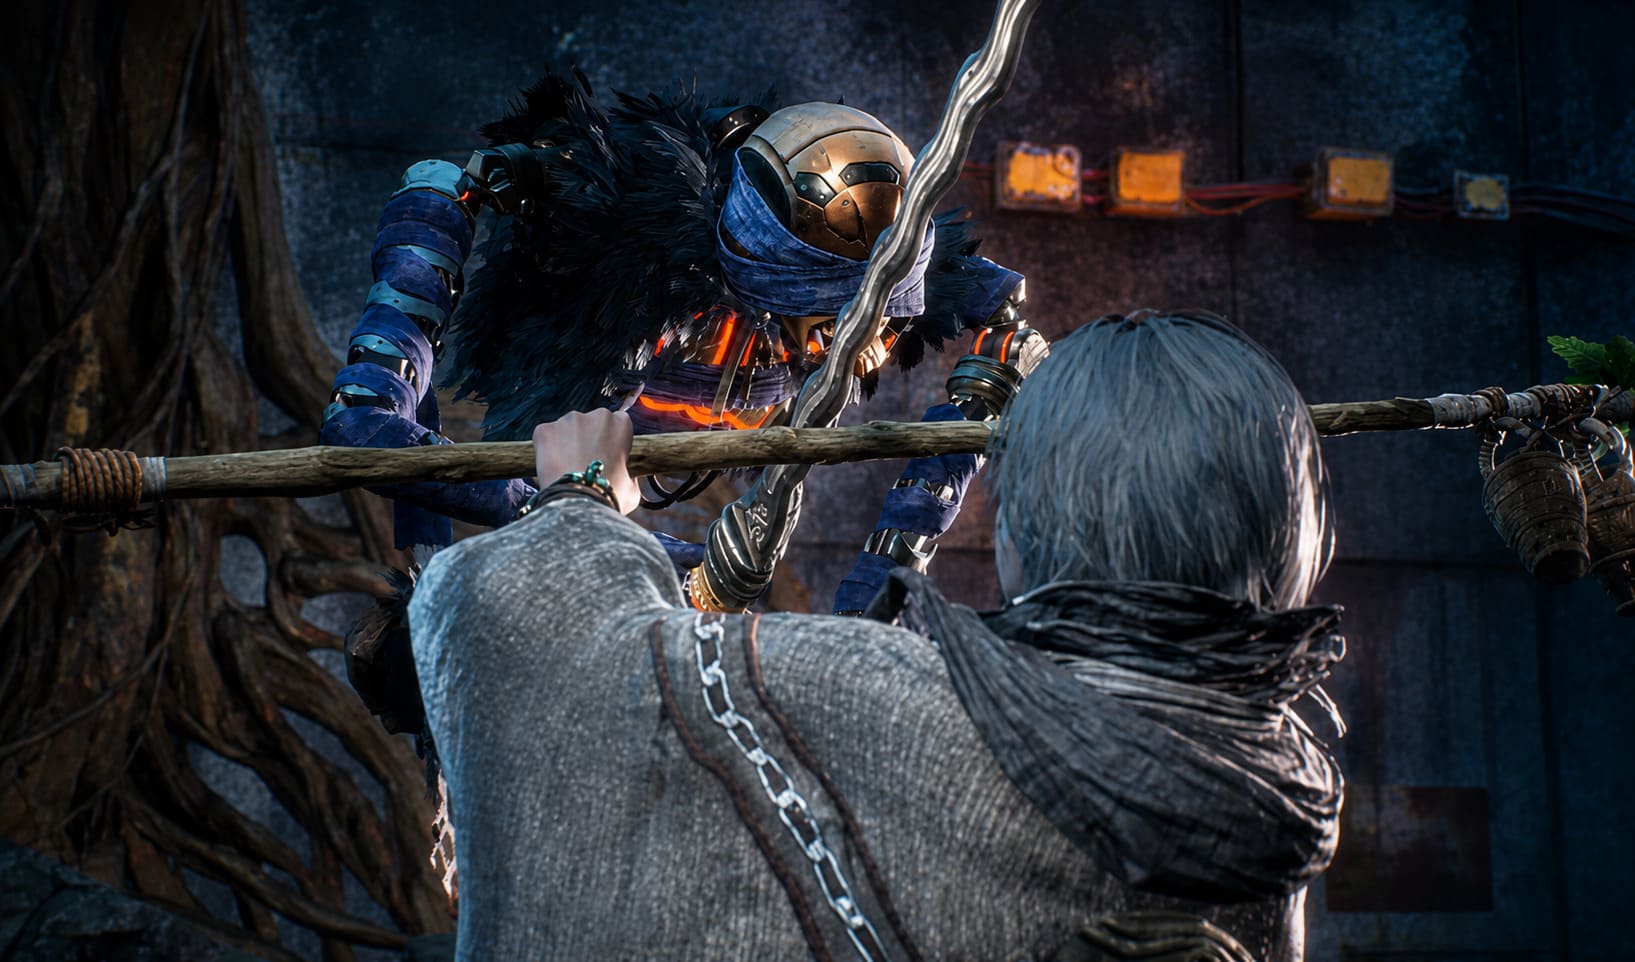
It also builds Focus Points (FP), and FP is one of your most valuable combat resources.
Without FP, you’ll quickly notice something missing.
Your companion becomes far less useful.
Koo Is More Than a Companion
At first glance, Koo feels like another AI partner that occasionally attacks nearby enemies.
That’s not really what’s happening.
Think of Koo as another weapon you actively control.
Every FP point you generate allows you to issue commands during combat, letting Koo interrupt enemies, pressure dangerous targets, or support your current strategy.
Depending on the situation, I constantly switched between three command styles.
- Aggressive for clearing regular enemies.
- Defensive during difficult boss phases.
- Focused Targeting whenever I wanted to burst down one dangerous opponent.
The game feels significantly smoother once you stop viewing Emma and Koo as separate characters.
They’re one combat system.
The Best Early Combat Habit
One combo became my favorite during the opening hours because it’s reliable and works against almost everything.
It usually goes something like this:
- Wait for an incoming attack.
- Land a clean parry.
- Spend FP to command Koo.
- Keep pressure with ranged attacks.
- Dash into melee.
- Finish with an execution if the stagger bar breaks.
Nothing about this sequence is flashy.
It simply works.
After repeating it for several hours, combat started feeling much more natural instead of chaotic.
Blooming Arts Add Strategy Without Slowing the Pace
One mechanic I wasn’t expecting to enjoy was the Blooming Arts system.
Normally I’m not a huge fan of combat wheels that interrupt fast gameplay.
Fortunately, Beast of Reincarnation handles it differently.
Time slows down just enough for you to think.
Instead of mashing abilities, you’re encouraged to make quick tactical decisions.
Sometimes you’ll choose crowd control.
Sometimes you’ll expose a weak point.
Other times you’ll save resources for the next enemy wave.
That tiny pause creates surprisingly interesting decision-making without ruining combat flow.
Traversal Is More Creative Than It First Appears
The game’s movement system deserves more attention than it’s getting.
Emma’s Blight abilities aren’t just combat tools.
They’re also how you explore the environment.
Using her plant-based powers, you can:
- Reach elevated platforms.
- Cross ruined highways.
- Grapple toward distant anchors.
- Create temporary plant pathways.
Here’s the part I completely missed early on.
Holding the traversal button behaves differently from tapping it.
For several hours I assumed my movement options were limited because I only used quick grapples.
Later I realized holding the ability creates entirely new routes across gaps.
That single discovery opened multiple hidden areas I had previously ignored.
If exploration feels restrictive early on, experiment with your traversal controls more than the tutorial encourages.
Choose a Build That Matches Your Playstyle
The skill tree gives plenty of flexibility without becoming overwhelming.
Rather than spreading points everywhere, I recommend committing to one direction during the first half of the game.
Here’s a quick comparison.

| Build | Best For | Strengths |
|---|---|---|
| Melee | Aggressive players | Strong combos, heavy stagger generation, excellent boss pressure. |
| Stealth | Patient exploration | Silent eliminations, safer encounters, high opening damage. |
| Ranged | Methodical combat | Excellent status effects, safer positioning, reliable crowd control. |
Personally, I leaned toward melee because I enjoyed the parry system.
However, I can already imagine ranged-focused builds becoming extremely popular once experienced players begin experimenting with endgame combinations.
Never Ignore the Cleanse Walker
The Cleanse Walker isn’t just another checkpoint.
It’s essentially your mobile headquarters.
Every time I returned there, I followed the same routine.
- Upgrade equipment. Weapon improvements become increasingly noticeable after the first few regions.
- Manage Spirit Stones. Some Spirit Stones completely change how Koo performs in combat, making certain encounters dramatically easier.
- Talk to NPCs. Several side conversations unlock useful rewards, lore, and optional content that many players will probably overlook.
- Take care of Koo. I’ll admit I originally thought grooming Koo was purely cosmetic. It isn’t. Keeping your companion in good condition noticeably improves his responsiveness during combat, making commands feel more reliable. It’s a surprisingly small mechanic that ends up having meaningful gameplay value.
Explore More Than the Main Path
The world isn’t fully open, but it’s full of interconnected areas and hidden branches.
My biggest advice is simple:
Don’t rush objective markers.
Some of the most useful upgrade materials, crafting resources, and optional discoveries are tucked away behind side paths that are incredibly easy to miss.
Backtracking later is possible.
It’s also much less enjoyable.
The game’s environments become significantly more dangerous as the story progresses, so collecting resources naturally while exploring saves a lot of frustration.
Spend Extra Time in the Tutorial
I know.
Everyone wants to reach the “real” game as quickly as possible.
Resist that temptation.
The opening section is actually one of the safest places to practice.
Use those early enemies to perfect:
- Parry timing
- Camera control
- Koo commands
- Weapon range
- FP management
Those few extra minutes of practice make the first major boss dramatically less intimidating.
Beast of Reincarnation Dev Blog Updates 2026: Gameplay, Release Date, and Everything We Know So Far
Think About New Game Plus Early
Completionists should know this before investing dozens of hours.
A single playthrough won’t show everything the game has to offer.
New Game Plus introduces stronger enemies, additional combat pressure, and reasons to continue improving your build.
Because of that, don’t waste rare upgrade materials randomly.
Invest in weapons and abilities that fit your preferred playstyle instead of constantly switching directions.
Future you will appreciate that decision.
Beast of Reincarnation Twitch Drops Guide 2026: Get Free In-Game Rewards
Final Thoughts
After spending time with Beast of Reincarnation, I don’t think its biggest strength is the combat alone.
It’s the way every system supports another.
- Parrying fuels FP.
- FP empowers Koo.
- Koo creates openings.
- Those openings lead into executions.
- Exploration rewards better equipment.
- Better equipment encourages tougher fights.
Everything feeds into the same gameplay loop, making progression feel consistently rewarding.
My biggest recommendation for newcomers is simple: slow down.
Don’t approach this like a hack-and-slash game where faster button presses solve every problem. Learn enemy patterns, trust the parry system, experiment with Koo’s commands, and take time exploring every corner of the world. Once all those mechanics start clicking together, Beast of Reincarnation transforms from a brutally punishing action RPG into one of the most satisfying combat experiences Game Freak has ever produced.