Town to City Crop Transfer Guide (Global Stockpile Explained)
If you’ve spent any real time in Town to City, you probably already noticed something weird: the game looks relaxed and cozy on the surface, but the economy underneath behaves like a tightly controlled logistics puzzle.
This is especially obvious when you start dealing with farming regions, crop production, and cross-map supply chains.
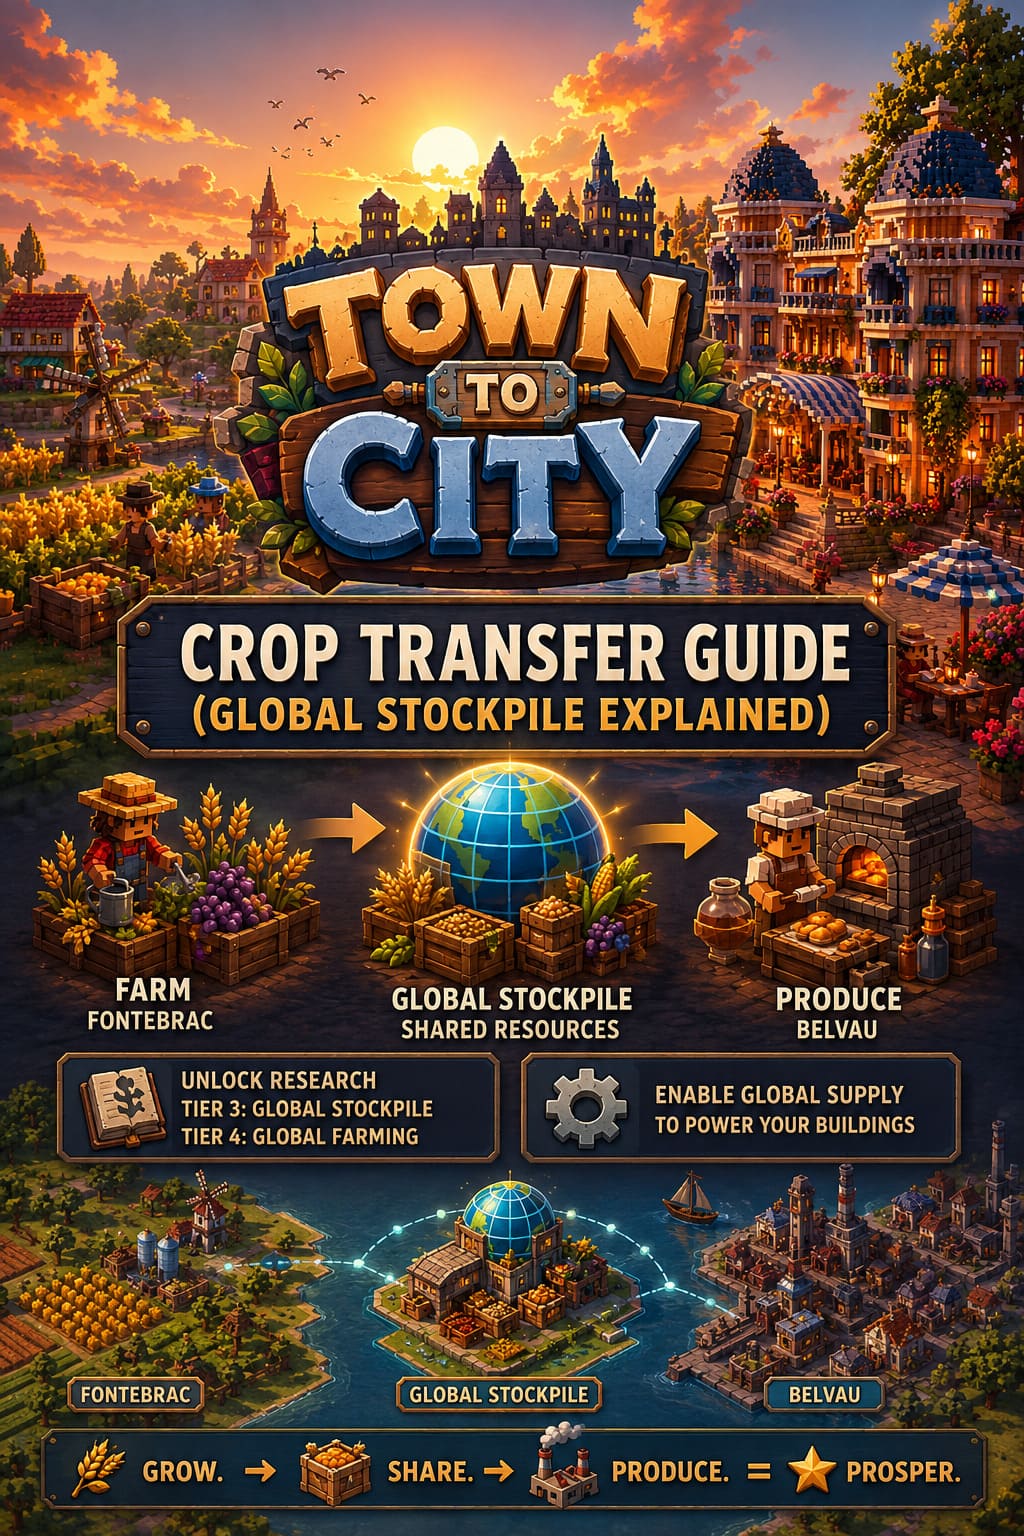
This guide is written from a player perspective after running into the same confusion most people hit: why your Bakery is idle, why your crops are “missing,” and why nothing seems to move between cities until suddenly everything clicks.
Town to City Happiness Guide: How I Keep Citizens Above 60% Mood as a Streamer
The Core Problem: Two Maps That Don’t Communicate (At First)
Early progression splits your economy into separate regions. You’ll typically manage a main city like Belvau and a farming region like Fontebrac, but the connection between them is not active from the beginning.
That creates a common frustration loop:
- Bakeries require Wheat but stay inactive
- Wineries demand Grapes but show empty inputs
- Artisan buildings refuse to produce anything
The assumption most players make is that there should be visible trade routes, carts, or rail systems. But that’s not how the system works. Instead, resource flow is locked behind progression and a hidden global inventory layer.
Forza Horizon 6 Beginner’s Guide: Master Japan’s Roads Fast
Why Nothing Works: The Hidden Isolation System
Before unlocking the correct research, each map behaves like an isolated economic container. That means crops harvested in Fontebrac cannot be used in Belvau under any circumstances.
Even if you build warehouses, granaries, and perfect road networks, everything remains local. There is no automatic inter-region transport. This is where most players think the game is bugged—but it’s actually intentional design.
What this means in practice
- Farming output is trapped per region
- Industrial cities cannot access external resources
- Warehouses only function inside their own map
Step 1: Building a Functional Farming Region
Before anything global becomes relevant, Fontebrac must be fully operational as a standalone production zone. If your farms are inefficient here, the entire system will collapse later.
Recommended farming setup
- Place Farmer Residences to define crop zones
- Paint fields directly around housing areas
- Assign crops such as Wheat, Corn, or Grapes
- Build Granaries near production zones
- Connect everything to a central Warehouse
The key detail most players underestimate is proximity. If your granary is too far from fields, production slows significantly due to internal hauling delays.
Step 2: Unlocking the Global Stockpile System
The real turning point comes from farming research progression. Once you reach higher-tier upgrades, you unlock what the game internally treats as a shared economy layer.
Core unlock structure
| Tier | Unlock | Effect |
|---|---|---|
| Tier 3 | Global Stockpile | Links warehouses across all regions |
| Tier 4 | Global Farming Expansion | Allows farming across any map |
Once Tier 3 is unlocked, your economy shifts from regional isolation to a shared resource pool. This is the moment the game stops feeling fragmented and starts behaving like a unified system.
Step 3: Why Buildings Still Don’t Work After Unlocking
Even after unlocking Global Stockpile, many players return to their main city expecting instant results. But production buildings often remain inactive.
The reason is simple: unlocking research does not automatically enable resource usage at the building level.
Each production building must manually be configured to accept global resources.
How to activate production properly
- Return to your main city (Belvau)
- Click on an inactive production building
- Open its input settings panel
- Enable “Global Supply” toggle
Once activated, the building immediately starts pulling resources from the shared stockpile, and production resumes.
Common Failures and Why They Happen
Even when everything is set correctly, the system can still fail due to hidden inefficiencies in your supply chain.
1. Labor shortages
If granaries or warehouses lack workers, crops will pile up in fields and never enter the global system.
2. Production imbalance
One farm is rarely enough to support multiple industrial buildings. Scaling is required early.
3. Broken logistics connections
A single missing road segment can interrupt the entire chain, even if everything visually appears connected.
Late-Game Efficiency Structure
Once the system stabilizes, the most efficient setup separates roles clearly between regions.
| Region | Role | Main Output |
|---|---|---|
| Fontebrac | Agricultural Hub | Wheat, Grapes, Corn |
| Belvau | Industrial Core | Bakery Goods, Wine, Artisan Products |
| Global Stockpile | Distribution Layer | Shared Resource Pool |
This structure removes micromanagement pressure and turns the game into a smooth production network once fully established.
Final Thoughts
What makes Town to City interesting is how it disguises complexity behind a calm, cozy presentation. At first, the crop system feels restrictive and unclear. Then it feels unintuitive. But once the Global Stockpile unlocks and you understand the toggle-based production logic, the entire simulation opens up.
From a player perspective, this is one of those systems that feels broken until it suddenly feels brilliant. Once everything is connected, your cities stop acting like separate zones and start functioning as a single living economy.