Onimusha Way of the Sword Lore Scrolls Guide: All Kyoto Collectible Locations
There are two things I always enjoy in an Onimusha game: finding a genuinely useful secret and discovering some strange piece of lore that makes the world feel bigger than the main story suggests. Onimusha: Way of the Sword delivers plenty of both.
Capcom’s return to its classic samurai action series sends Miyamoto Musashi through a dark fantasy version of Edo-period Kyoto, where familiar historical locations have been twisted by the Genma invasion. Temples, shrines, merchant districts, riverbanks, and mountain paths all hide pieces of the story.
Among the most interesting collectibles are the Historical Lore Scrolls. They are easy to overlook, especially when a fight breaks out and your first instinct is obviously to draw your sword rather than inspect every corner of a courtyard.
If you’re trying to complete your collection, this Onimusha: Way of the Sword lore scroll locations guide covers all 12 scrolls described in the game areas, from Kiyomizu-dera Temple to Mount Oe.
And honestly, I recommend hunting them down. Some collectibles feel like filler in games. These don’t. The scrolls add context to the Genma invasion and make Kyoto feel like a place that existed before Musashi arrived.
Onimusha: Way of the Sword Lore Scrolls – Quick Overview
| Scroll | Area | Main Location |
|---|---|---|
| 1 | Kiyomizu-dera | Right Courtyard |
| 2 | Kiyomizu-dera | Wooden Scaffolding |
| 3 | Kiyomizu-dera | Hidden Spring Path |
| 4 | Kiyomizu-dera | Main Stage Pavilion |
| 5 | Yasui Konpiragu Shrine | Torii Path |
| 6 | Yasui Konpiragu Shrine | Binding Stone Chamber |
| 7 | Kyoto Residential District | Gion Tea House |
| 8 | Kyoto Residential District | Blacksmith’s Alley |
| 9 | Kyoto Residential District | Kamogawa River |
| 10 | Mount Oe | Mountain Base Cavern |
| 11 | Mount Oe | Abandoned Shrine |
| 12 | Mount Oe | Upper Peak Fortifications |
Before You Start Hunting the Scrolls
The collectible system isn’t particularly complicated, but Onimusha: Way of the Sword doesn’t always put everything directly in front of you. This is one of those games where checking side paths pays off.
The area progress screen can tell you how many collectibles you still have to find, but it doesn’t necessarily solve the puzzle for you. You’ll need to pay attention to environmental details, suspicious dead ends, breakable objects, and unusual structures.
Keep These Things in Mind
- Check your area progress regularly. If you’re missing one scroll, it gives you a reason to reconsider places you’ve already visited.
- Watch for glowing collectibles and suspicious containers. Some scrolls are hidden inside objects rather than sitting openly on the ground.
- Use your Oni Gauntlet intelligently. Certain barriers and dark Genma seals may require progression or additional upgrades.
- Don’t ignore destructible scenery. Bamboo, wooden barricades, damaged structures, and other obstacles can hide small rooms.
- Save after finding difficult collectibles. Losing progress after a long detour is exactly the kind of thing that can turn a fun collectible hunt into a chore.
The good news is that the game generally rewards curiosity. If something looks slightly out of place, there’s a decent chance Capcom wants you to investigate it.
Kiyomizu-dera Temple Lore Scroll Locations
Kiyomizu-dera is one of the first major locations you’ll explore, and it immediately establishes the game’s visual identity. The famous temple is recognizable, but the Genma corruption gives the entire area a much darker atmosphere.
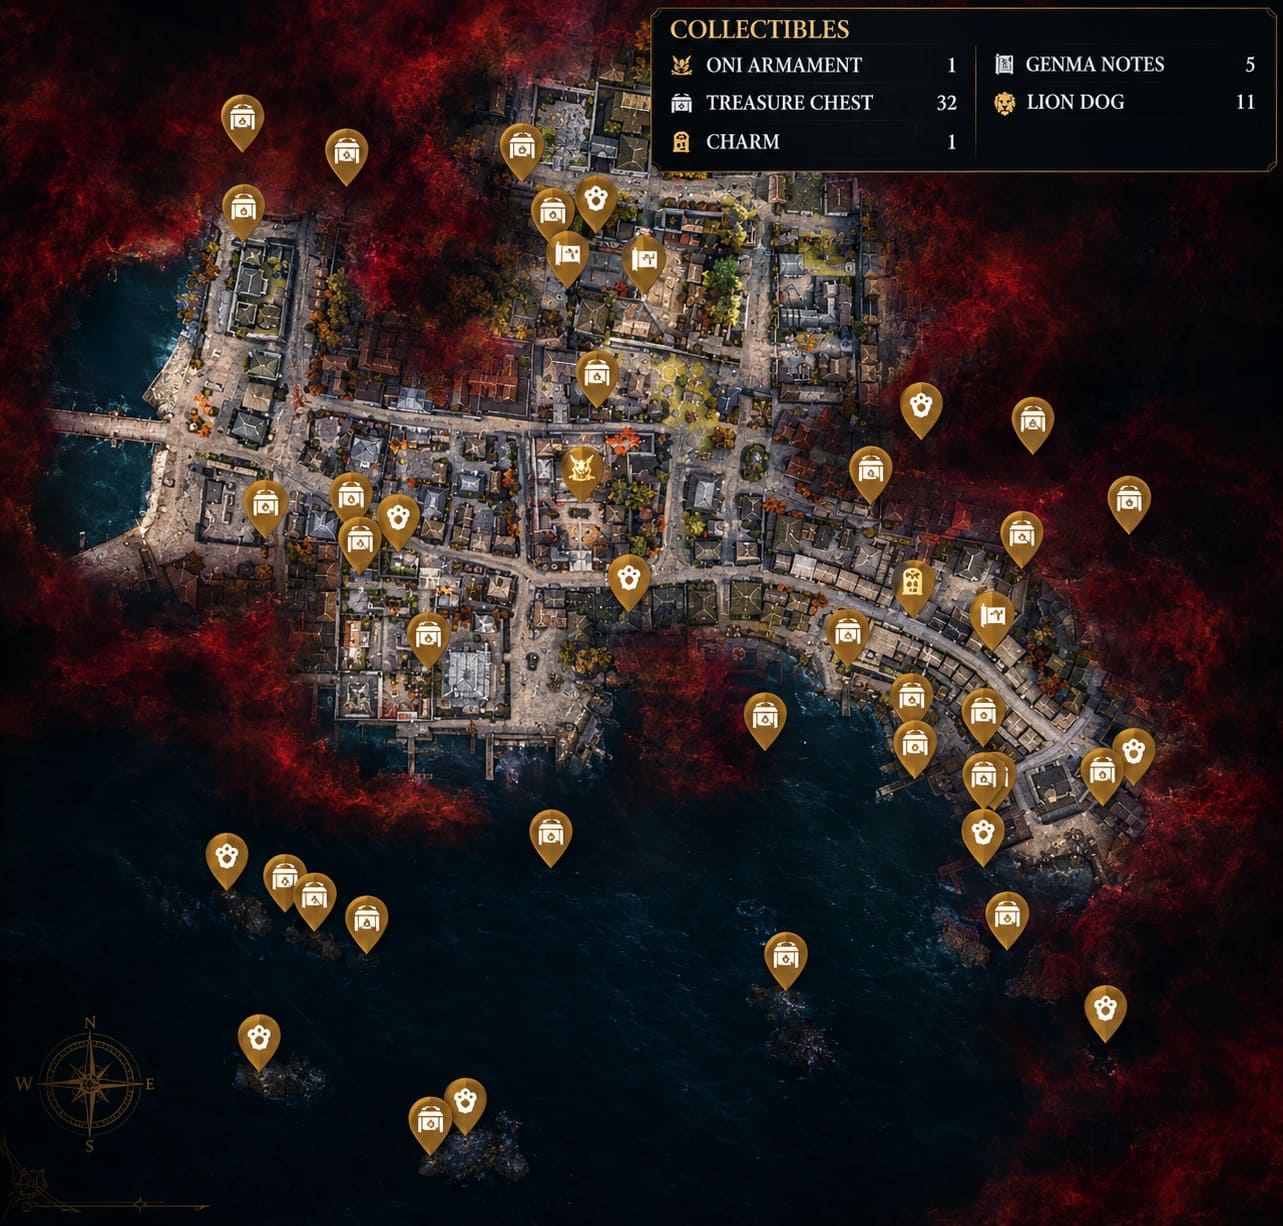
There are four lore scrolls to find here.
Scroll 1 – The Founding of the Pure Water Temple
Location: Main Approach, Right Courtyard
During the initial climb toward the temple gates, you’ll encounter Genma soldiers and archers. Before continuing through the main red gate, turn right and enter the small courtyard.
Look around the stone lanterns. The scroll is tucked behind the third lantern on the left, close to the stone wall.
The document covers the early history of the temple and explains how the Genma began exploiting the natural springs beneath the mountain.
It’s a small collectible, but I like this one because it immediately starts mixing real-world Japanese history with the game’s supernatural fiction.
Scroll 2 – The Monks’ Last Stand
Location: Scaffold Under-Structure
Once you’ve entered the main temple complex, you’ll eventually move beneath the enormous wooden stage.
Don’t rush through this section.
Drop down toward the lowest eastern section of the scaffolding and follow the narrow beam. You’ll eventually find a skeleton holding the second scroll.
The lore here describes the monks’ final attempt to protect the temple’s sacred relics during the Genma assault.
This is also a good example of why exploration matters. If you’re focused entirely on combat, it’s very easy to move past this area without ever noticing the path.
Scroll 3 – The Corrupted Otowa Waterfall
Location: Hidden Spring Path
Near the lower section of the temple, you’ll find the Otowa Waterfall. Naturally, the game has no intention of letting one of Japan’s famous landmarks remain peaceful.
The water has been corrupted and takes on an unsettling purple appearance.
Look for a damaged stone sluice gate near the pavilion. Use a heavy attack to break through it and enter the small cave beyond.
Inside you’ll find a lacquer box containing the third scroll.
The document explains how the Genma manipulated the spiritual power of the waterfall for their own purposes.
Scroll 4 – Chronicles of the Demon Gate
Location: Kiyomizu-dera Main Stage Pavilion
This one is particularly easy to miss because you’re approaching a major story encounter.
Before triggering the cutscene in the center of the stage, check the decorative screens along the rear wall.
Cut through the middle screen to expose a hidden altar. The scroll is waiting there.
The lore explains Kyoto’s spiritual barriers and gives more information about the Genma plan to destroy the remaining protective shrines.
If you’re doing a completionist run, definitely check this area before moving on.
Yasui Konpiragu Shrine Scroll Locations
The Yasui Konpiragu Shrine section has a very different atmosphere. The tight pathways, torii gates, and cursed surroundings make it feel much more claustrophobic than Kiyomizu-dera.
There are two scrolls here.
Scroll 5 – Curses and Severed Bonds
Location: Main Torii Pathway
As you enter the shrine grounds, follow the line of torii gates.
About halfway through, check the left side of the path for a small opening in the wooden fence.
Squeeze through it and you’ll reach a hidden garden. The scroll rests on a stone bench beneath a dead cherry tree.
Its story focuses on the shrine’s traditional association with breaking unwanted relationships and curses. The Genma have twisted that idea into something much more sinister, using the shrine’s power to separate souls from their bodies.
It’s one of the more interesting pieces of environmental storytelling in this section.
Scroll 6 – The Monument of Broken Curses
Location: Binding Stone Chamber
At the center of the shrine stands a huge stone monument covered in paper charms.
Getting the scroll isn’t simply a matter of walking up and picking it up.
You’ll first have to deal with the Genma enemies surrounding the monument. After clearing the encounter, use the Oni Gauntlet to absorb the remaining dark energy.
A hidden opening at the base of the monument becomes accessible, revealing the scroll.
The document explains the origins of the binding stone and its connection to Kyoto’s spiritual defenses.
Kyoto Streets and Residential District Scrolls
This is where the collectible hunt starts becoming more rewarding for me. The city itself feels like a giant maze, and the best discoveries are often tucked away in places that look completely optional.
Three scrolls can be found across the residential and merchant districts.
Scroll 7 – The Merchant’s Ledger
Location: Gion District, Abandoned Tea House
Look for a damaged two-story tea house in the Gion district.
The entrance on the ground level won’t get you where you need to go. Instead, you’ll have to reach the nearby watchtower, deal with the enemy stationed there, and use the available movement route to reach the upper window of the tea house.
Inside, check beside the dusty low table.
The merchant’s ledger provides a glimpse into Kyoto’s economic collapse as the Genma invasion disrupts trade.
I particularly like collectibles like this because they show how the invasion affects ordinary people rather than only warriors and supernatural characters.
Scroll 8 – Rumors of the One-Legged Blacksmith
Location: Blacksmith’s Alley
Head toward the western side of the residential district and look for the old ironworks.
The area should be hard to miss thanks to the smoke, furnaces, and mutated enemies.
At the back of the forge is a dead-end alley blocked by discarded armor and weapons. Destroy the obstruction using an Oni-powered attack or an explosive item.
The scroll is located on a weapon rack inside.
Its story concerns a legendary blacksmith whose weapons were supposedly capable of hurting spirits.
For an Onimusha fan, this is exactly the kind of weird folklore I want to see more of.
Scroll 9 – The Kamogawa River Log
Location: Riverbed Docks
Make your way down to the Kamogawa River.
Under the large wooden bridge connecting the two sides of the city, look for a small wooden lockbox attached to the central stone support.
The rope holding it can be cut with a normal sword attack.
Once the box falls, break it open and collect the scroll.
The document contains the final messages of Kyoto’s guards as they watched Genma creatures emerge from the river.
It’s another small detail, but together these scrolls make the invasion feel much more serious than simply another sequence of enemy encounters.
Mount Oe Lore Scroll Locations
Mount Oe is where things get considerably nastier.
The mountain is associated with the legendary demon Shuten Doji, so naturally an Onimusha game was never going to make this a relaxing hiking trip.
The environment becomes more dangerous, enemies hit harder, and the routes become easier to overlook.
There are three scrolls here.
Scroll 10 – The Legend of the Ogre King
Location: Mountain Base Cavern
At the beginning of the mountain ascent, you’ll encounter a fork.
Take the right-hand route instead of immediately climbing upward.
This leads into a cavern filled with purple crystals and dangerous gas vents. Move carefully and time your dashes between the hazards.
At the deepest part of the cavern, search around the enormous stone club.
The tenth scroll is located nearby and explains the legend of Shuten Doji and his connection to the Genma forces.
This is one collectible I’d recommend grabbing immediately rather than leaving for later, because the side route becomes much harder to navigate once you’re focused on the main mountain path.
Scroll 11 – The Hermit’s Warning
Location: Abandoned Mountain Shrine
Further up Mount Oe, you’ll find a ruined shrine built into the cliff.
The bridge leading toward it has collapsed.
You can either make the crossing with a carefully timed dash or look for the narrow route around the cliff.
Once inside, check behind the central Buddha statue.
The scroll is hidden in a hollow section and contains the final writings of a hermit who witnessed the Genma’s return.
The location itself is worth investigating even without the collectible. It’s the kind of quiet, creepy area that Onimusha does surprisingly well.
Scroll 12 – The Battle of the Crags
Location: Upper Peak Fortifications
The final scroll is located shortly before the massive iron gates leading toward Shuten Doji’s lair.
The area is heavily defended, so don’t simply sprint toward the entrance.
Clear the Genma watchtowers first. Once the area is relatively safe, climb the westernmost tower.
You’ll find a war table on the tower deck with the final scroll pinned to it.
The document describes the Genma’s plans for launching an assault from Mount Oe and wiping out what remains of Kyoto’s resistance.
And that’s a fitting place for the final collectible. By this point, the scrolls have gradually turned the invasion from background spectacle into something with a history, strategy, and human cost.
My Tips for Completing the Scroll Collection
If you’re going for all 12, I’d strongly recommend treating the hunt as a second layer of exploration rather than trying to speedrun the main story.
A few habits make a big difference:
- Save at every opportunity. If you’ve just found a difficult scroll, don’t gamble your progress.
- Practice Issen. Strong Genma commanders can turn a collectible detour into a painful fight. A well-timed Issen can remove that problem immediately.
- Revisit suspicious locations. If you find a sealed door, blocked passage, or strange chest you can’t access yet, remember where it is.
- Upgrade before forcing difficult areas. Some secrets are clearly designed around later progression.
- Explore vertically. Rooftops, scaffolding, towers, and elevated walkways hide several of the more easily missed collectibles.
The biggest mistake is assuming every collectible should be available the first time you see it.
Sometimes the game is simply telling you: come back later.
Onimusha Way of the Sword Upgrade Guide: Best Items and Weapons to Upgrade First
Is Collecting All the Lore Scrolls Worth It?
Absolutely, especially if you’re already enjoying the exploration side of Onimusha: Way of the Sword.
The scrolls aren’t just random pieces of text scattered around Kyoto. Taken together, they build a broader picture of the Genma invasion and show how the supernatural disaster affects temples, merchants, guards, blacksmiths, monks, and ordinary residents.
For completionists, collecting all 12 also provides an additional achievement/trophy goal and contributes to the game’s broader collectible progression.
But even if you’re not chasing 100%, I’d still recommend grabbing the ones you find naturally.
Onimusha has always worked best when swordplay and atmosphere are allowed to exist together. The main story gives you the big battles and dramatic moments. The lore scrolls fill in the quieter spaces between them.
And after waiting so long for another proper Onimusha adventure, I’m perfectly happy to spend a few extra minutes exploring a ruined shrine or climbing an old watchtower if it gives me another reason to stay in this version of Kyoto.
Onimusha: Way of the Sword Talisman Guide – All Defense, Might & Upgrade Locations
Final Thoughts
Finding all 12 Historical Lore Scrolls in Onimusha: Way of the Sword takes some patience, but the hunt is considerably more enjoyable than a typical checklist collectible system.
Kiyomizu-dera introduces the historical mystery, Yasui Konpiragu Shrine explores curses and spiritual bonds, Kyoto’s streets reveal the civilian side of the invasion, and Mount Oe brings the lore back to the game’s darker demon mythology.
The important thing is not to rush.
Look behind structures. Break suspicious objects. Check rooftops. Explore dead ends. And when something looks like it was deliberately placed there for no obvious reason, investigate it.
That’s usually where Onimusha hides its better secrets.
For players aiming for a complete archive, these lore scrolls are worth the effort. They make the world feel less like a collection of combat arenas and more like a corrupted historical setting with its own stories, legends, and tragedies.
Grab your Oni Gauntlet, sharpen Musashi’s blade, and take your time exploring Kyoto. The Genma aren’t the only things worth finding.