Onimusha Way of the Sword Charm Guide: Best Combinations and Locations
There’s a point in Onimusha: Way of the Sword where the combat finally clicks. You stop treating every Genma attack like something you need to dodge and start looking for opportunities to turn their aggression against them. Parry. Deflect. Issen. Counter. Suddenly, Musashi isn’t just surviving encounters — he’s dismantling them.
And that’s exactly where the charm system becomes interesting.
At first, charms can look like another layer of RPG-style stat bonuses that you can safely ignore. I wouldn’t recommend that. Once you have multiple charm slots unlocked, the right combination can completely change how Musashi plays. A defensive build can make difficult bosses much more manageable, while an aggressive setup can turn one successful parry into a ridiculous burst of damage.
I’ve spent a lot of time with action games that give you dozens of upgrades but only a handful that actually matter. Onimusha: Way of the Sword thankfully doesn’t feel like that. The best charms aren’t simply stronger versions of everything else. They encourage different approaches to combat.
So, rather than throwing every charm into one giant list, here are the combinations I’d actually consider using — and why.
How Charms Work in Onimusha: Way of the Sword
Musashi starts with limited charm capacity, which means you won’t immediately be able to create some absurd three-piece combination. As you progress through the game and invest in character progression, you can unlock additional charm slots.
Eventually, you can have three charms equipped at the same time. That’s the point where the system starts getting genuinely fun.
The other thing I like is that you don’t have to commit to a build permanently. Charms can be changed through the Equipment menu, so you’re free to adjust your setup depending on what you’re doing.
- Exploring Kyoto? Use something focused on survivability or soul collection.
- Learning a boss? Stack healing and defensive bonuses.
- Feeling confident with parries? Go all-in on counterattack damage.
There is one catch: upgrading charms requires a trip to Enma’s Hall. You can’t simply upgrade them from the equipment screen. Reinforcement materials can be found through exploration, treasure, environmental destruction, and Kyoto Mysteries, so there is a real reason to poke around instead of sprinting from objective to objective.
The Charms I’d Keep an Eye On
| Charm | What It Does | Best For |
|---|---|---|
| Lion Dog Lovable Charm | Boosts attacks following a successful Parry or Reflex Dodge | Counter Builds |
| Charm of the Healer | Improves healing effectiveness | Survival |
| Kubi Akari Charm | Improves combat tracking and execution-oriented mechanics | Technical Play |
| The Blazing Charm | Improves Blazing Gauge generation and flame duration | Elemental Damage |
| Charm of Awakening | Provides powerful bonuses during critical combat conditions | High Damage |
There are reportedly 22 different charms to discover, but these are the ones that immediately stand out when you’re trying to build around a specific combat strategy.
My Favorite: The Issen Counter Build
Recommended Charms:
- Lion Dog Lovable Charm
- Kubi Akari Charm
- The Blazing Charm
This is the setup I’d recommend to anyone who already feels comfortable with Onimusha’s defensive mechanics.
It isn’t particularly forgiving, but that’s also what makes it so satisfying. You’re essentially building Musashi around the idea that the enemy attacking you is actually giving you an opportunity.
The Lion Dog Lovable Charm is the centerpiece. At Level 1, it provides a significant damage increase to attacks immediately following a successful Parry or perfectly timed Reflex Dodge, with the bonus increasing further when upgraded.
Then you’ve got Kubi Akari supporting the technical side of the build. Its combat-oriented bonuses make the whole setup feel more reliable when you’re trying to stay aggressive and connect your follow-up attacks.
Finally, The Blazing Charm adds another layer to the loop by improving the Blazing Gauge mechanic. Successful defensive actions help you build toward the flaming weapon state, giving your attacks additional elemental punch.
The result is a very simple rhythm:
Wait for the attack → Parry → Counter → Build Blazing Gauge → Burn through the enemy.
Against regular Genma, this can feel borderline unfair once you’ve upgraded the relevant charms. Against tougher enemies, the build rewards patience because you’re getting considerably more value from every successful defensive read.
My advice here is simple: don’t use this build if you’re still panic-dodging everything. You’ll get far more out of a sustain setup until the timing starts becoming second nature.
The Safer Option: Undying Samurai Build
Recommended Charms:
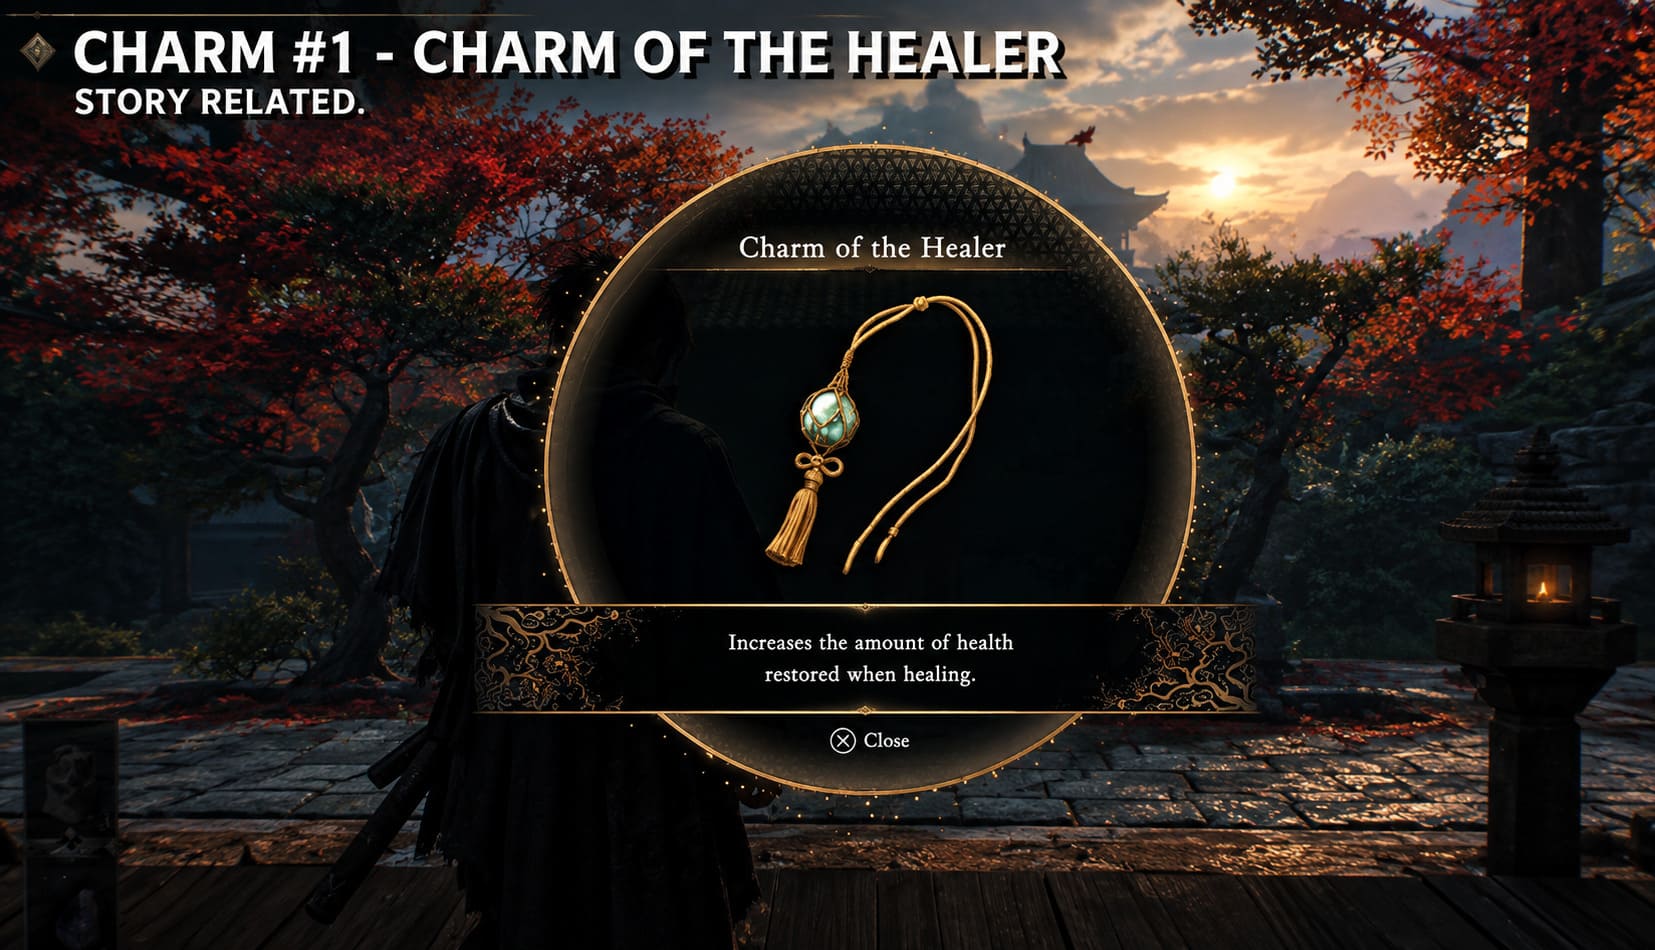
- Charm of the Healer
- Guardian’s Resolve Charm
- Phoenix Rebirth Charm
This is the build I’d hand to someone who keeps reaching a boss with half a health bar and absolutely no patience left.
And honestly, there’s nothing wrong with that.
Onimusha’s combat can punish mistakes extremely hard. If you miss a defensive timing and then burn through your stamina while blocking, you can end up in a guard-break situation at exactly the wrong moment.
Guardian’s Resolve helps address that problem by reducing stamina consumption during standard blocks. It isn’t as flashy as a giant damage multiplier, but it gives you more room to learn enemy attack patterns without immediately getting punished for every mistake.
Then comes the Charm of the Healer. Its job is straightforward: make your healing resources more valuable. The base bonus already helps, and upgrading the charm makes the difference more noticeable during longer encounters.
And if everything goes horribly wrong, Phoenix Rebirth gives you another layer of protection by activating health regeneration when Musashi reaches a dangerous health threshold.
This combination isn’t going to produce the biggest damage numbers in your screenshots. That’s not the point. It’s designed to keep you alive long enough to actually learn the fight.
For a first playthrough, I honestly think that’s underrated.
The Greedy Build: Oni Armament Soul Farming
Recommended Charms:
- Charm of Awakening
- Soul-Binder’s Jade
- Mirror of the Void
This one is for players who look at a giant group of enemies and immediately think, “How many times can I use my special ability before everything dies?”
The answer with this setup is: probably more than you expect.
Onimusha’s soul economy is divided into different colors, with Yellow Souls supporting health recovery, Red Souls serving upgrade-related purposes, and Blue Souls powering Oni-related abilities.
Soul-Binder’s Jade is particularly useful here because it improves the collection of Blue and Red Souls while also making it easier to pull them toward Musashi.
That attraction radius sounds like a minor convenience until you’re fighting several enemies at once. Then you realize you aren’t constantly stopping to chase floating resources around the battlefield.
Mirror of the Void completes the loop by reducing the resource cost of special weapon abilities. In practical terms, you’re making your powerful abilities cheaper while simultaneously improving your ability to gather the resources needed to use them again.
Charm of Awakening then gives the build another offensive spike during critical combat conditions.
It’s not the build I’d use for learning precise Issen timings. But when you’re clearing groups, farming resources, or simply want to play Musashi like a walking supernatural blender, this is a lot of fun.
Where to Find Some of the Most Useful Charms
Finding the right charm is only half the battle. Knowing where to look saves a lot of unnecessary wandering around Kyoto.

- Lion Dog Lovable Charm: Available as a pre-order bonus for eligible players and associated with later Kyoto side mysteries.
- Charm of the Healer: Earned after defeating Daidara at the end of the “The Stage is Set at Kiyomizu” mission.
- Kubi Akari Charm: Available by carrying save data from the official demo into the full game.
- The Blazing Charm: Hidden in an ornate chest within the burning districts of Central Kyoto during Chapter 3.
- Charm of Awakening: Obtained after solving an environmental puzzle in a sunken temple area.
If you’re collecting charms seriously, don’t rush through story missions. Some of the game’s rewards are tucked away behind exploration, environmental puzzles, or side content.
Don’t Ignore Oni Vision
This is probably my biggest exploration tip.
Use Oni Vision.
It’s easy to forget about special abilities when you’re focused on combat, but Oni Vision can reveal things that aren’t obvious during normal exploration. Hidden paths, breakable sections, spirit trails, and other environmental clues can lead to useful resources and upgrade materials.
If you’re trying to maximize charm levels, randomly smashing objects isn’t just busywork. There can be a real payoff.
And yes, that means I recommend breaking boxes.
All of them.
You’re playing Onimusha. You have a magical gauntlet. If there’s a suspicious barrel sitting in a corner, destroy it. That’s just common sense.
Onimusha Way of the Sword Lore Scrolls Guide: All Kyoto Collectible Locations
How I Would Build Musashi for Different Playstyles
| Playstyle | Best Combination | Why |
|---|---|---|
| Technical | Lion Dog + Kubi Akari + Blazing | Turns Parry timing into huge counter damage |
| Beginner | Healer + Guardian’s Resolve + Phoenix Rebirth | Maximum room for mistakes |
| Ability Spam | Awakening + Soul-Binder’s Jade + Mirror of the Void | Strong resource and Oni Armament loop |
One More Tip: Change Your Charms More Often
I think this is where a lot of players will miss out.
Because charms can be swapped from the Equipment menu, there isn’t much reason to treat your build as permanent. The game gives you the flexibility to adapt, so use it.
If you’re exploring, prioritize utility and resource collection. Before a difficult boss, switch to survivability or your strongest combat synergy. Once you’ve learned the boss and you’re comfortable with the timing, swap back into the aggressive setup.
Don’t be afraid to experiment. The best charm build isn’t necessarily the one with the biggest theoretical damage output. It’s the one that matches the way you actually play.
Onimusha Way of the Sword Upgrade Guide: Best Items and Weapons to Upgrade First
Final Verdict: Which Charm Build Is Actually Best?
If I had to choose just one, I’d take the Lion Dog Lovable + Kubi Akari + Blazing Charm combination. Once the combat system starts clicking, this setup captures what makes Onimusha: Way of the Sword so satisfying: defense isn’t passive. It’s the beginning of your attack.
But for a first playthrough, I’d probably start with the Healer sustain build. There’s no shame in giving yourself a bigger safety net while learning the game’s timing. You’ll eventually reach the point where blocking feels too slow, dodging feels unnecessary, and you’re deliberately standing in front of a Genma waiting for it to swing.
That’s when the counter build becomes ridiculous.
The important thing is not to chase a “perfect” meta setup too early. Upgrade the charms you actually use, explore Kyoto thoroughly, collect the materials you find, and adjust your loadout when the situation changes.
Onimusha: Way of the Sword rewards players who understand its combat rather than simply overpowering it. The charm system reinforces that idea beautifully. Whether you want to become an Issen specialist, an almost impossible-to-kill samurai, or a supernatural soul-farming machine, there is plenty of room to build Musashi around your own style.
And personally, that’s exactly how I prefer these systems to work.