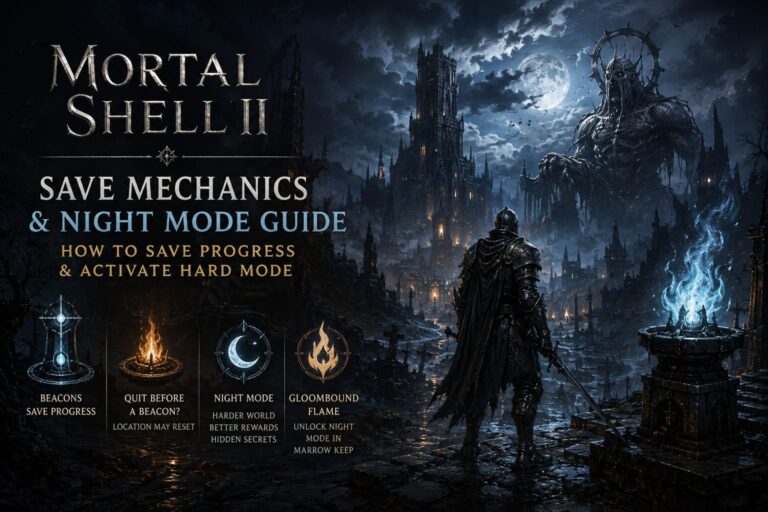
Onimusha: Way of the Sword Talisman Guide – All Defense, Might & Upgrade Locations
Talismans are easy to overlook in Onimusha: Way of the Sword. They are usually tucked beside corpses, hidden behind breakable objects, placed on environmental structures, or simply sitting somewhere you would never think to check during a hectic fight. And that is exactly why I recommend keeping an eye out for them.
Onimusha does a good job of making exploration feel worthwhile. You are rarely just walking from one combat encounter to another. There is usually something sitting just off the main route, and Talismans are some of the better rewards for taking a few extra seconds to look around.
Whether you are playing through the story on Story Mode or pushing yourself with the much tougher Action Mode, these items can make a noticeable difference. Defense Talismans can save you when a boss catches you with a nasty combo, while Might Talismans are excellent when you finally find an opening and want to turn it into serious damage.
This Onimusha: Way of the Sword Talisman Locations Guide covers the Talismans found throughout Kiyomizu-dera Temple, the Oni Refuge, Eastern Kyoto, and the story missions. I have also included the unique Byakue’s Talisman rewards, because those are particularly important for upgrading the Oni Gauntlet.
How Talismans Work in Onimusha: Way of the Sword
Before hunting them down, it helps to understand what you are actually collecting.
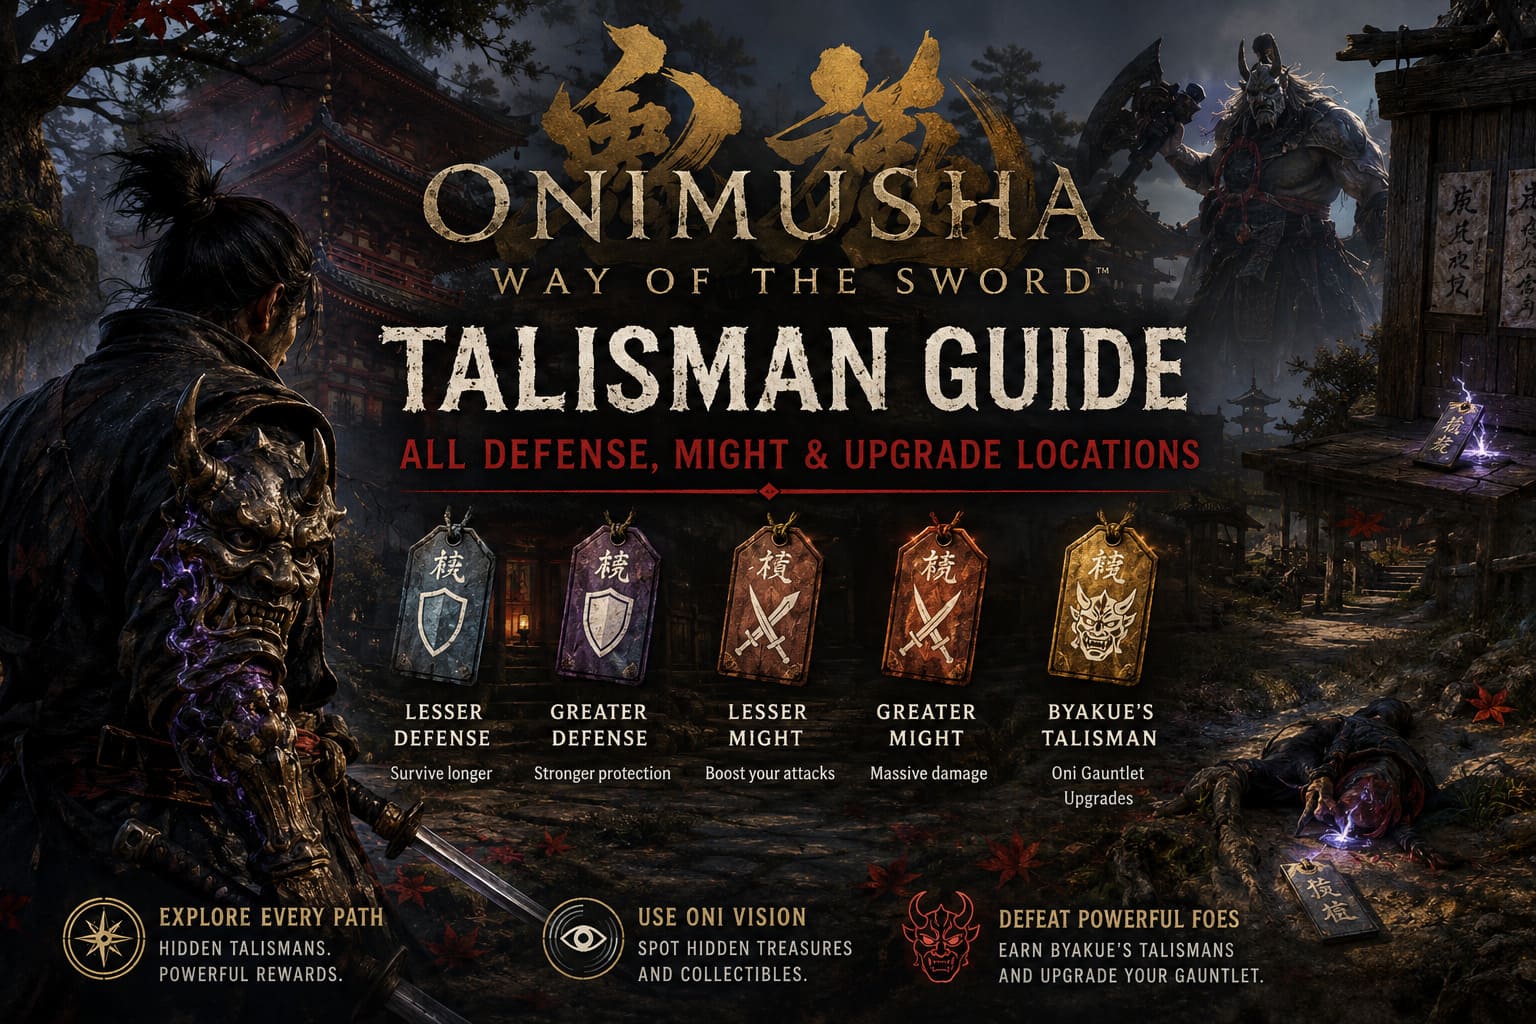
There are several different types of Talismans, but they broadly fall into two categories: temporary combat buffs and special upgrade materials.
| Talisman Type | Main Purpose | Best Use |
|---|---|---|
| Lesser Defense Talisman | Temporary defensive boost | Difficult encounters and learning bosses |
| Greater Defense Talisman | Stronger defensive boost | Boss fights and dangerous enemy groups |
| Lesser Might Talisman | Temporary offensive boost | Fast damage and stamina pressure |
| Greater Might Talisman | Powerful offensive boost | Major bosses and elite Genma |
| Byakue’s Talisman | Oni Gauntlet progression material | Special upgrades |
The Lesser versions are the ones you will encounter most often. Don’t dismiss them, though. I found them particularly useful when exploring unfamiliar areas because they give you a little room for error without forcing you to burn your strongest resources.
Greater Talismans are different. These are the items I would personally save instead of using casually. When a boss fight starts going badly, having a powerful defensive or offensive buff available can completely change the pace of the encounter.
Use Oni Vision to Make Talisman Hunting Easier
One of the best things you can do early in the game is invest in the exploration-related Oni Vision abilities.
At a Spirit Mirror, spend your Red Souls and Favour on:
- Oni Vision: Treasures
- Oni Vision: Treasures 2
- Oni Vision: Search Range
Once these abilities are developed, Oni Vision becomes much more useful for exploration. Hold L2 and tap R2 to activate the radar effect, revealing hidden treasures and nearby collectible items through obstacles.
Honestly, this is one of those upgrades that sounds optional until you start missing items. Onimusha’s environments have plenty of visual clutter, and a small item sitting beside a wall or underneath an awkward structure can be surprisingly easy to miss.
If you are trying to collect every Talisman, get the exploration upgrades early.
Kiyomizu-dera Temple Talisman Locations
Kiyomizu-dera is where the game starts teaching you to pay attention to the environment. The area is relatively straightforward compared with later sections, but several Talismans are positioned just far enough away from the obvious route to make them easy to miss.
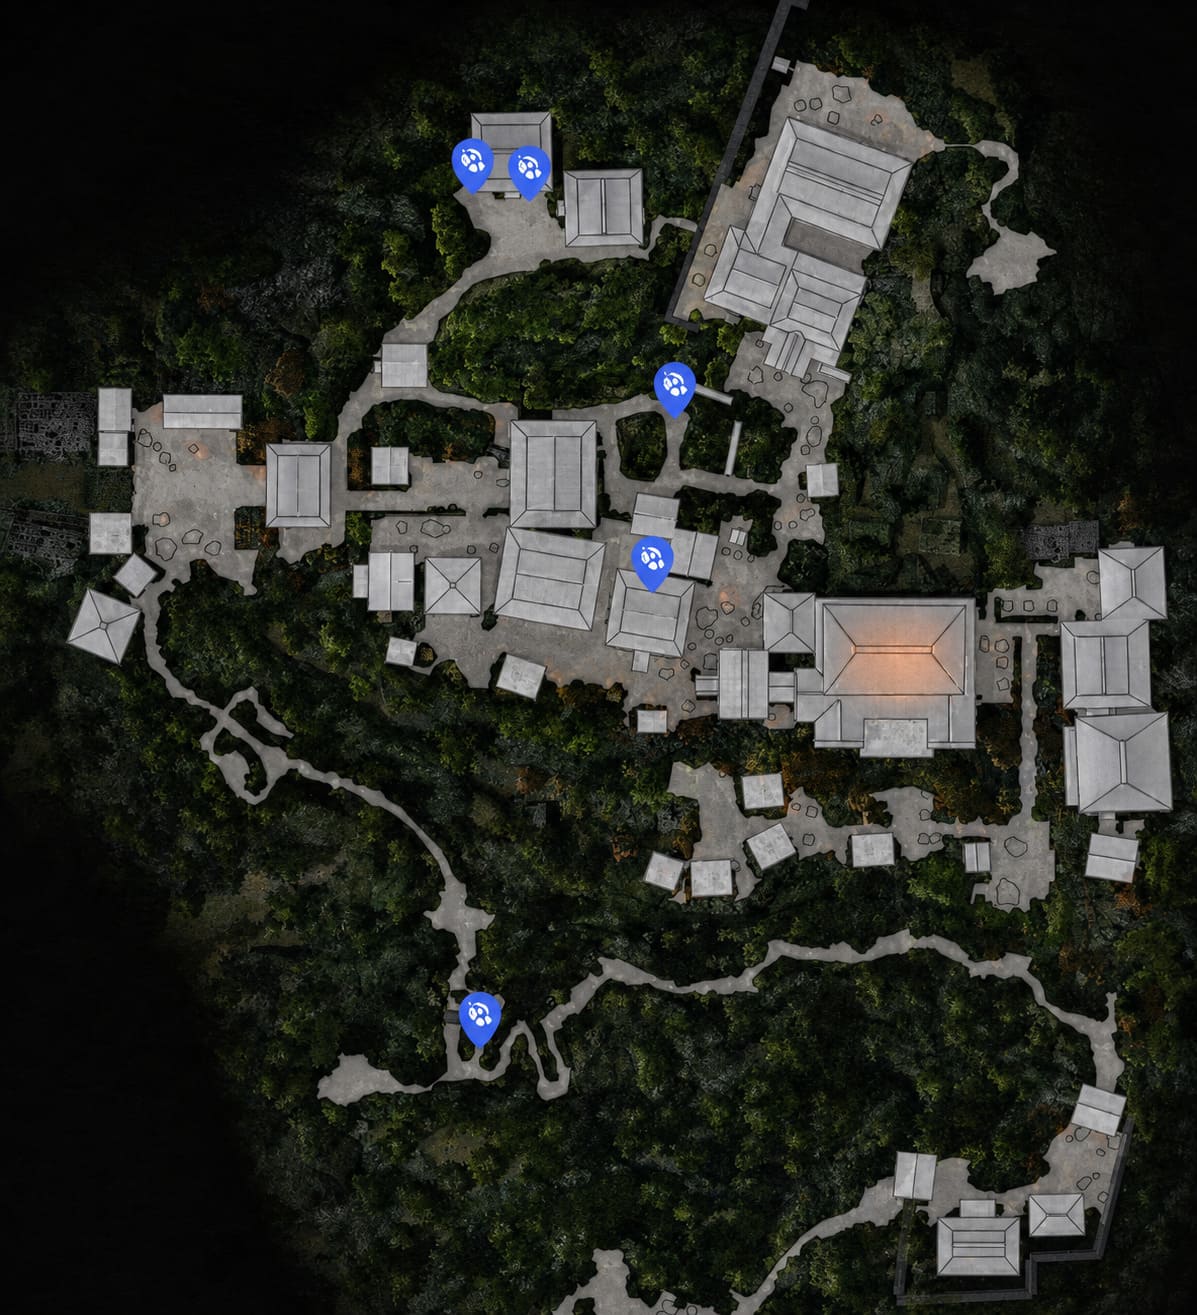
1. Lesser Defense Talisman — Temple Courtyard
During your early exploration of the temple grounds, follow the main stone pathway toward the courtyard.
Look for a large old tree standing near the central area.
The Lesser Defense Talisman is lying directly in front of the tree’s roots. It is not locked behind a puzzle or difficult encounter, so this one is simply a matter of looking around rather than rushing forward.
Location clue: Large tree near the main courtyard.
2. Lesser Defense Talisman — Near the Pagoda
When you reach the large pagoda structure, don’t immediately head inside.
Check the lower exterior area and examine the wooden beams beneath the platform. You should eventually spot a hanging corpse beneath the structure.
The Talisman is positioned next to it.
This is exactly the sort of item that can disappear into the background if you’re focused entirely on the next objective.
Location clue: Hanging corpse underneath the pagoda platform.
3. Lesser Might Talisman — Broken Cart
Continue exploring the outer temple courtyards until you reach an area occupied by several lower-level Genma.
Look around for a destroyed wooden transport cart that has been knocked over.
The Lesser Might Talisman is sitting on the ground beside the wreckage.
If enemies are still nearby, clear them first. There is nothing worse than spotting an item and then getting interrupted by a Genma while trying to pick it up.
4. Lesser Might Talisman — Storage Building
This one is hidden inside a small auxiliary building attached to the temple complex.
Enter the room and check the darker corners. You will find several wooden crates blocking part of the area.
Break them with your sword to reveal the Talisman.
This is a good reminder that you should get into the habit of destroying suspicious objects. Onimusha likes hiding useful things behind environmental clutter.
5. Lesser Defense Talisman — Malice Barrier
During the The Stage is Set at Kiyomizu mission, you will eventually reach a large Malice Barrier guarded by Genma.
The encounter includes ground enemies and two archers positioned above you.
Defeat the enemies, then climb the wooden stairs to reach the elevated archer platform.
The Lesser Defense Talisman can be found between the fallen archers.
This is one of the more memorable locations because the item is essentially sitting in the aftermath of the fight.
Oni Refuge Talisman Locations
The Oni Refuge has a very different atmosphere from the main temple areas. It feels more mysterious and compact, and some of the collectibles are placed along routes that are easy to overlook when you’re focused on the next objective.
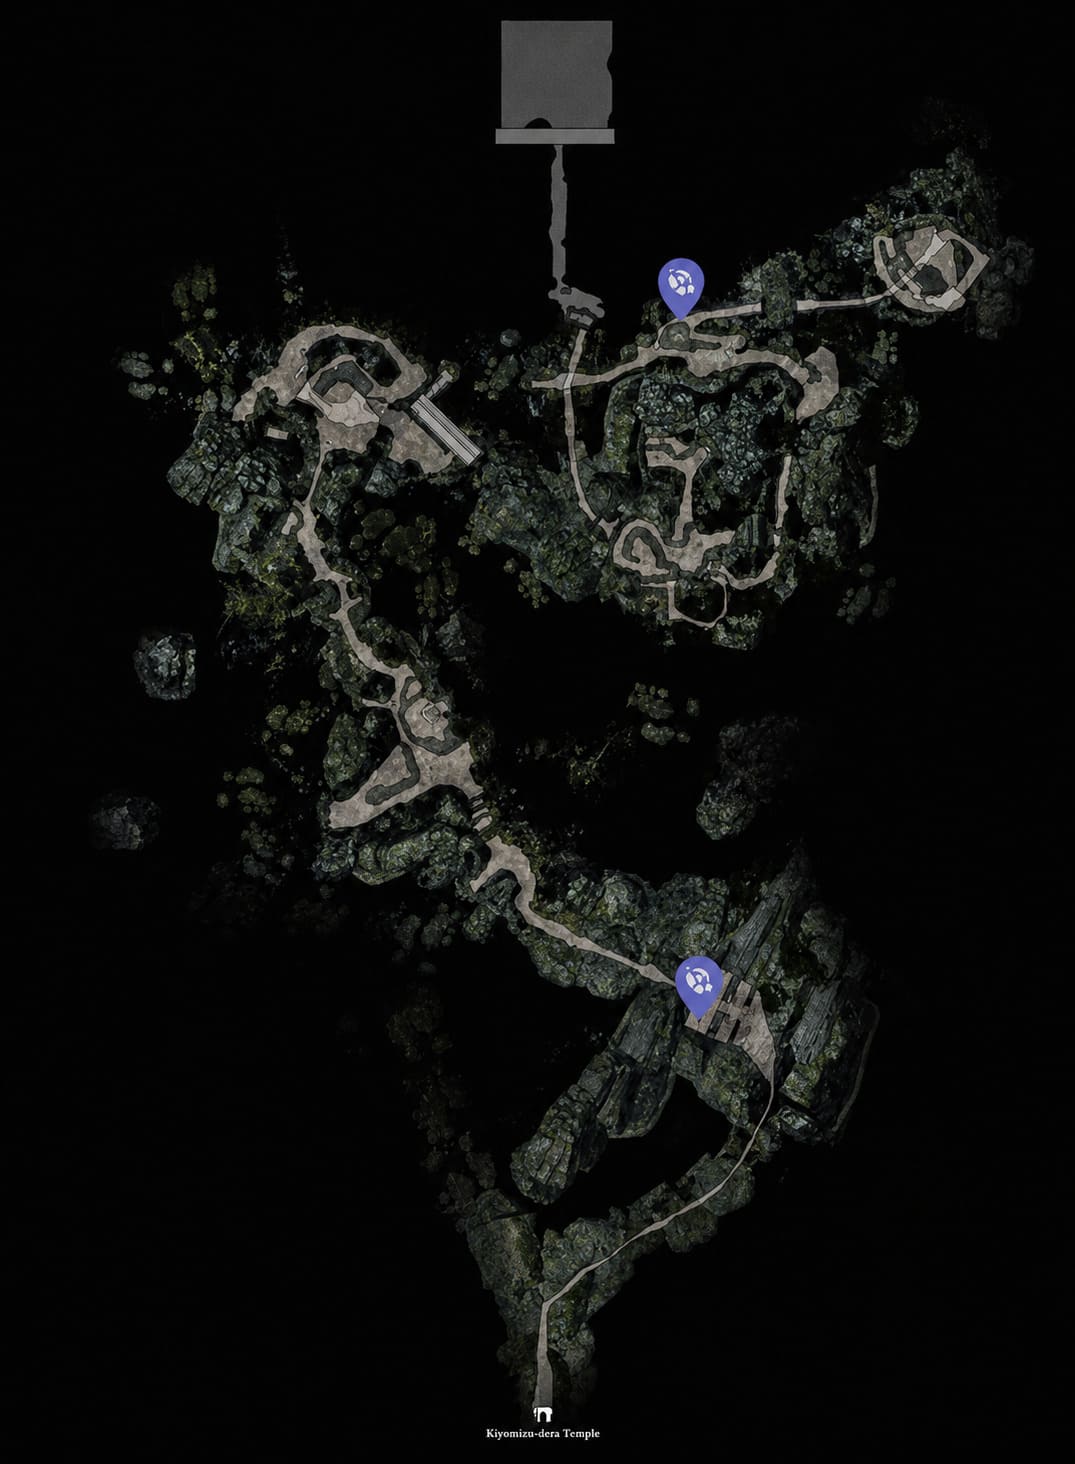
6. Lesser Defense Talisman — Hall Spirit Mirror
Start near the main Hall Spirit Mirror.
Look for a small house-like residential structure positioned close to the mirror room. Enter it and check the side room.
Inside, you will find a spiritual altar.
The Lesser Defense Talisman is sitting directly on top.
Location clue: Side house near the Hall Spirit Mirror → altar.
7. Lesser Might Talisman — Upper Path
As you move through the elevated sections of the Oni Refuge, you will encounter mountain paths, scaffolding, and dirt tracks leading toward the higher chambers.
Keep checking the main walkway rather than sticking completely to the objective route.
The Lesser Might Talisman is sitting out in the open on the upper path.
Unlike some of the temple collectibles, this one isn’t really hidden. The problem is simply that it is easy to run past.
Eastern Kyoto & Corrupted Kyoto Talisman Locations
Once the game moves into Eastern Kyoto, exploration becomes much more interesting.
The streets are larger, the environment is more corrupted, and there are more distractions everywhere. Rifts, Genma, environmental objects and branching paths can make it difficult to remember where you’ve already searched.
This is where Oni Vision starts becoming especially valuable.
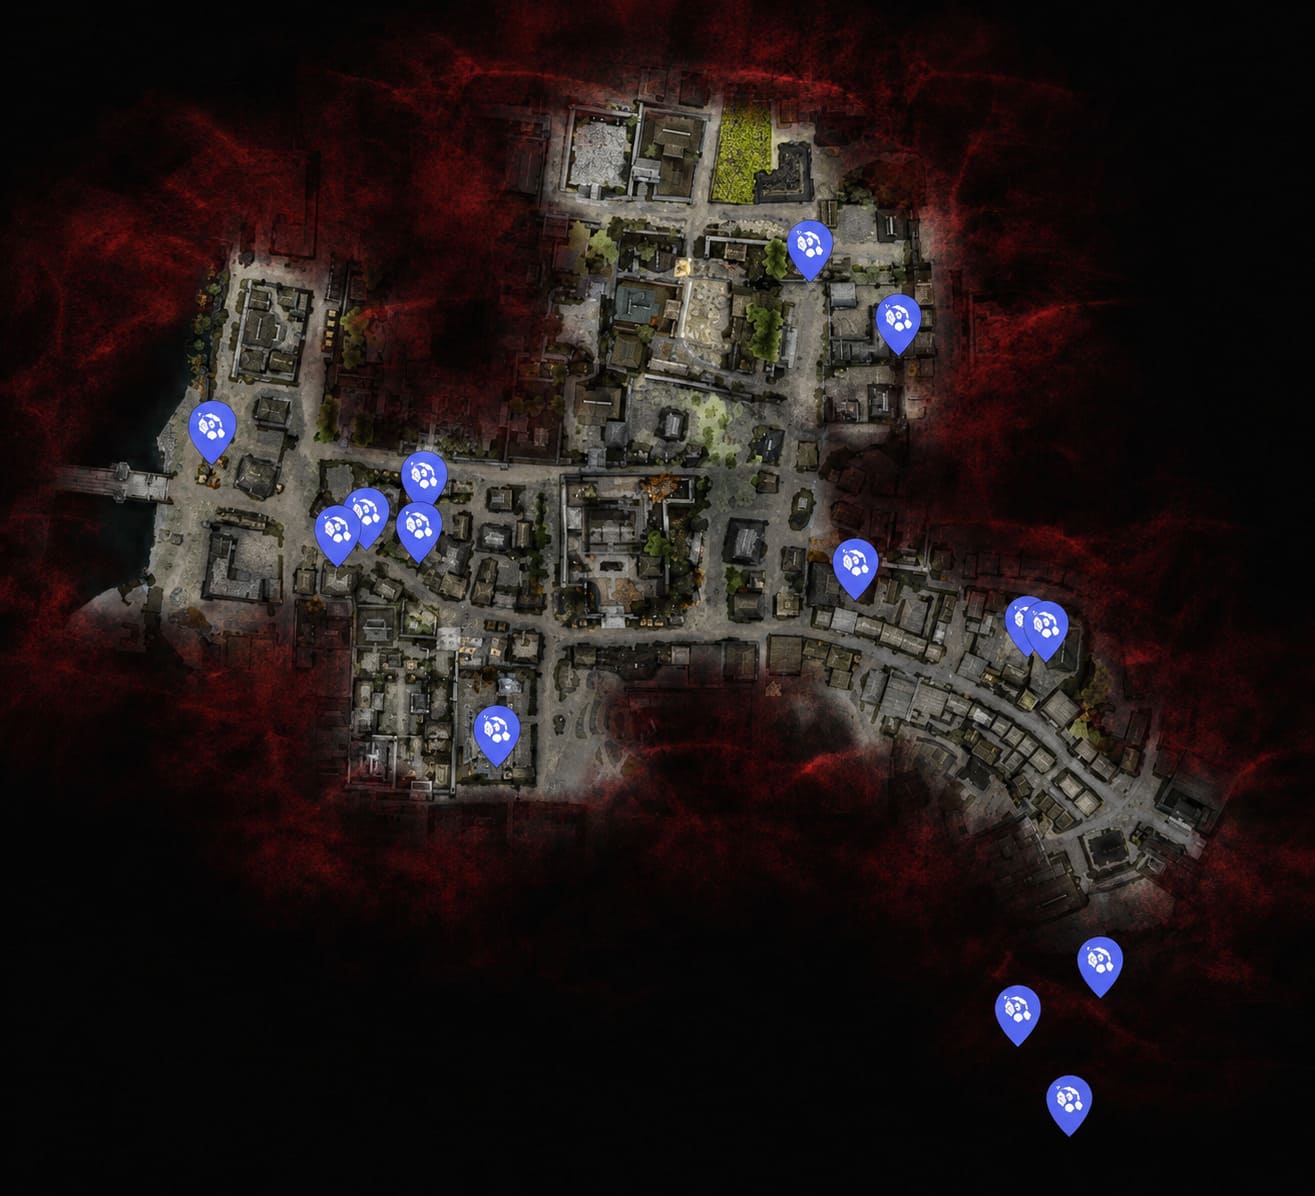
8. Greater Defense Talisman — Wooden Notice Boards
During the Kyoto, Corrupted mission, you will be exploring the city while searching for and purifying demonic Rifts.
Follow the main thoroughfare and look for large wooden official notice or ballot boards.
The Greater Defense Talisman is sitting directly on top of these boards.
This is one of the more valuable pickups in the entire early section, so don’t rush past it.
9. Lesser Defense Talisman — Broken Gate
Move through the residential streets until you find a narrow bottleneck blocked by a badly damaged wooden gate.
The gate is heavily splintered and hard to miss.
Look directly on the ground in front of it.
The Lesser Defense Talisman is lying in the dirt.
Location clue: Broken wooden gate blocking a narrow passage.
10. Lesser Defense Talisman — Riverbank Corpse
When you reach the river area, the terrain changes into a steep and muddy hillside.
Follow the path running partway up the slope beside the water.
Eventually you will find a fallen soldier’s corpse near some bushes.
Search the body to collect the Lesser Defense Talisman.
This is another reason I recommend checking corpses instead of assuming they are only environmental decoration.
11. Greater Defense Talisman — Wooden River Crossing
Stay around the same riverbank region.
Follow the stream until you find a basic crossing made from large wooden planks.
Walk out onto the crossing and look around before continuing.
The Greater Defense Talisman is sitting on the planks, safely above the water.
Considering how easy it is to simply follow the river path, this one is very easy to miss on a first playthrough.
12. Lesser Might Talisman — Genma Courtyard
This Talisman is located inside a fortified courtyard patrolled by stronger Genma enemies.
Clear the area first, then search around the perimeter.
Near one of the walls you will find a small woven storage basket.
Break or interact with the basket to obtain the Lesser Might Talisman.
The location is straightforward once the courtyard is safe, but I would not recommend searching while the enemies are still active.
13. Lesser Might Talisman — Lower River Slope
Continue along the winding hillside route leading toward the lower river docks.
Partway down the slope, look for another corpse lying beside the path.
The Lesser Might Talisman is positioned next to the body.
The terrain here can make the item blend into the environment, so use Oni Vision if you have trouble spotting it.
Unique Boss Talisman: Byakue’s Talisman
14. Byakue’s Talisman ×2 — The Curse of Kiyomizu-zaka Slope
This is the most important unique Talisman reward on the list.
During the sixth major story mission, The Curse of Kiyomizu-zaka Slope, Musashi faces Byakue, a huge and extremely dangerous opponent wielding a massive battleaxe.
This fight is one of those encounters where the game makes it very clear that simply attacking harder isn’t always the answer.
You will want to pay attention to perfect parries, stamina management, and opportunities to use the Oni Bow to weaken the boss.
After defeating Byakue and absorbing the nearby Malice Rift, you receive:
2× Byakue’s Talisman
These aren’t ordinary consumables. They are valuable progression materials used for Oni Gauntlet upgrades.
So don’t treat them like something you should immediately burn during combat. Keep them safe and take them to a Spirit Mirror when you are ready to improve your Gauntlet.
Careful What You Wish For Talisman
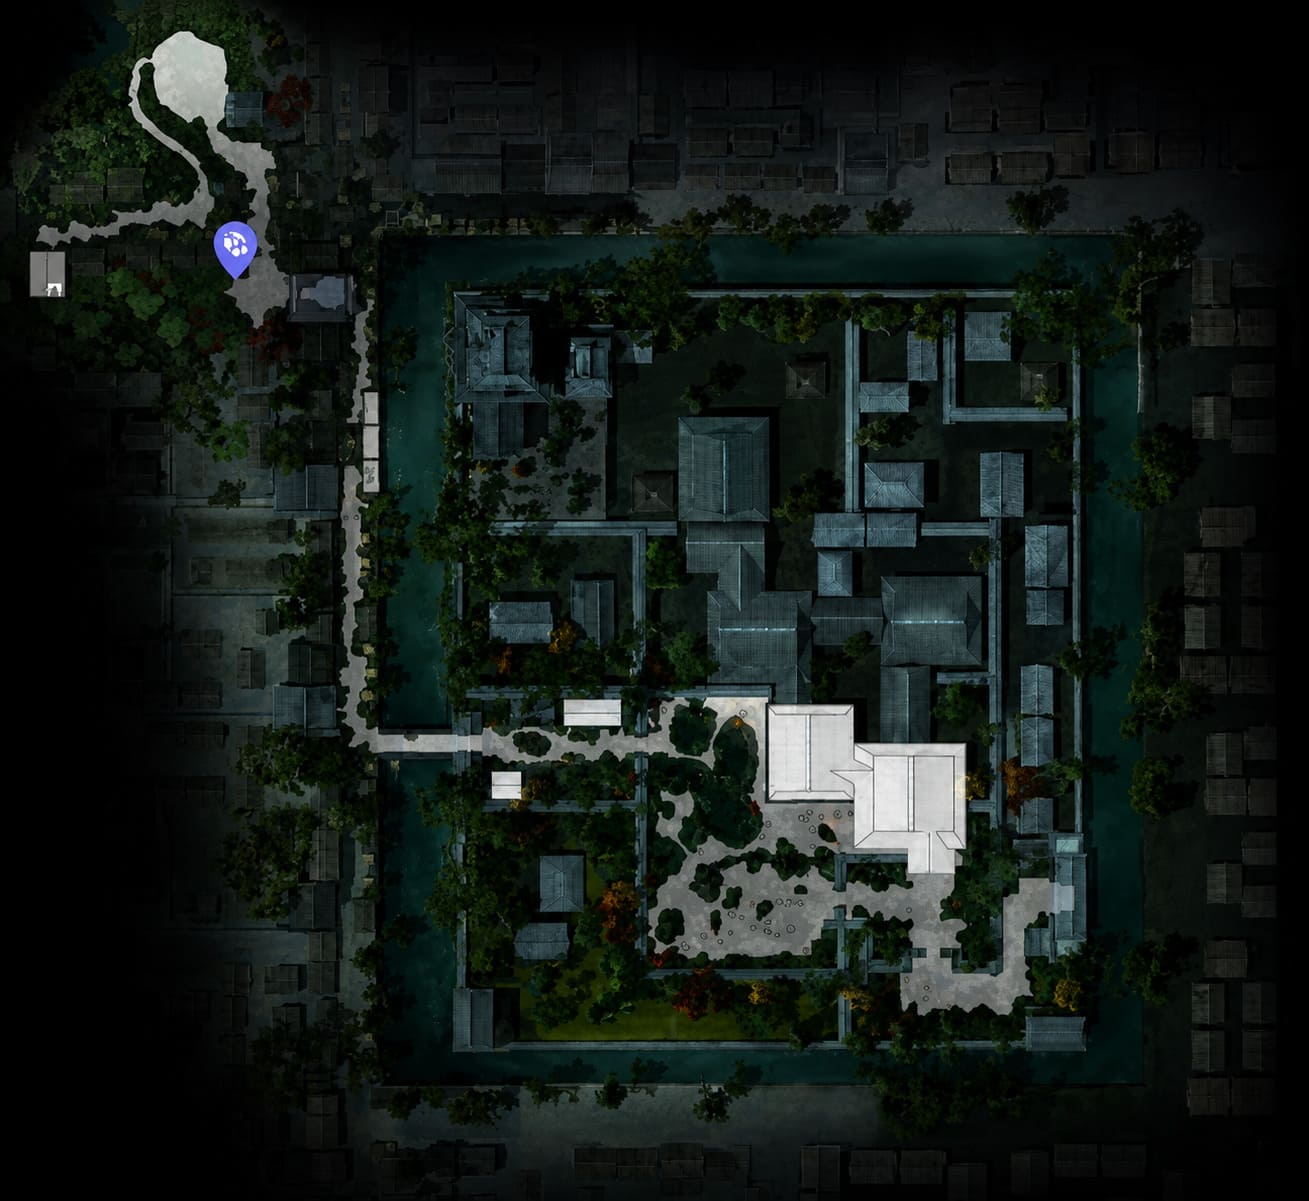
15. Lesser Defense Talisman — Before the White Door
During the Careful What You Wish For side-content sequence, Musashi enters an isolated compound filled with destructible porcelain vases.
Before opening the large white door that leads deeper into the estate, stop and look at the ground outside.
You will find a corpse near the entrance.
Search it to collect the Lesser Defense Talisman.
I’d strongly recommend grabbing this one before going through the door because there is an ambush waiting inside. Having the extra defensive option available can be useful if you’re already low on health or simply don’t want to get caught off guard.
Complete Onimusha: Way of the Sword Talisman List
| # | Talisman | Area / Mission | Location Clue |
|---|---|---|---|
| 1 | Lesser Defense | Kiyomizu-dera | Large tree in courtyard |
| 2 | Lesser Defense | Kiyomizu-dera | Hanging corpse near pagoda |
| 3 | Lesser Might | Kiyomizu-dera | Broken wooden cart |
| 4 | Lesser Might | Kiyomizu-dera | Behind crates in storage building |
| 5 | Lesser Defense | The Stage is Set at Kiyomizu | Archer platform |
| 6 | Lesser Defense | Oni Refuge | Altar near Hall Spirit Mirror |
| 7 | Lesser Might | Oni Refuge | Upper mountain path |
| 8 | Greater Defense | Kyoto, Corrupted | Wooden notice boards |
| 9 | Lesser Defense | Eastern Kyoto | Broken wooden gate |
| 10 | Lesser Defense | Eastern Kyoto | Corpse near riverbank |
| 11 | Greater Defense | Eastern Kyoto | Wooden river crossing |
| 12 | Lesser Might | Eastern Kyoto | Basket in fortified courtyard |
| 13 | Lesser Might | Eastern Kyoto | Corpse on river slope |
| 14 | Byakue’s Talisman ×2 | The Curse of Kiyomizu-zaka Slope | Reward for defeating Byakue |
| 15 | Lesser Defense | Careful What You Wish For | Corpse before white door |
When Should You Actually Use Talismans?
Finding Talismans is only part of the system. The bigger question is when to use them.
Personally, I wouldn’t waste Greater Talismans on random enemies unless the situation has already gone completely sideways. Regular Genma encounters are usually manageable once you get comfortable with Musashi’s combat rhythm.
Instead, save your best buffs for:
- Major boss fights
- Elite Genma encounters
- Malice Barrier fights
- Difficult areas with multiple enemies
- Sections where healing resources are running low
A Greater Defense Talisman is particularly useful when learning a boss. The extra survivability gives you more opportunities to study attack patterns instead of restarting the fight every time you make one mistake.
Greater Might Talismans are a different story. They shine when you already understand an enemy and can consistently create damage openings. Pairing a strong offensive buff with a successful Issen can turn a good opening into a huge chunk of damage.
And that’s probably my favorite thing about Talismans in Onimusha. They aren’t just generic stat boosts. They encourage you to think about the fight you’re about to enter.
How to Fix NBA 2K27 Low FPS, Stuttering, and Lag on Windows 11 (2026 Definitive Guide)
Don’t Confuse Talismans With Other Upgrade Resources
One thing that can get confusing is the number of collectible systems in the game.
Talismans are not the same as permanent progression items such as Power Stones or Hozuki Pouches. Some Talismans are temporary combat consumables, while unique items like Byakue’s Talisman are connected to Oni Gauntlet progression.
Food works differently too.
Items such as Nashi Pears, Watermelons, and Rice Balls can be taken to Enma’s Hall and offered in exchange for Favour.
So when you’re exploring, don’t assume every collectible serves the same purpose. Some make you stronger permanently, some help you in the next fight, and others contribute toward specific upgrades.
Final Thoughts
The best way to approach Talisman hunting in Onimusha: Way of the Sword is simply to slow down a little.
The game rewards curiosity. Check the corpses. Break suspicious crates. Look underneath platforms. Walk onto bridges instead of immediately following the objective marker. And when an area looks like it has nothing interesting in it, give Oni Vision a try.
The 15 locations covered in this guide, including the two Byakue’s Talisman rewards, give you a strong collection of defensive and offensive resources throughout the main early regions and story missions.
My biggest recommendation is not to hoard everything forever. Greater Talismans are worth saving for difficult encounters, but Lesser Talismans are there to be used. If one helps you survive a tough section or gives you enough damage to finish a boss cleanly, that’s exactly what it’s for.
Onimusha’s combat can be brutal when you get careless. A well-timed Talisman can give you just enough breathing room to turn a fight around.
And sometimes, especially against a boss that has already killed you a few times, that’s all you need.