STALKER 2 Ultimate Artifact Hunting Guide: Best Infinite Farming Routes (2026)
There are plenty of ways to make money in S.T.A.L.K.E.R. 2: Heart of Chornobyl, but artifact hunting is easily my favorite. It is one of those activities where the game constantly makes you question whether the next ten seconds are worth the risk.
You hear the detector start chirping. Radiation is climbing. An anomaly is flashing somewhere nearby. Your armor is already taking a beating, and there is probably a mutant waiting just outside your peripheral vision.
Then you see the artifact.
That moment is exactly why I keep coming back to the Zone.
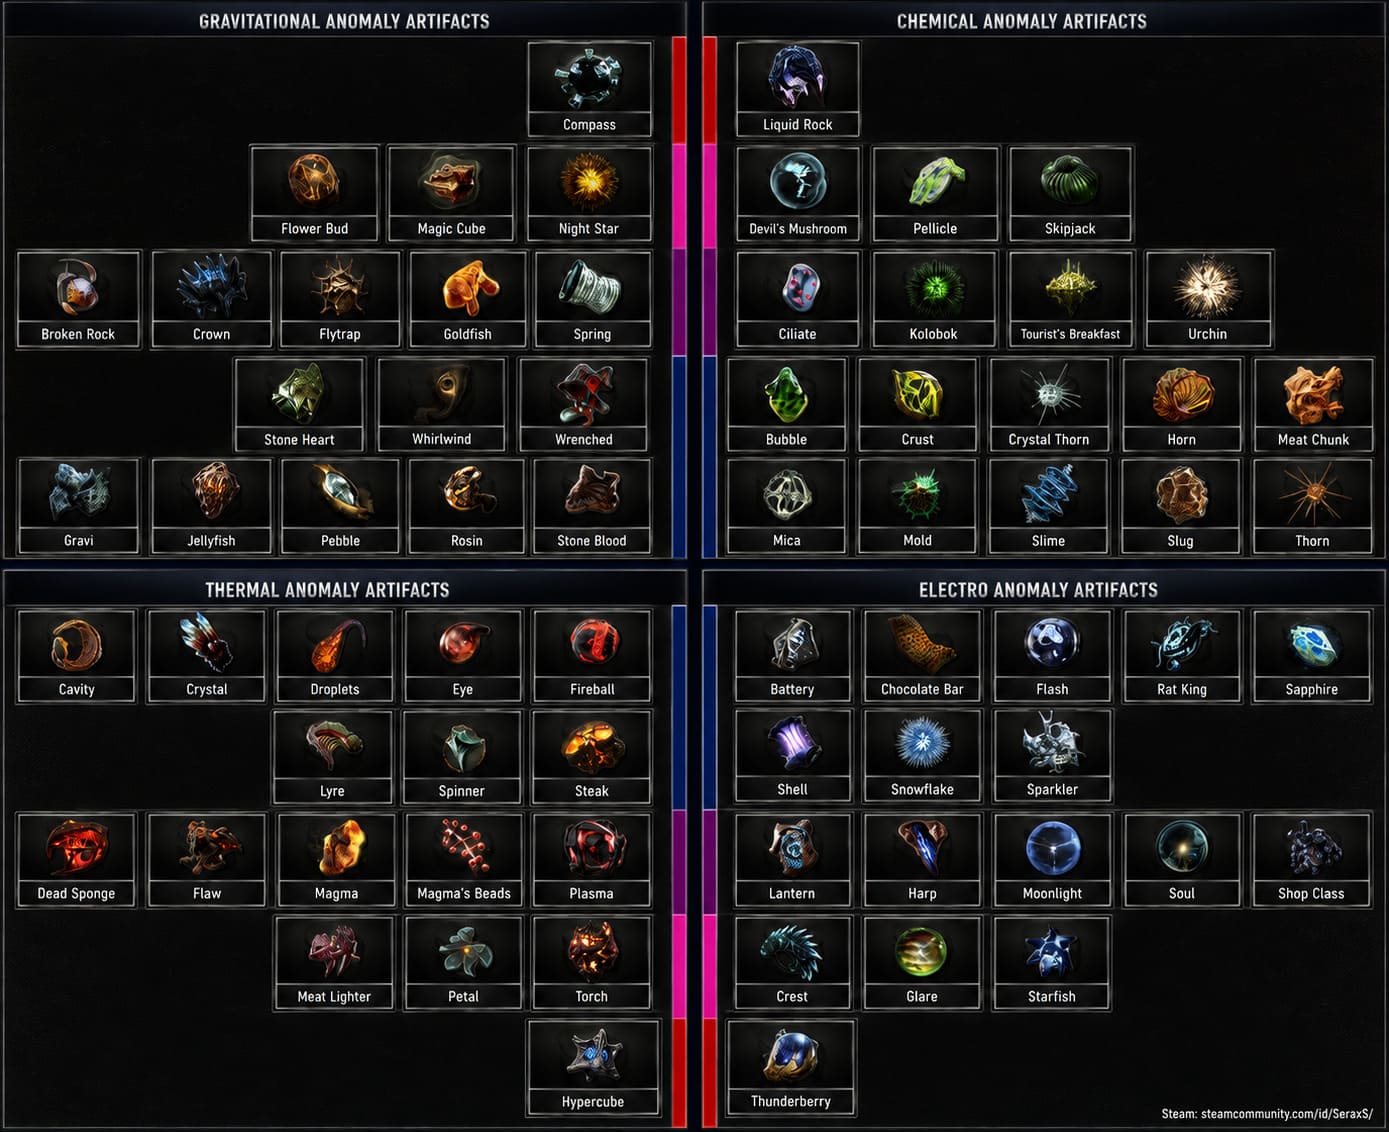
Artifacts are not just expensive objects you sell to a trader. The right artifact can completely change how your character handles radiation, bleeding, elemental damage, stamina, or health regeneration. Once you have better equipment and access to dangerous regions, artifact hunting can also become one of the most reliable ways to build up a serious pile of coupons.
But there is a big difference between wandering into random anomaly fields and actually having a good artifact farming route.
After spending enough time getting lost, wasting medkits, damaging expensive suits, and occasionally running away from something I absolutely did not want to fight, I think the best approach is to treat artifact hunting like a proper expedition. Pick several anomaly locations that make sense geographically, clear the route, collect everything useful, and return after the Zone has refreshed.
Here are the routes I would personally use in 2026.
How Artifact Farming Actually Works in STALKER 2
Before talking about specific locations, it helps to understand why some farming runs feel productive while others feel completely pointless.

The Zone’s anomaly fields are tied to the world’s dynamic state. Emissions are especially important, because they can refresh anomaly areas and give you another opportunity to search for artifacts.
That means you should not think of an anomaly field as a one-time loot box.
If you are planning serious farming sessions, keep an eye on Emissions and use them as the natural reset point for your routes. When you are waiting for another cycle, sleeping at a safe location can also help advance the game world.
There is another thing that matters: progression.
Early in the game, you are simply not going to walk into every anomaly field and pull out the best artifact in the Zone. Your early discoveries tend to be much more modest. As you progress through the story and encounter tougher enemies and regions, the quality of potential artifact rewards becomes much more interesting.
And honestly, that is a good thing.
Finding a top-tier artifact too early would remove a lot of the excitement from exploration.
My Favorite Early-Game Route: Lesser Zone
If you are still getting established in the Zone, I would not recommend immediately chasing the most dangerous anomaly fields.
The Lesser Zone gives you a much better risk-to-reward balance. You are close to traders and settlements, and a failed run is much less painful than losing an expensive suit deep inside Zaton.
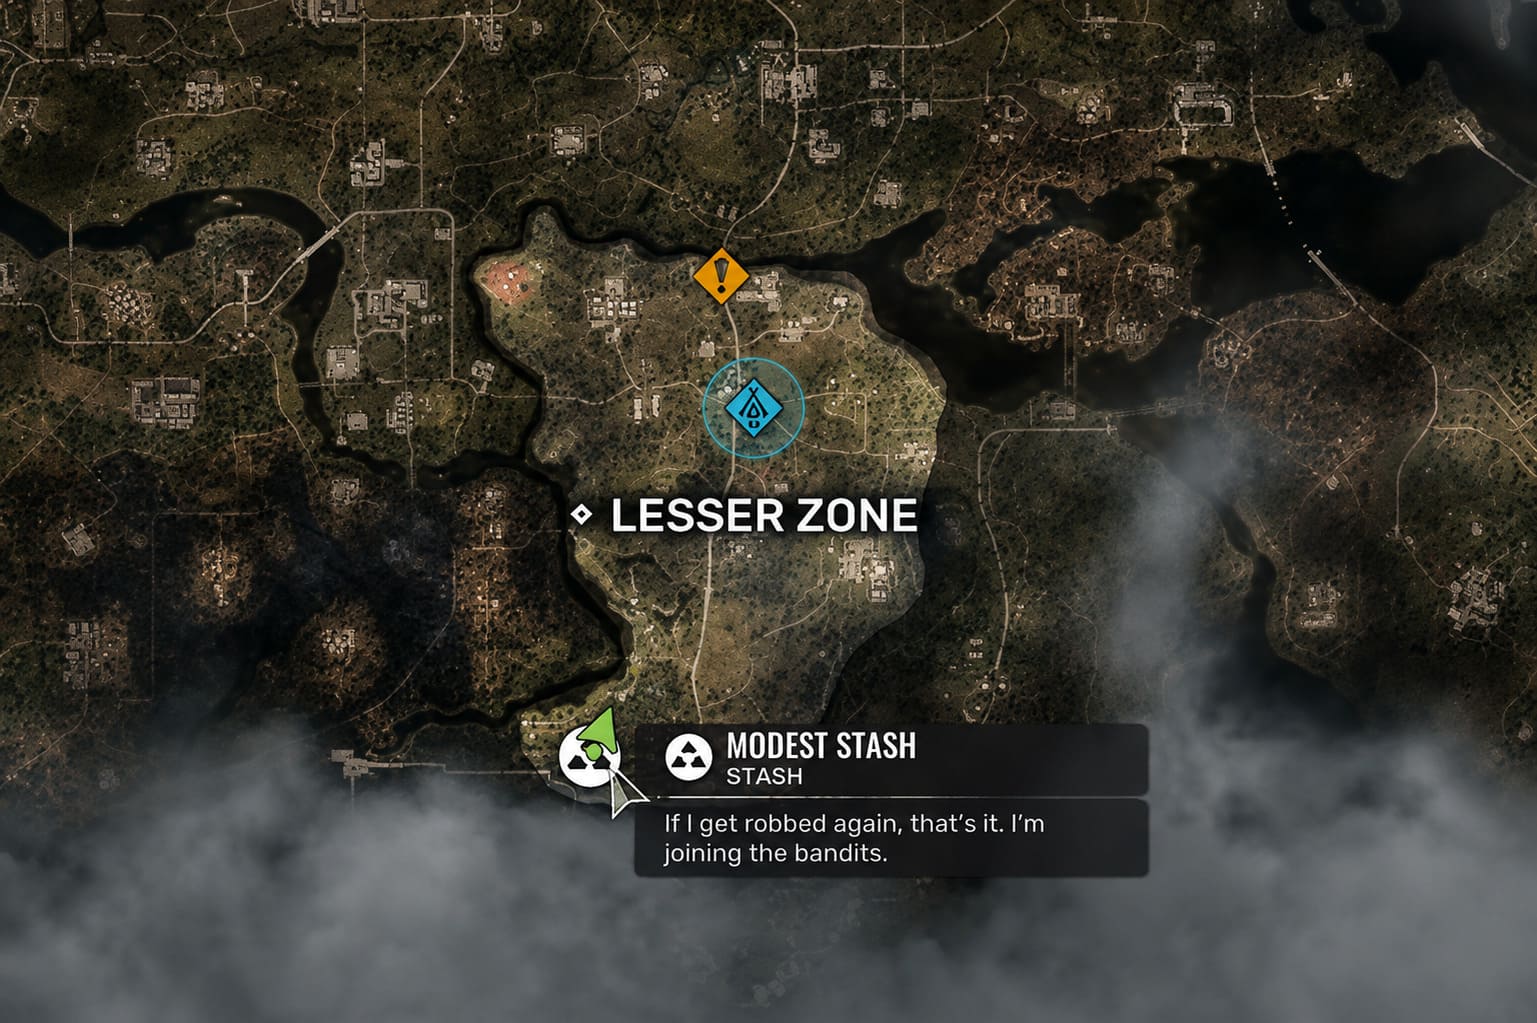
1. Nuclear Waste Burial
Start around the southern side of Rookie Village and work your way toward the irradiated ditch.
This is exactly the kind of location I like early in the game. It is dangerous enough to teach you how to use bolts and detectors properly without turning every mistake into a death sentence.
Move slowly around the anomaly activity and let your detector do the work.
A basic artifact here might not make you rich, but early defensive artifacts can be surprisingly useful.
2. Magnetic Cave
Next, move toward the outskirts of Zalyssia.
The cave is surrounded by localized gravitational and thermal hazards, so this is a good place to practice moving through anomalies without panicking. The wildlife around the entrance can also be annoying, so I recommend clearing anything aggressive before beginning the actual artifact search.
Once the area is quiet, bring out your detector and work through the cave carefully.
3. The Ribs
The Ribs is another worthwhile stop if you are already moving through the central Lesser Zone.
The gravitational anomalies here make rushing a bad idea. Throw bolts, watch the environment, and avoid taking unnecessary damage just because you want to save a few seconds.
If your character has progressed beyond the earliest stage of the game, this location becomes more interesting for artifact hunting.
4. The Old Mill
I actually like the Old Mill as the final stop of this early route.
The area can become messy because of wildlife and environmental hazards, but there is a useful trick: look for ways into the structure that let you avoid fighting everything outside.
Once inside, switch your attention completely to the detector.
The goal of this route is not legendary loot. It is consistency.
You can make several stops, collect useful artifacts, sell what you do not need, and repair your equipment without traveling halfway across the Zone.
The Garbage Route: My Pick for Mid-Game Money
Once you have better equipment, the Garbage becomes much more attractive.
This is where artifact hunting starts feeling like an actual business.
There are several anomaly clusters relatively close together, meaning you can build a compact route rather than spending half your expedition walking between locations.
| Location | Main Risk | Why I Like It |
|---|---|---|
| Detention Center | Underground Anomalies | Safe starting point |
| Electro Field | Electrical Hazards | Good artifact potential |
| Toxic Bog | Chemical Damage | Dense search area |
| Vehicle Graveyard | Mutants and Anomalies | Useful final sweep |
Detention Center Underground
Start beneath the Detention Center.
The underground section is uncomfortable, cramped, and full of hazards, but that is also why I like starting here. Outside enemies are less of a problem, allowing you to focus on the environment.
Keep your detector ready and search the corners instead of blindly running through the tunnels.
Electro Field
From there, head toward the Slag Heap and search the large electrical anomaly field.
This is one of those locations where patience pays off.
The electrical effects can make the area look chaotic, but the basic rule remains simple: do not rush because your detector is beeping faster.
That is exactly when you are most likely to make a stupid mistake.
Use bolts to identify safe movement paths and take your time.
Toxic Bog and Vehicle Graveyard
The final section of this route is where preparation really matters.
The Toxic Bog can punish you quickly if your chemical and radiation protection is poor. Bring the appropriate consumables and make sure your suit is not already falling apart before entering.
After searching the bog, continue toward the nearby tunnels and Vehicle Graveyard.
I would treat this as a bonus sweep rather than spending ages fighting every mutant in the area. If the place turns into a full combat encounter, move on.
Your goal is artifacts, not a personal grudge against every Snork in Garbage.
The Late-Game Route: Cement Factory to Zaton
Once your equipment is strong enough, this is where artifact hunting becomes genuinely addictive.
The Cement Factory and Zaton circuit has some of the best opportunities for high-value artifacts, but the danger level jumps considerably.
You should have a strong detector, enough medical supplies, radiation protection, and armor that can survive several anomaly encounters.
Floodplain and Reloading Point
Start around the Floodplain near the Cement Factory.
Work along the waterline and sweep the area before moving toward the Reloading Point.
This section is all about positioning. Multiple anomalies can overlap, and stepping into the wrong place can turn a routine search into an expensive repair bill.
I recommend taking the slower route here.
You are not racing anyone.
The Fire Station and Hell
Next comes one of the nastier sections of the entire circuit.
The area commonly referred to as Hell around the ruined fire station is packed with thermal hazards.
This is where specialized protection becomes much more important.
If your character is poorly equipped for thermal anomalies, I would skip this section until later. There is no shame in returning when your gear is better.
The potential rewards are much more interesting once you can actually survive the area without burning through half your inventory.
Canning Factory and the Zaton Coast
From the Cement Factory area, work east toward Zaton and follow the coastline toward the Canning Factory.
Electrical anomalies make this section particularly dangerous, while mutants and other threats can turn a quiet artifact search into a fight.
Clear immediate threats first.
Then search.
Trying to operate the detector while something is attacking you is one of the fastest ways to lose an artifact opportunity.
The Circus: The Stop I Never Skip
If I had to choose one late-game location for dedicated artifact farming, the Circus anomaly in Zaton would be near the top of my list.
The area is dangerous, but the potential reward makes the risk much easier to justify once you have appropriate equipment.
The large thermal anomaly field can produce multiple artifacts, making it particularly attractive for repeat runs.
This is also where save management becomes interesting for players who are comfortable experimenting with the game’s RNG.
Before committing to the anomaly field, create a manual save at a reasonable distance. If you are specifically hunting for a rare artifact, you can reload and test another approach rather than wasting an entire expedition.
I would not build an entire playthrough around save scumming, though.
For me, the fun of STALKER 2 comes from actually going into the Zone and dealing with whatever happens. But if you have already spent hours searching for one specific artifact, I completely understand wanting to give the RNG another chance.
The Boiler: Finish the Loop Here
After the Circus, head north toward the Boiler.
This makes a good final stop because you can continue searching for thermal artifacts while completing the southern Zaton circuit.
The biggest problem here is not necessarily the anomaly itself.
It is everything that can wander into the area while you are busy searching.
High-level mutants can make a detector run surprisingly dangerous, so listen carefully and keep an escape route in mind. If something powerful shows up, there is no prize for standing your ground.
Grab the artifact and leave.
Gear I Recommend for Serious Artifact Runs
You do not need a perfect endgame build, but a few pieces of equipment make a huge difference.
- A good detector: Use a long-range detector when approaching dangerous areas, then switch to a more precise model when you are inside the anomaly field.
- A suit with artifact slots: Extra container capacity is incredibly valuable because it lets you carry more useful artifacts while managing their negative effects.
- Bolts: Never underestimate them. They are one of the simplest tools for checking anomaly behavior before you commit your character to a dangerous path.
- Radiation protection: Carry enough supplies for the entire expedition instead of assuming you will find a safe place halfway through.
- Durable armor: Artifact profits disappear quickly when every run ends with a massive technician bill.
One personal rule I always follow is to avoid unnecessarily exposing my best weapons to environmental hazards. There is no reason to walk around with your most expensive rifle out while your character is navigating an anomaly field.
How to Fix WARDOGS Out of Video Memory Error on Launch (RTX 3060 Guide)
Should You Sell Every Artifact?
Absolutely not.
This is one of the easiest mistakes to make when you first discover that artifacts can sell for serious money.
Some artifacts are much more valuable as equipment than as cash.
If an artifact gives you a useful defensive bonus, stamina improvement, radiation management, or another effect that fits your build, keep it.
Sell duplicates.
Sell artifacts that do not fit your playstyle.
And definitely sell the junk you are carrying around simply because you are afraid you might need it later.
The Zone is full of things worth keeping. Your inventory does not need to be one of them.
The Best Farming Strategy Overall
If I were starting a new STALKER 2 playthrough today, I would approach artifact farming in three stages.
Early game: Stay around the Lesser Zone and build up basic equipment.
Mid game: Move into Garbage and use the dense anomaly clusters to make consistent money.
Late game: Run the Cement Factory and Zaton circuit after Emissions, focusing on the most dangerous anomaly fields once your gear can handle them.
The important part is not finding one magical location that prints money forever.
It is building a route that you can repeat efficiently.
A good artifact run should have a clear starting point, several nearby anomaly fields, manageable travel time, and a safe place to sell or store your haul. Once you stop treating every artifact as a random discovery and start planning your expeditions, the Zone becomes much easier to exploit.
And that is probably my favorite thing about artifact hunting in STALKER 2.
You never completely control the outcome.
You can prepare perfectly, bring the right detector, wear the right suit, and follow the safest route possible. Then an anomaly moves, a mutant appears, your detector starts screaming, and suddenly the entire plan falls apart.
That is the Zone.
Take the risk when the reward makes sense, know when to walk away, and never assume the artifact sitting five meters ahead is worth dying for.