How to Transfer Valheim Worlds from Xbox to Steam (2026 Complete Guide)
If you’ve spent hundreds of hours building a giant Viking settlement in Valheim, the idea of starting over just because you moved from Xbox to PC is pretty painful. I’ve always thought that losing a carefully built base is one of the worst things that can happen in a survival game. You don’t just lose a save file — you lose all those little projects you probably don’t even remember building.
The good news is that moving a Valheim world from Xbox to Steam is possible, and the process is much less intimidating once you understand how the game’s save system works.
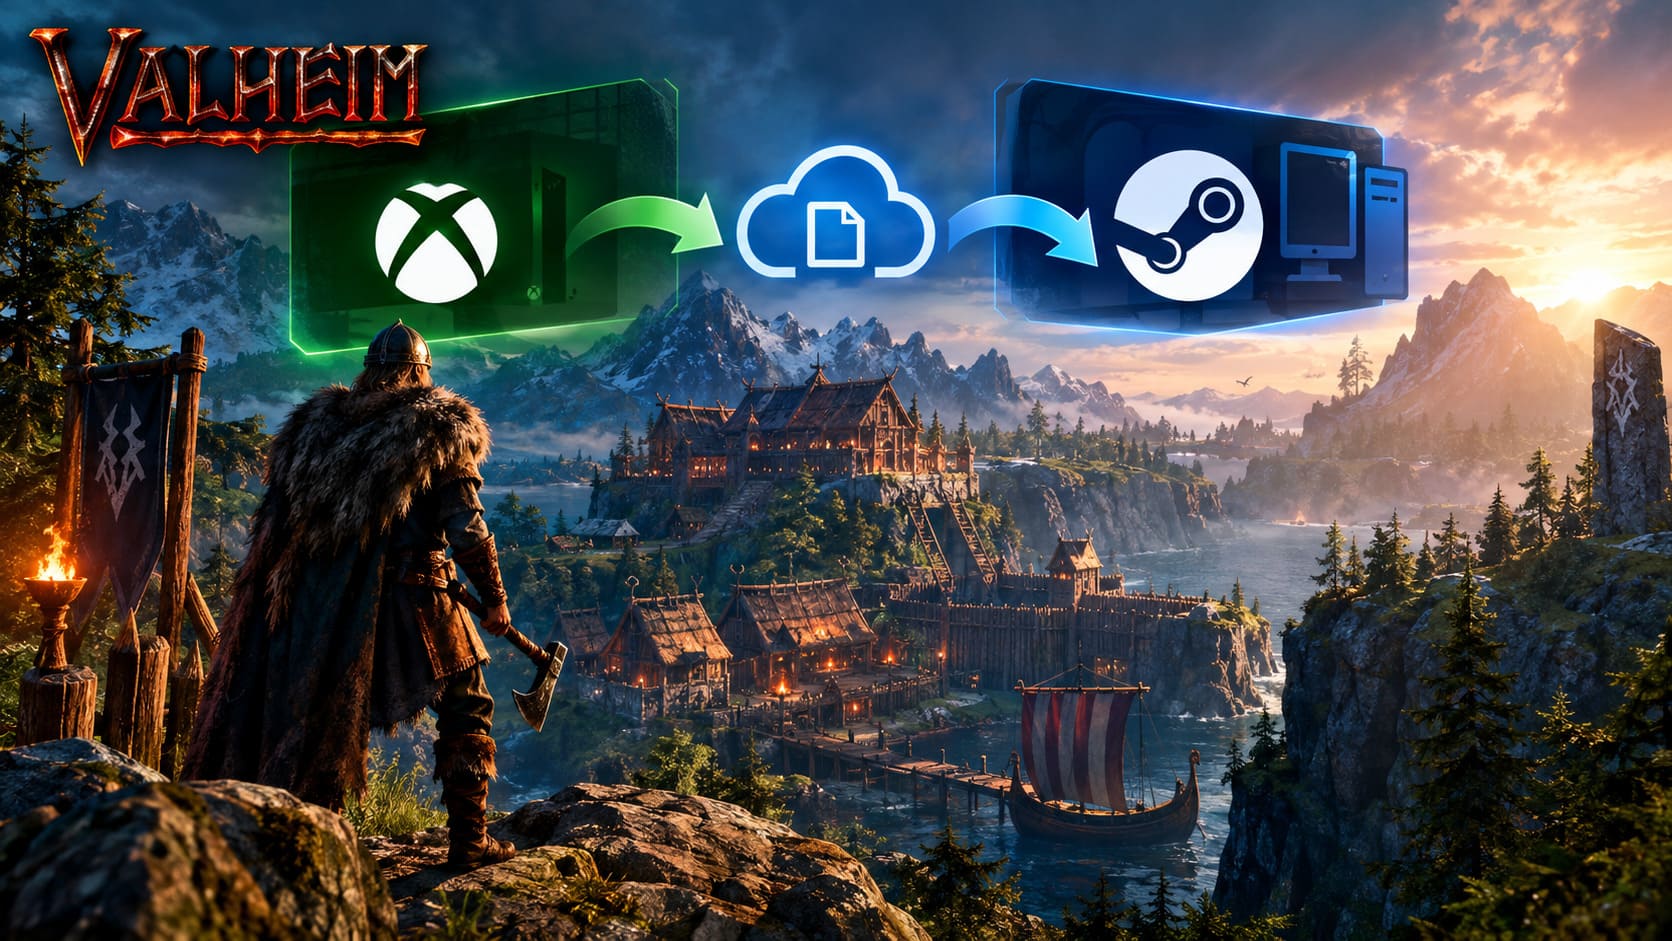
There isn’t a magical “Transfer to Steam” button, though. Microsoft and Steam use different ecosystems, so you need to use the Windows version of Valheim as a bridge. The basic idea is simple: sync your Xbox save to Microsoft’s cloud, open it through the PC Xbox version, move it to a local save, and then let the Steam version read that local data.
I’ve broken the process down into the safest order I would personally use. The most important advice is simple: make a backup before you start moving anything.
Xbox to Steam Valheim Save Transfer at a Glance
| Step | What You Do | Why It Matters |
|---|---|---|
| 1 | Sync your Xbox world | Makes sure the newest save reaches the cloud |
| 2 | Open Valheim on PC Xbox | Pulls the Xbox data onto Windows |
| 3 | Move the save to Local | Converts the cloud save into usable local data |
| 4 | Move your character too | Preserves gear, skills, and inventory |
| 5 | Launch Valheim through Steam | Steam detects the local world |
| 6 | Back up the files | Protects your progress from future sync problems |
The entire process sounds complicated when you first read about it, but in practice it is mostly a matter of moving the save from Cloud to Local.
Before You Start: What You Actually Need
You don’t need any special save editor or third-party conversion program. In fact, I would avoid random save-conversion utilities unless you have a very specific reason to use one.
For the standard method, you should have:
- A Windows 10 or Windows 11 PC
- The Xbox app installed
- The same Microsoft/Xbox account you use on your console
- Access to the PC version of Valheim through Microsoft’s ecosystem
- The Steam version of Valheim installed on the same computer
- A stable internet connection
The important part is the Microsoft account. If you accidentally sign into a different Xbox account on your PC, your world obviously isn’t going to magically appear.
Before doing anything else, check that you’re using the same account on Xbox and Windows.
Step 1: Make Sure Your Xbox World Is Synced
This is the step I would take seriously. Don’t rush into the PC version immediately after playing for several hours.
Start Valheim on your Xbox and open the world selection screen.
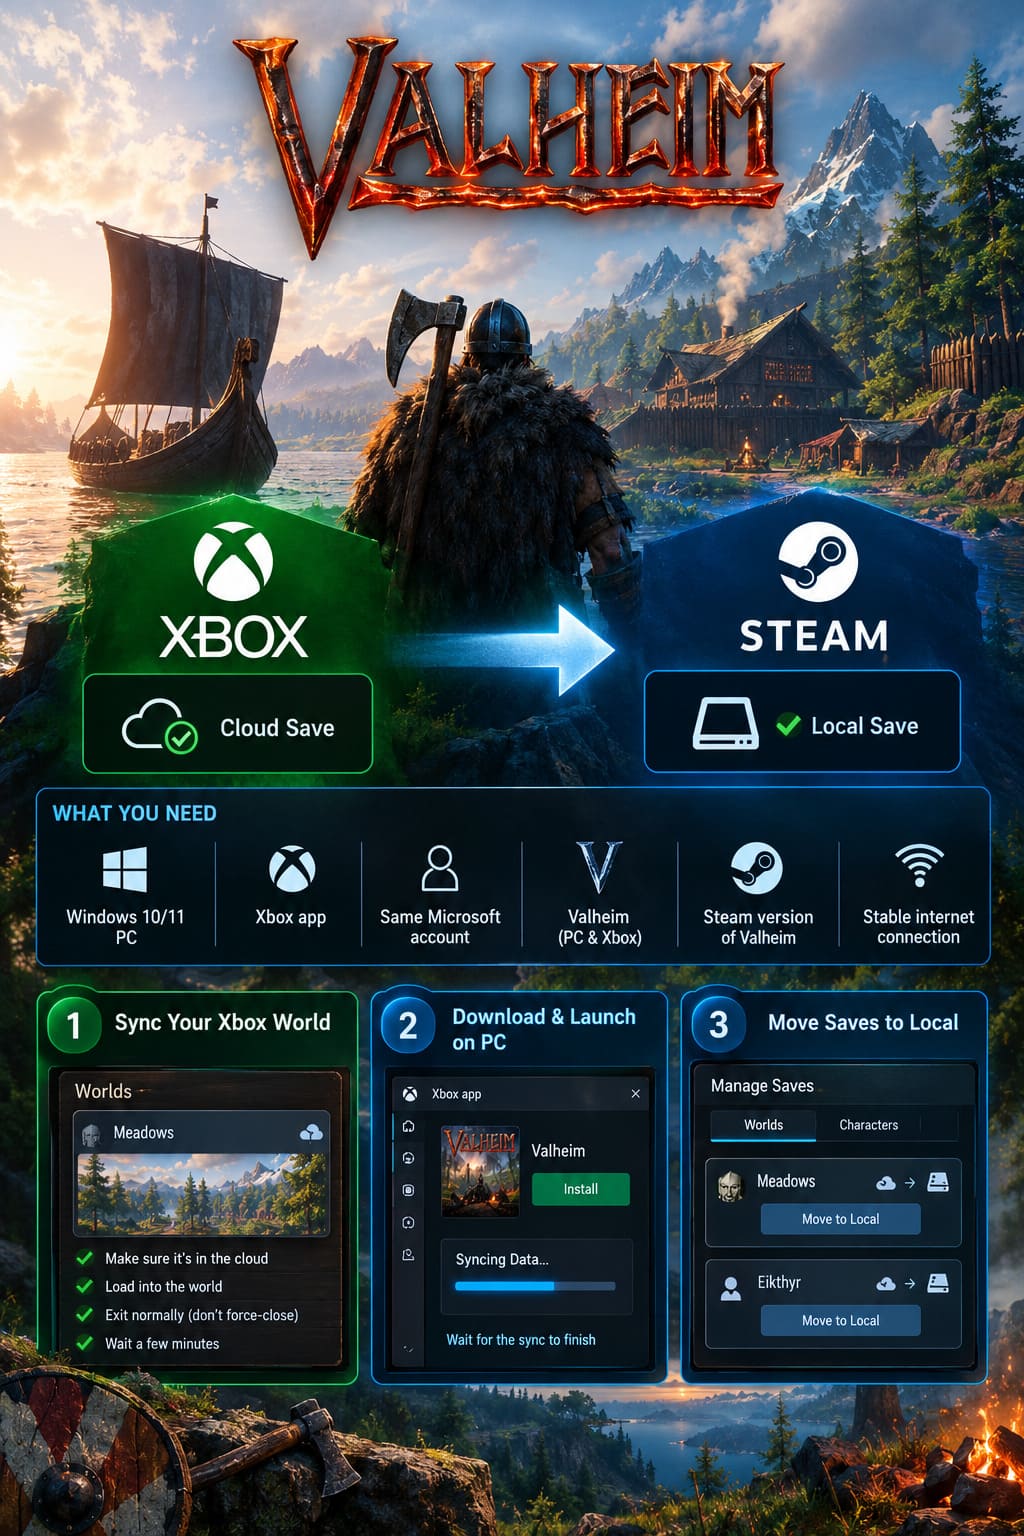
Find the world you want to transfer. If the save is stored in the cloud, you should see the appropriate cloud indicator beside it. If the world is still stored locally on the console, use the save-management options to move it to the cloud.
Once you’re certain the correct world is in the cloud, load into it.
I recommend actually entering the world rather than simply launching Valheim and immediately quitting. Walk around, open your inventory, and give the game a moment to register that you’re playing.
Then quit normally through the game’s menu.
Don’t force-close Valheim through the Xbox interface if you can avoid it. A clean exit gives the game the opportunity to finish writing its latest state before the console synchronizes the save.
Give the console a couple of minutes afterward. Personally, I’d rather wait a little longer than discover later that the PC version downloaded a save from yesterday.
Step 2: Download the Xbox PC Version of Valheim
Now move to your Windows PC.
Open the Xbox app and sign into the same Microsoft account connected to your Xbox.
Find Valheim and install the PC version available through Microsoft’s ecosystem.
Launch it once the installation is complete.
This is where the Xbox-to-PC bridge becomes useful. The Windows version can synchronize your Microsoft cloud save, giving you access to the world you were playing on your console.
You may see a “Syncing Data” message when the game starts.
Let it finish.
Seriously — don’t close the game halfway through the synchronization process. If the save is large or your connection is slow, it can take longer than you expect.
Once you’re at the Valheim main menu, choose Start Game.
But don’t immediately jump into your world.
Step 3: Use Manage Saves to Convert the Cloud Save
This is the part that makes the whole transfer possible.
Open the Manage Saves section.
Go to the Worlds tab and locate the world you just synchronized from Xbox.
You should see that the world is associated with cloud storage.
Select the world and choose Move to Local.
This is the key operation.
Instead of leaving the world inside Microsoft’s cloud save system, you’re telling Valheim to place a local copy of the save on your Windows PC.
Once the operation finishes, the world should be listed as a local save rather than a cloud save.
Don’t Forget Your Character
Your world and your character are separate pieces of data.
This is an easy detail to overlook, and I would hate to see someone successfully transfer a massive base only to discover that their favorite Viking, equipment, skills, and inventory are missing.
Go to the Characters tab in Manage Saves.
Find your main character and select Move to Local there as well.
If you only move the world, you may end up with your entire base but not the character you used to build it.
Once both saves are local, completely exit Valheim.
Step 4: Where Your Local Valheim Saves Are Stored
If you want to verify that everything worked, Windows gives you a relatively straightforward way to inspect the local Valheim data.
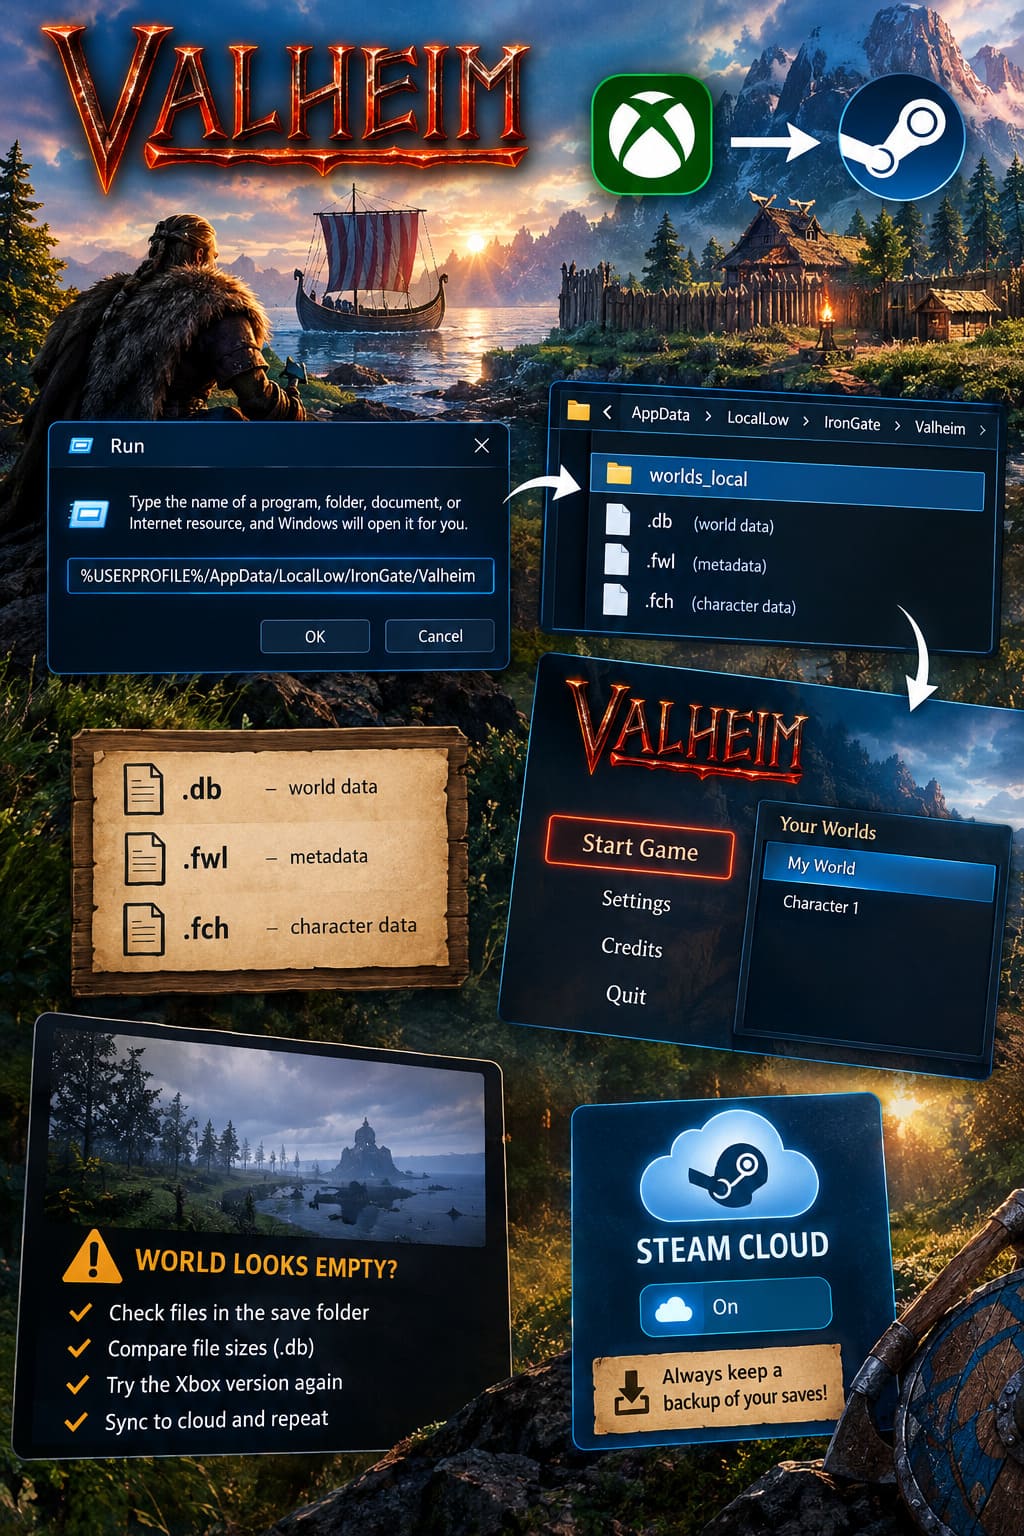
Press Windows Key + R to open the Run window.
Enter:
%USERPROFILE%/AppData/LocalLow/IronGate/Valheim
Press Enter.
This should open the Valheim directory.
Look for the local world save folder, commonly:
worlds_local
Inside, you’ll find the files associated with your world.
Depending on the version and save structure you’re dealing with, Valheim may use the familiar world files such as:
.db— the main world data.fwl— world metadata.fch— character data
The exact organization can change as Valheim’s save infrastructure evolves, so don’t panic if your folder doesn’t look exactly like an old guide or YouTube video from several years ago.
The important thing is that Valheim’s local save-management system is what matters, rather than manually trying to reconstruct a save from random folders.
Step 5: Open the World Through Steam
Now comes the satisfying part.
Close the Xbox version of Valheim completely and launch Valheim through Steam.
Open Start Game.
Check your world list.
If the local save was created correctly, your Xbox world should appear in Steam because the game is reading the same local Valheim save location.
Select your transferred character and world.
Before doing anything adventurous, I strongly recommend checking the world itself first.
Load in and look around.
Is your base there?
Are your buildings intact?
Does the terrain look correct?
Are your portals still present?
Are your map discoveries and important locations where you remember them?
If everything looks normal, congratulations — you’ve effectively moved your Xbox adventure into the Steam version without having to rebuild your entire Viking civilization.
And yes, that feels considerably better than starting from scratch.
Moving the Save to Steam Cloud
If you’re happy with the transferred world, you have another choice.
You can leave it as a local save, which is actually my preferred option when I’m testing a newly transferred world. Local saves give you direct access to the files and make manual backups extremely easy.
Alternatively, you can use Valheim’s Manage Saves menu to move the world to Steam Cloud.
The same applies to your character.
Just remember that cloud storage is not a substitute for a personal backup. If you’re dealing with a world that represents hundreds of hours of work, I would keep a separate copy anyway.
What If the World Appears Empty?
This is probably the scariest problem you can encounter.
You launch the Steam version, select your transferred world, and suddenly you’re looking at what seems to be a brand-new world.
Don’t immediately panic.
The first thing I’d do is quit without making further changes.
A mismatch between the world database and its metadata can cause serious problems. Check your local save directory and make sure the expected world files exist.
If the database file is suspiciously tiny compared with what you’d expect from a world you’ve played extensively, that’s another warning sign.
At this point, go back to the PC Xbox version rather than repeatedly launching the broken-looking save through Steam.
You can move the local save back to the cloud, allow it to synchronize again, and then repeat the process from the Xbox source.
The golden rule here is:
Never overwrite a potentially good save with a bad or empty copy.
That’s exactly why making a backup before experimenting is so important.
If Your Xbox World Looks Outdated on PC
Another common headache is seeing an older version of your world after synchronization.
Maybe you built a new house last night, flattened a huge section of land, or finally defeated a boss — but the PC version doesn’t show any of it.
That usually means the latest Xbox state wasn’t properly synchronized before you attempted the transfer.
Return to the Xbox and load the world again.
Make a small change if necessary, then exit normally through the game.
Give the console time to finish synchronization before opening the PC version again.
I know this sounds like unnecessary waiting, but it’s much better than troubleshooting an apparently missing base for an hour.
My Biggest Recommendation: Back Up Everything
This is the part I wouldn’t skip.
Once your Xbox world has been successfully moved to local PC storage, create a manual backup before you start experimenting with Steam Cloud.
Copy the relevant Valheim save files to another folder, an external drive, or another safe storage location.
Give the backup a useful name, such as:
Valheim_Xbox_Transfer_Backup_2026
If Steam Cloud later creates a conflict, or you accidentally replace the wrong version, you have something to fall back on.
For a world you’ve spent hundreds of hours building, a backup takes minutes. Rebuilding that world could take months.
Valheim Blood Magic Leveling Guide: Best AFK Farm Builds (2026)
Can You Use the Transferred World on a Dedicated Server?
Yes, this is one of the biggest advantages of getting your Xbox world onto a Windows PC.
Once you have the appropriate local save data, you can use it as the starting point for a dedicated server setup.
That can be particularly useful if your goal is to stop relying on one player’s Xbox being online whenever friends want to continue the world.
Server providers may have their own procedures for uploading Valheim saves, so follow the specific instructions for your chosen host. Usually, however, the process involves placing the correct world save data into the server’s designated save directory.
I’d still keep the original Xbox backup untouched.
Valheim Siege Weapons Repair Guide: How to Fix Catapults and Battering Rams (2026)
Final Thoughts: Is Moving From Xbox to Steam Worth It?
For me, absolutely — especially if you’re moving to PC because you want more control over your Valheim experience.
Steam opens the door to a much larger PC ecosystem, including mods, community tools, graphics tweaks, dedicated servers, and easier access to your save files. If you’ve already built a world you’re attached to, there’s really no reason to abandon it just because you’re changing platforms.
The transfer process isn’t quite as elegant as it could be. I would love to see a completely platform-agnostic “Export Save” option that lets players move their world between Xbox, Microsoft PC, and Steam with a couple of clicks.
For now, though, the Xbox PC version provides a practical bridge.
The process can be summarized pretty simply:
Xbox Cloud → Xbox PC Version → Move to Local → Steam
Just take your time, make sure you’re using the correct Microsoft account, transfer both the world and character, and most importantly, make a backup before trusting any new cloud synchronization.
If your Valheim base is the kind of place you’ve spent an unreasonable number of hours perfecting — and let’s be honest, most of us have one — five extra minutes of backup work is a very small price to pay.
Your Viking empire is worth protecting.