Wardogs i9-14900K Crash Fix: 2026 Gaming Stability Guide
Wardogs is the kind of PC game that makes you stare at your hardware and wonder whether your rig is actually ready for 2026. The visuals are brutal, the physics are constantly working, and the sheer amount of simulation happening behind the scenes can push a modern system far harder than a typical multiplayer shooter.
That is great when everything works.
It is incredibly annoying when it doesn’t.
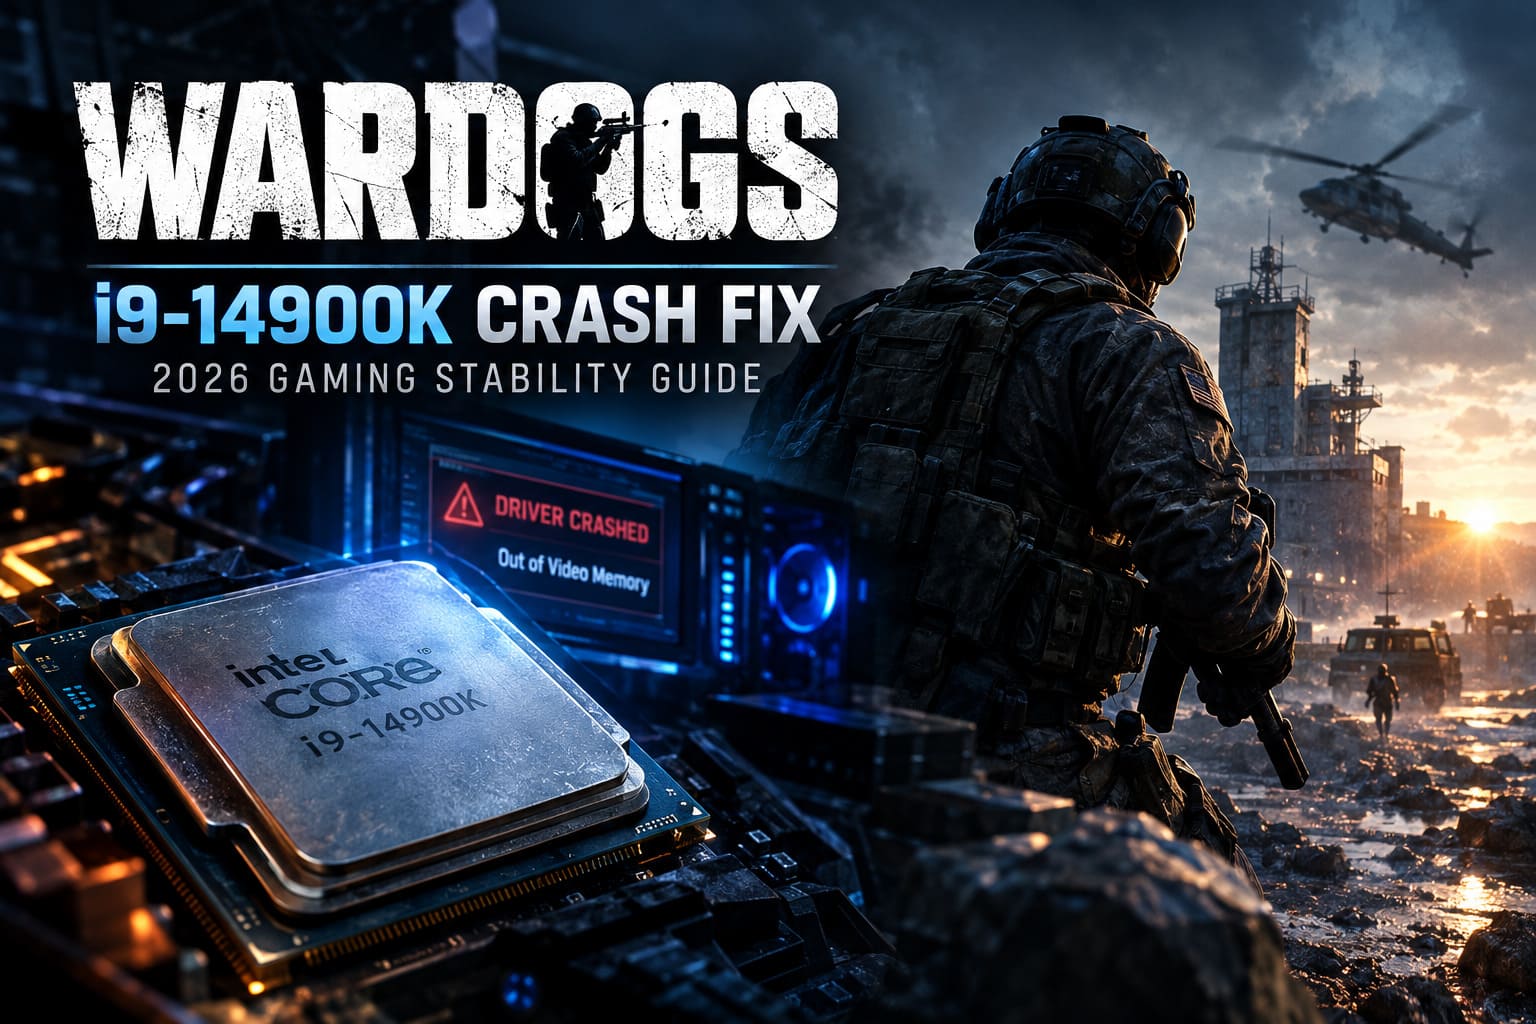
One particularly nasty problem has been reported by players running Intel Core i9-14900K systems: random crashes to desktop, graphics-driver failures, freezes during loading, and the wonderfully misleading “Out of Video Memory” message appearing even when the GPU still has plenty of VRAM available.
If you’ve been playing Wardogs for 20 minutes only to get dumped straight back to the desktop, you already know how frustrating this is. There is nothing worse than spending money on a flagship CPU and then having a game expose every weakness of the platform.
The good news is that the i9-14900K itself isn’t automatically doomed to crash in Wardogs. The real problem can sit much deeper in the system: BIOS behavior, CPU voltage, motherboard power settings, thermal limits, silicon degradation, shader compilation, and aggressive boost behavior can all combine into one giant stability headache.
I’ve put together this guide around the settings I’d actually check on a high-end gaming PC instead of blindly telling someone to reinstall Windows and hope for the best.
Why Wardogs Can Be So Unfriendly To the i9-14900K
The Core i9-14900K is still an absolute monster. With up to 6.0 GHz boost clocks, 24 cores, and 32 threads, it has more than enough horsepower for Wardogs.
But there’s a catch.
Many Z690 and Z790 motherboards shipped with BIOS configurations that were far more aggressive than Intel’s intended operating limits. Depending on the manufacturer and BIOS version, automatic motherboard settings could effectively remove sensible power restrictions, increase voltage, or use aggressive load-line calibration.
That is fantastic for benchmark screenshots.
It’s not necessarily fantastic for long-term stability.
Intel’s Raptor Lake and Raptor Lake Refresh instability problems made this especially important. Excessive voltage and sustained thermal stress can contribute to Vmin shift, where the processor gradually requires more voltage to remain stable at a given frequency.
Wardogs can be particularly good at exposing marginal CPU stability because modern game engines aren’t simply rendering pretty pictures. Shader compilation, DirectX 12 workloads, asset streaming, background simulation, physics and CPU-heavy game logic can create rapid changes in processor load.
This is why a system can pass several games without problems and then suddenly explode in Wardogs.
And when the CPU produces an incorrect calculation during a graphics-heavy workload, the resulting crash doesn’t always tell you the real story. The GPU driver may fail and Windows or the game can report an Out of Video Memory error.
Your GPU might be completely innocent.
Step 1: Update the BIOS Before Touching Anything Else
This is the boring part, but don’t skip it.
If you’re running an i9-14900K on an older BIOS, I wouldn’t waste time experimenting with voltage offsets or CPU multipliers until the motherboard firmware is current.
Intel released several microcode updates aimed at addressing the voltage and boost behavior associated with affected 13th- and 14th-generation desktop processors.
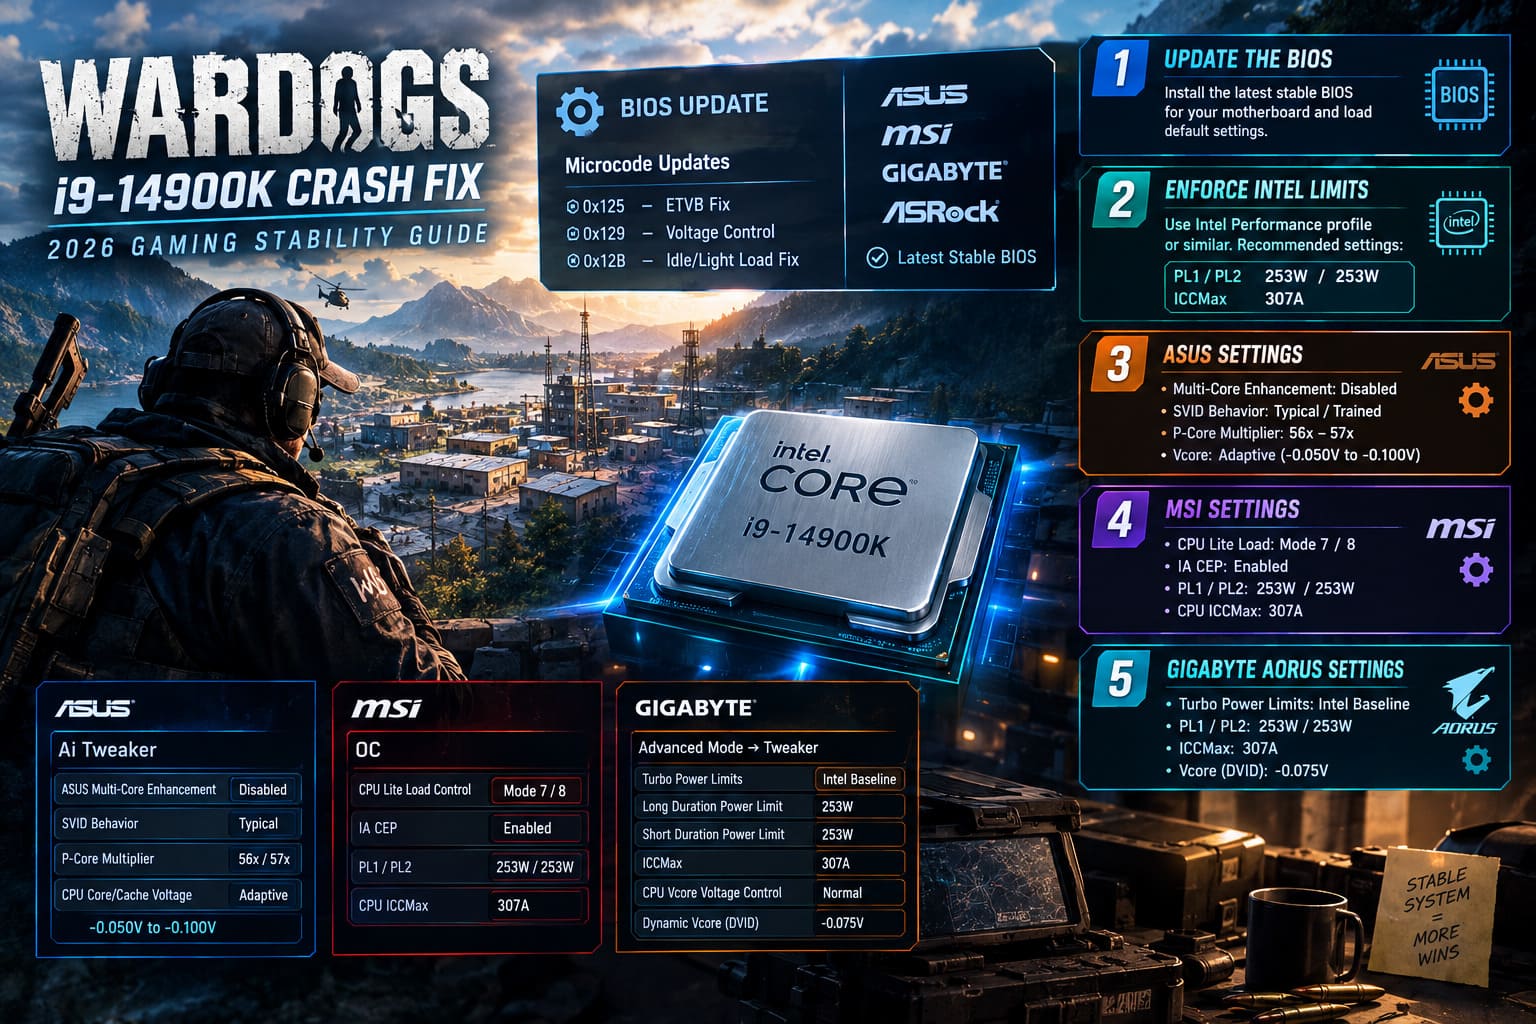
Important milestones included:
| Microcode | Main Purpose |
|---|---|
| 0x125 | Corrected issues involving Enhanced Thermal Velocity Boost behavior |
| 0x129 | Added tighter control over maximum CPU voltage requests |
| 0x12B | Further addressed elevated voltage requests during idle and light workloads |
Your exact BIOS implementation depends on the motherboard manufacturer, so don’t assume that the BIOS number itself tells you everything.
Check the official support page for your ASUS, MSI, Gigabyte, or ASRock motherboard and install the newest stable BIOS available for your exact model.
After flashing the BIOS, load the appropriate default settings before starting your stability tuning.
Do not start changing five different voltage and power options at once. That’s how you end up with a system where you don’t know which setting fixed the problem — or which setting created a new one.
Step 2: Stop Your Motherboard From Ignoring Intel’s Limits
This is probably the most important part of the entire guide.
Some enthusiast motherboards love to treat Intel’s recommended limits as suggestions rather than actual limits. For a 14900K that is already showing instability, that’s exactly the behavior you don’t need.
Look for a BIOS option such as:
- Intel Default Settings
- Intel Baseline
- Enforce All Limits
- Factory Baseline
- Intel Performance Profile
The naming changes between manufacturers.
For a stability-focused gaming configuration, the Intel Performance-style profile is generally the sensible starting point.
The configuration described in this guide uses:
PL1: 253W
PL2: 253W
ICCMax: 307A
Some motherboard BIOS versions may expose these values differently, and certain Intel profiles can offer an Extreme configuration with a higher current limit around 400A.
For a gaming system where stability matters more than squeezing every last benchmark point from the processor, I would start with the more conservative 253W / 253W / 307A configuration.
The difference in real-world gaming performance is often far smaller than people expect.
The difference in temperatures and stability can be much more noticeable.
Step 3: ASUS i9-14900K Stability Settings
If you’re running an ASUS ROG or TUF Gaming motherboard, head into the Ai Tweaker section.
Start with:
ASUS Multi-Core Enhancement: Disabled — Enforce All Limits
This is a big one. You don’t want the motherboard quietly removing the power restrictions you’ve just spent time establishing.
For SVID Behavior, use a more conservative option such as Typical Scenario or Trained, depending on your BIOS.
If Wardogs continues crashing, reducing the maximum P-core frequency can be an extremely effective troubleshooting step.
Instead of allowing the chip to chase 6.0 GHz, try:
P-Core Multiplier: 56x or 57x
Yes, you’re technically leaving some advertised clock speed on the table.
But here’s the funny thing about PC gaming: a perfectly stable 5.6–5.7 GHz processor is considerably more useful than a theoretically faster CPU that throws you back to the desktop every half hour.
For voltage, use an Adaptive configuration and consider a negative offset in the region of:
-0.050V to -0.100V
Don’t blindly copy the maximum offset.
Every chip is different. If the system becomes less stable after the undervolt, back it off.
Step 4: MSI Motherboard Configuration
MSI boards have their own set of options, and CPU Lite Load deserves special attention.
Open the OC section and switch to Advanced mode.
Find:
CPU Lite Load Control
If the motherboard is applying an unnecessarily aggressive voltage profile, try reducing it to something like Mode 7 or Mode 8 as a starting point.
Then test.
If the system is stable, you can experiment with a lower setting. If Wardogs starts crashing or synthetic tests report errors, move back toward a more conservative configuration.
Also verify:
IA CEP: Enabled
And set:
PL1: 253W
PL2: 253W
CPU ICCMax: 307A
The goal isn’t to create the world’s coolest benchmark result. The goal is to stop the CPU from bouncing between extreme voltage, current and temperature behavior every time Wardogs decides to compile shaders or load a huge section of the map.
Step 5: Gigabyte AORUS BIOS Settings
Gigabyte AORUS owners should head into Advanced Mode → Tweaker.
Look for the Turbo Power Limits configuration.
Instead of leaving it on Auto, select the Intel Baseline-style configuration if your BIOS provides it.
If you’re entering the limits manually, start with:
Long Duration Power Limit: 253W
Short Duration Power Limit: 253W
ICCMax: 307A
For voltage tuning, look for CPU Vcore Voltage Control and use Normal mode.
A reasonable starting point for Dynamic Vcore (DVID) is:
-0.075V
Again, treat that as a starting point, not a magic number.
If the machine crashes under CPU stress, reduce the undervolt. If temperatures remain excessive despite stability, you can experiment carefully with further optimization.
Step 6: Don’t Launch Wardogs Yet — Test the CPU First
This is where I see a lot of PC gamers make the same mistake.
They change BIOS settings, immediately launch the game, play for 40 minutes, and declare victory.
That’s not really testing.
You need to determine whether the CPU is actually stable before blaming Wardogs.
OCCT AVX2 Testing
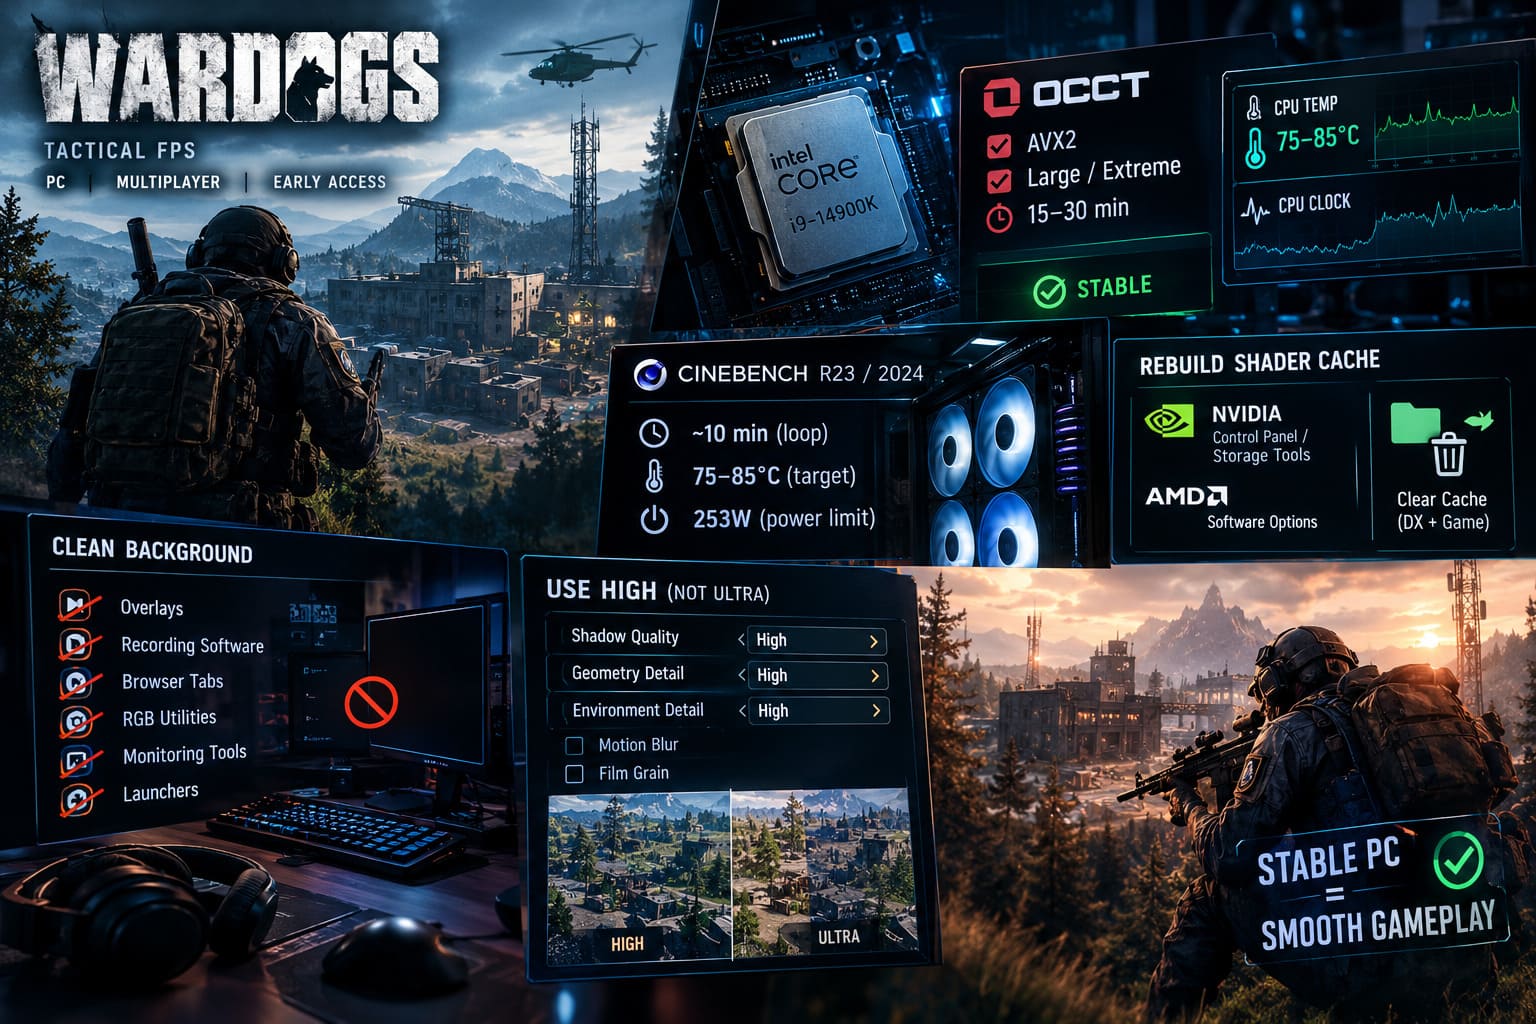
Use OCCT with a demanding CPU workload and a large/extreme data configuration.
Run it for around 15–30 minutes as an initial stability check.
If OCCT reports hardware errors quickly, don’t ignore them.
An error can indicate that your voltage is too low for the selected frequency, or that the processor simply can’t maintain the chosen clock under that workload.
At that point:
- Increase voltage slightly.
- Reduce the P-core multiplier.
- Recheck temperatures.
- Run the test again.
A stable gaming PC should not be throwing hardware errors just because you want another 100 MHz.
Cinebench R23 or 2024
A continuous Cinebench loop is another useful sanity check.
Run approximately 10 minutes while watching CPU package temperature and clock behavior with monitoring software such as HWiNFO64.
With a strong 360mm AIO and a sensible 253W power limit, a heavily loaded 14900K can still get hot, but the system should be substantially easier to control than an unrestricted configuration.
As a rough target, seeing sustained temperatures around 75–85°C under this type of configuration is much more comfortable than constantly smashing into the 100°C thermal limit.
Step 7: Rebuild Wardogs’ Shader Cache
Once the CPU is stable, move on to the game itself.
This is particularly important if the crashes started after changing CPU clocks, BIOS settings or graphics drivers.
Shader caches can become invalid or corrupted after hardware and driver changes. Rather than allowing an old cache to complicate troubleshooting, perform a clean rebuild.
Clear the DirectX Shader Cache through your graphics driver environment.
For NVIDIA users, this can be handled through the NVIDIA Control Panel/Windows storage tools depending on the installed driver configuration. AMD users should use the corresponding AMD software options.
If Wardogs maintains a local shader/cache directory in its AppData installation, clearing that cache can also force a fresh compilation.
The first launch afterward may take longer.
That’s normal.
Let the game finish its shader work instead of immediately assuming the longer loading time means something is broken.
Step 8: Reduce Background CPU Competition
Wardogs is already asking your processor to do a lot.
You don’t need Chrome with 47 tabs, OBS, Discord overlays, RGB control software, motherboard utilities, hardware monitoring tools, browser video playback and three different launchers fighting for CPU time in the background.
I’m not saying you need to turn your PC into a laboratory machine every time you play.
But while troubleshooting crashes, keep things clean.
Temporarily disable unnecessary:
- Game overlays
- Recording software
- Browser workloads
- RGB utilities
- Hardware monitoring overlays
- Third-party tuning applications
Once Wardogs becomes stable, re-enable them one at a time.
That gives you an actual answer instead of the classic PC troubleshooting strategy of changing everything and hoping the problem disappears.
Step 9: Use High Instead of Ultra
Here’s another recommendation that won’t make your PC-gaming pride happy, but it works.
If Wardogs continues crashing after fixing the CPU configuration, don’t automatically run everything at Ultra.
Try High for CPU-heavy settings such as:
Shadow Quality
Geometry Detail
Environment Detail
Ultra settings can dramatically increase draw calls, object density and simulation overhead. The visual difference between High and Ultra can sometimes be surprisingly small while the performance hit is much larger.
For troubleshooting, I would rather have a stable 100 FPS on High than an unstable 105 FPS on Ultra.
You can also disable unnecessary post-processing such as Motion Blur and Film Grain if you don’t like them.
These settings aren’t the primary solution for CPU instability, but reducing the overall rendering and simulation burden can help expose whether the crash is hardware-related or simply an engine-specific problem.
The Best Wardogs i9-14900K Stability Configuration
If I were troubleshooting a problematic 14900K gaming rig specifically for Wardogs, this is the baseline I’d work toward:
| Setting | Stability Target |
|---|---|
| BIOS | Latest stable motherboard firmware |
| Microcode | 0x12B or newer where applicable |
| PL1 | 253W |
| PL2 | 253W |
| ICCMax | 307A |
| P-Core Frequency | 5.6–5.7 GHz |
| Voltage Offset | Around -0.05V to -0.10V |
| MCE / Enhancement | Disabled / Intel Limits |
| IA CEP | Enabled |
| Shader Cache | Clean rebuild |
| Wardogs Preset | High starting point |
These aren’t universal magic numbers.
They’re a stability-first baseline.
Your individual CPU, motherboard, cooling solution and silicon quality still matter.
WARDOGS Steam Deck Performance Settings: How to Play and Maximize FPS (2026 Guide)
Wardogs i9-14900K Crash Fix Checklist
Before blaming the game, run through this list:
- Update the motherboard BIOS.
- Confirm the latest available Intel microcode is installed.
- Use Intel-oriented power limits instead of unrestricted motherboard defaults.
- Set PL1 and PL2 to 253W.
- Use 307A ICCMax as the conservative baseline.
- Disable motherboard auto-overclocking and Multi-Core Enhancement.
- Consider limiting P-cores to 5.6–5.7 GHz while troubleshooting.
- Use a moderate adaptive negative voltage offset only after establishing a stable baseline.
- Test with OCCT before returning to Wardogs.
- Run a Cinebench loop while watching temperatures.
- Clear and rebuild the shader cache.
- Disable unnecessary overlays and background applications.
- Start Wardogs with High rather than Ultra CPU-heavy settings.
WARDOGS Game 2026: Guide to Overpowered Mortars, Sniper Meta, and FOB Camping Strategies
Final Verdict: Don’t Chase 6.0 GHz While Your Game Is Crashing
The i9-14900K is still an absurdly capable gaming processor. Wardogs shouldn’t be able to turn it into a glorified paperweight just because the game decides to throw a nasty DirectX 12 workload at it.
But the combination of Raptor Lake Refresh voltage behavior, motherboard auto-tuning, aggressive boost clocks and an extremely demanding modern game engine can create exactly the kind of borderline instability that is difficult to diagnose.
The biggest mistake is assuming that an “Out of Video Memory” error automatically means your graphics card is running out of VRAM. If Wardogs crashes despite plenty of available video memory, the CPU and platform stability deserve investigation.
Start with the BIOS.
Get Intel’s power behavior under control.
Run the processor at a slightly more conservative clock if necessary.
Test the system properly.
Then clean the shader cache and return to the game.
Personally, I’d take a stable 5.6–5.7 GHz i9-14900K over a 6.0 GHz benchmark monster that randomly crashes during a Wardogs match every single time. Losing a tiny slice of theoretical performance is nothing compared with losing an entire match, a squad, or 40 minutes of progress because your desktop suddenly decided it had had enough.
For a demanding 2026 PC game, stability is performance. Once the system is genuinely stable, you can start pushing the settings back toward Ultra and experimenting with clocks. Until then, keep the ego overclock turned down and make Wardogs boring again — in the best possible way.