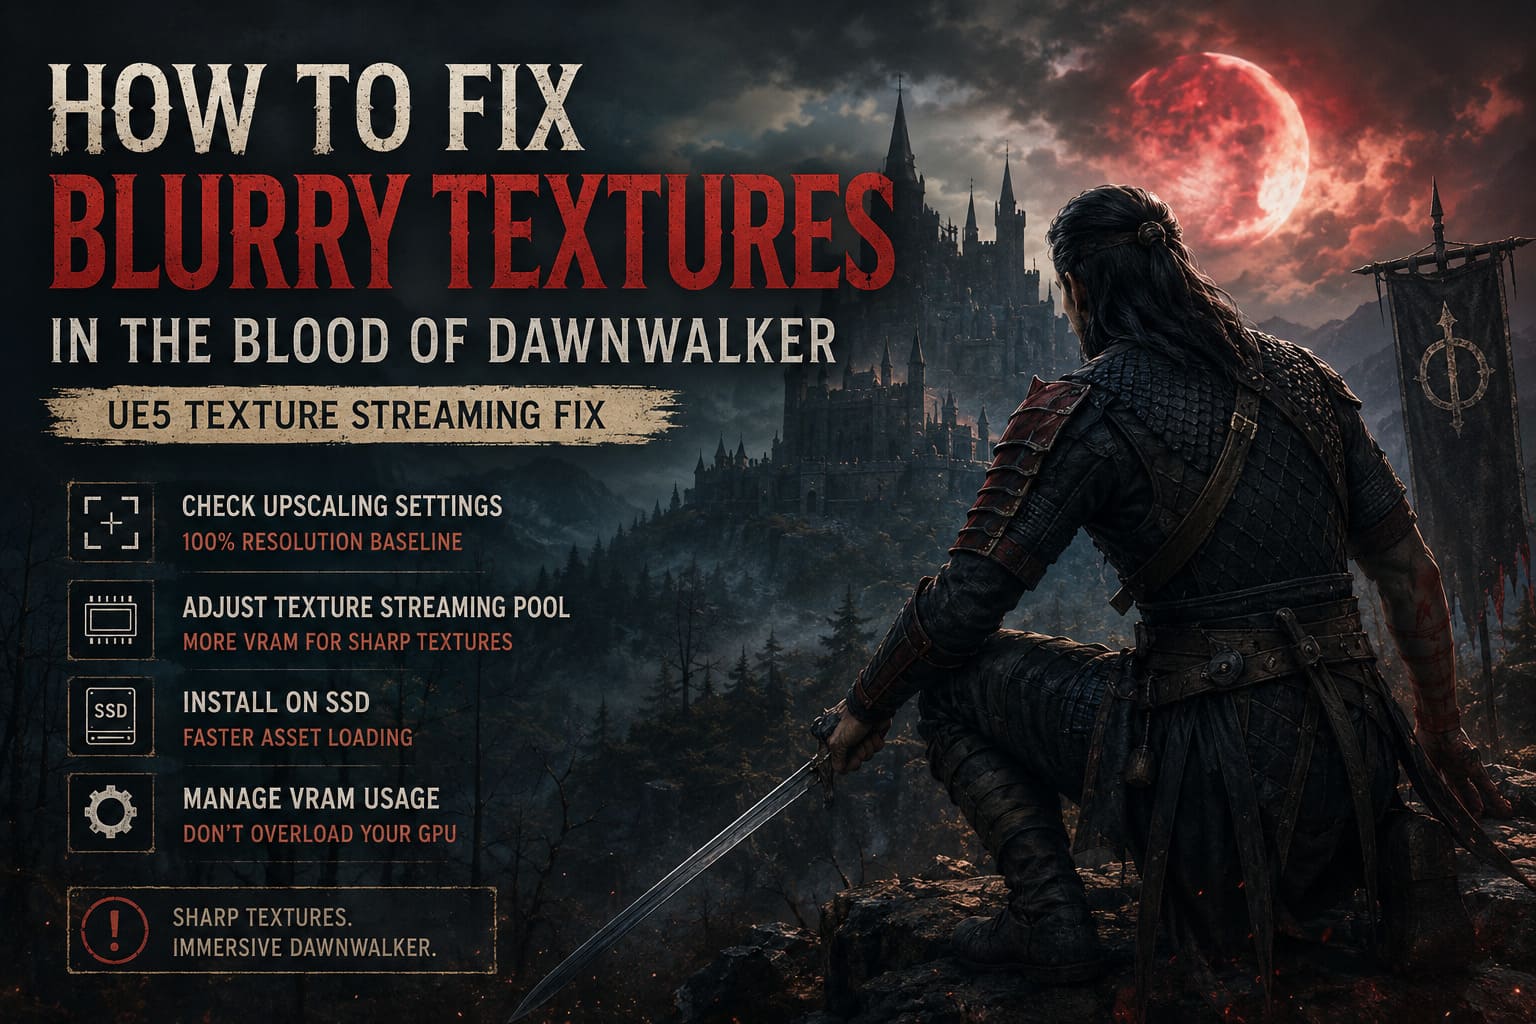
How to Fix Blurry Textures in The Blood of Dawnwalker (UE5 Texture Streaming Fix)
There are few things that can kill the atmosphere of a dark fantasy RPG faster than watching a supposedly ultra-detailed stone wall turn into a blurry mess two meters in front of your character.
The Blood of Dawnwalker is built around atmosphere. Its grim medieval environments, dense forests, ancient castles, weathered armor, atmospheric lighting, and detailed surfaces are a huge part of the experience. When those textures refuse to load properly, the entire game can suddenly look like it is running on hardware from another generation.
If you are dealing with blurry textures, low-resolution surfaces, texture pop-in, muddy character models, or assets that take forever to sharpen, the problem may not be your GPU being too weak. Unreal Engine 5 titles can be extremely aggressive with texture streaming and VRAM management, and Dawnwalker is no exception when the engine struggles to keep enough high-resolution assets resident in memory.
I’ve spent enough time messing around with PC graphics settings to know that blindly pushing every slider to Ultra is usually the worst way to troubleshoot this kind of problem. Sometimes the answer is actually to give the engine less work so it can properly stream the assets that matter.
This guide walks through the most useful fixes, from simple upscaling adjustments to VRAM management, configuration changes, shader-cache cleanup, and storage checks.
Why The Blood of Dawnwalker Textures Can Look Blurry
Before changing anything, it helps to understand what is actually happening.
Unreal Engine 5 uses texture streaming to decide which versions of textures should be loaded into memory. A wall, character, weapon, tree, or piece of armor can have multiple texture resolutions, commonly referred to as mip levels.
When you are far away from an object, there is no reason for the game to keep its highest-resolution texture active. As you move closer, the engine is supposed to stream in the sharper version.
That’s the theory.
When VRAM becomes heavily occupied, asset streaming gets interrupted, or the engine doesn’t correctly estimate available resources, you can end up with the low-resolution version remaining on screen for far too long. In particularly bad cases, it can appear as though the game has permanently forgotten to load the detailed texture.
The symptoms are easy to recognize:
- Castle walls remain blurry even when standing close to them.
- Character armor looks soft instead of detailed.
- Ground textures appear muddy.
- Texture quality changes noticeably while walking around.
- Objects suddenly become sharp several seconds after appearing.
- You experience aggressive asset pop-in.
- Increasing the Texture Quality setting doesn’t seem to make much difference.
And here’s the important part: this isn’t always solved by simply selecting Ultra textures.
If your GPU has 8GB of VRAM and the game is already consuming most of it, forcing every texture-related option to maximum can actually make the streaming situation worse.
First: Check Your Upscaling Settings
Before touching configuration files, start with the easiest test.
Go into the game’s graphics settings and temporarily disable your upscaler. Set the game to its native rendering resolution with 100% resolution scaling and compare the image.
This gives you a clean baseline.
If the textures suddenly look considerably sharper, your underlying texture streaming may not be the main problem. Your reconstruction method may simply be rendering the game at too low an internal resolution.
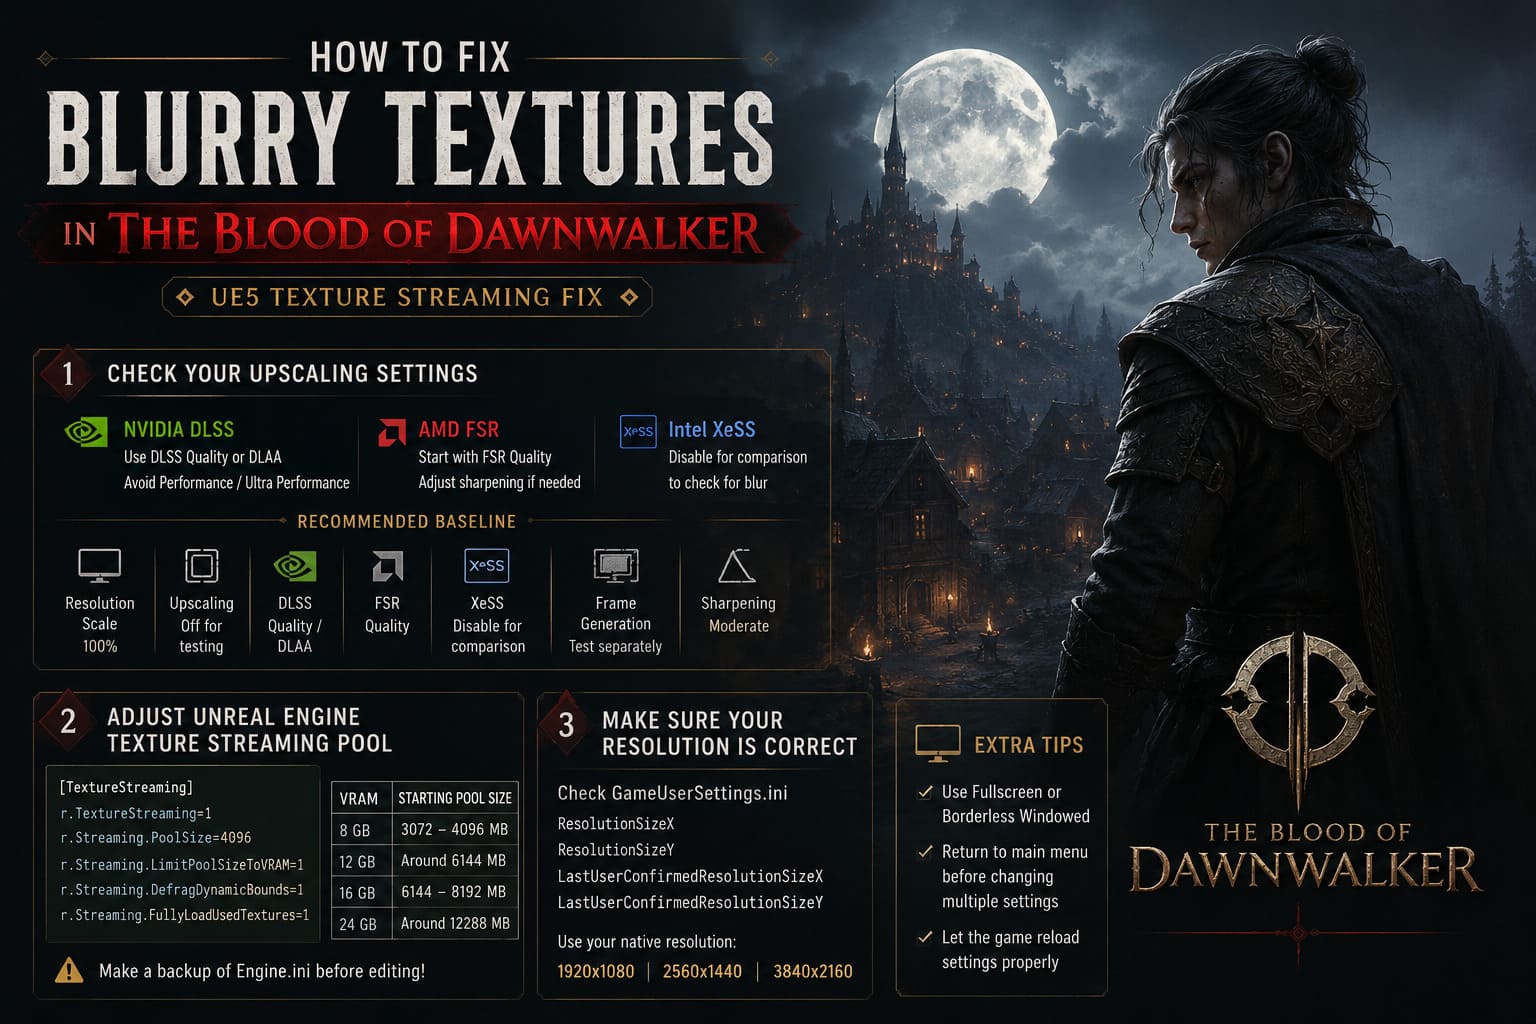
NVIDIA DLSS
For GeForce RTX owners, DLSS Quality is generally the first mode I would test.
At higher resolutions, DLSS can provide a very good combination of performance and image quality. If your GPU has enough headroom, you can also test DLAA for a native-resolution approach focused on image quality rather than performance scaling.
I would avoid jumping straight to Performance or Ultra Performance modes unless you genuinely need them. Those modes dramatically reduce the internal rendering resolution, and fine details can become noticeably softer.
That distinction matters.
A low-resolution reconstructed image can look like a texture problem even when the original texture itself is perfectly fine.
AMD FSR
AMD users should start with FSR Quality rather than aggressively lower presets.
FSR can produce a sharp image, but depending on the game’s implementation and sharpening settings, fine vegetation, roof edges, branches, and other tiny details can develop an overly processed appearance.
If the image looks crunchy, noisy, or strangely sharpened, reduce the sharpening rather than immediately blaming the textures.
Intel XeSS
If you are using XeSS and the entire image feels slightly smeared, run the same comparison test with XeSS disabled.
The goal here isn’t to claim that one upscaler is universally superior. The point is to establish whether the blur exists in the native image or is being introduced during reconstruction.
Recommended Baseline
| Setting | Baseline Recommendation |
|---|---|
| Resolution Scale | 100% |
| Upscaling | Off for testing |
| DLSS | Quality / DLAA |
| FSR | Quality |
| XeSS | Disable for comparison |
| Frame Generation | Test separately |
| Sharpening | Moderate |
Once you’ve found a sharp baseline, you can start adding performance features back one at a time.
Fix #2: Check the Unreal Engine Texture Streaming Pool
This is where things get more technical.
Unreal Engine has configuration variables that control texture streaming behavior. Depending on the specific build and configuration of the game, some variables may be ignored, overridden, or behave differently than expected, so make a backup of your configuration files before experimenting.
First, completely close The Blood of Dawnwalker.
Press Windows + R, enter:
%LOCALAPPDATA%and press Enter.
Look for the folder associated with the game and navigate toward its saved configuration directory. Depending on the build, the exact folder structure can vary, but you are generally looking for something resembling:
Saved\Config\WindowsNoEditoror a Windows-specific configuration folder.
Find:
Engine.iniMake a backup copy before editing it.
Then, if the configuration is exposed by the game, texture-streaming variables can be tested under an appropriate Unreal Engine configuration section.
A commonly used configuration set is:
[TextureStreaming]
r.TextureStreaming=1
r.Streaming.PoolSize=4096
r.Streaming.LimitPoolSizeToVRAM=1
r.Streaming.DefragDynamicBounds=1
r.Streaming.FullyLoadUsedTextures=1
Don’t blindly assume that 4096 is the correct number for every GPU.
The value represents a streaming-pool budget in megabytes when the variable is honored. Giving the engine an artificially huge pool doesn’t magically create VRAM.
| GPU VRAM | Reasonable Starting Point |
|---|---|
| 8GB | 3072–4096 MB |
| 12GB | Around 6144 MB |
| 16GB | Around 6144–8192 MB |
| 24GB | Around 12288 MB |
These are starting points rather than universal requirements.
If you have an 8GB graphics card, don’t expect a 12GB-style texture budget to suddenly work miracles. Your physical VRAM remains the hard limit.
Also, don’t immediately make Engine.ini read-only. That trick is frequently recommended in PC gaming communities, but it can cause headaches when the game needs to update its configuration or when troubleshooting later becomes more difficult.
If you test an Engine.ini modification, keep a clean backup so you can quickly revert it.
Fix #3: Make Sure Your Resolution Is Actually Correct
This sounds ridiculously basic, but it is worth checking.
Open:
GameUserSettings.iniin the same configuration directory.
Look for resolution entries such as:
ResolutionSizeX
ResolutionSizeY
LastUserConfirmedResolutionSizeX
LastUserConfirmedResolutionSizeY
Make sure they correspond to the resolution you actually want to use.
For example:
1920 × 1080
or
2560 × 1440
or
3840 × 2160
depending on your monitor.
After saving the configuration, launch the game and verify the resolution and display mode from the graphics menu.
I personally prefer Fullscreen or Borderless Windowed depending on the game and how well its implementation behaves. What matters here is making sure Windows, the game, and your GPU are not fighting over an unexpected resolution or scaling mode.
One particularly useful troubleshooting trick is to return to the main menu before making major graphics changes.
Don’t sit in the middle of a busy medieval town, change five graphics settings simultaneously, and then wonder why the image looks broken for the next thirty seconds.
Let the game reload its rendering configuration properly.
Fix #4: Don’t Overload Your VRAM
This is probably the most overlooked solution.
A graphics card with limited VRAM cannot be bullied into behaving like a higher-capacity card by changing an .ini file.
If your GPU is constantly sitting at its VRAM ceiling, the game has to make compromises.
Texture quality should match your actual hardware.
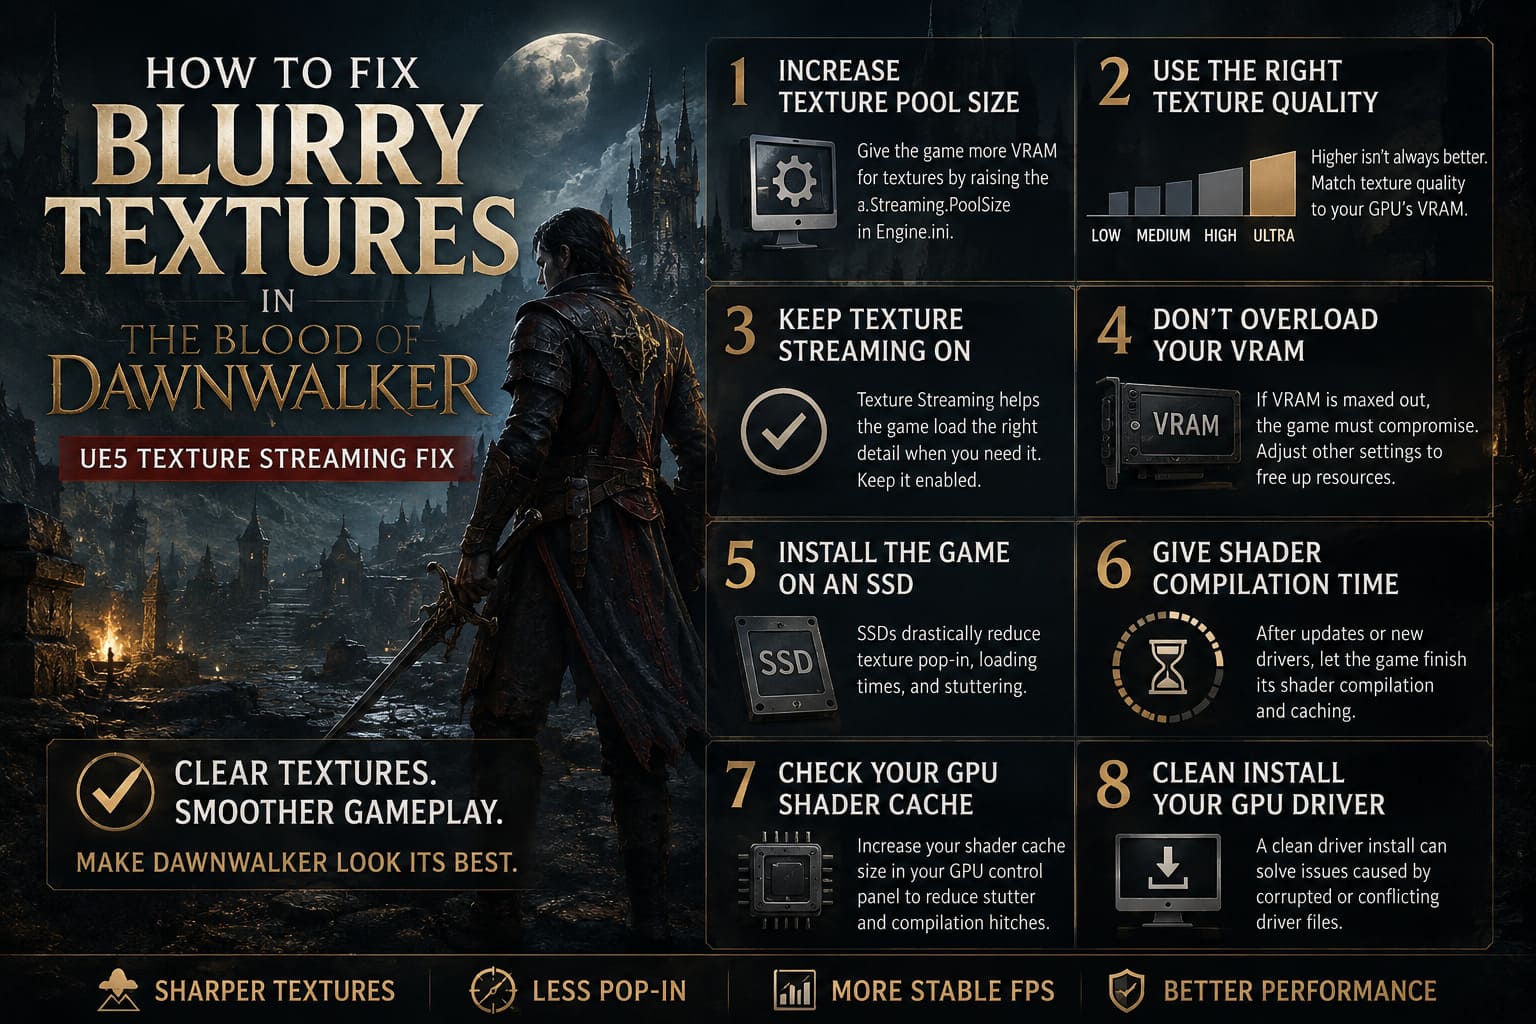
As a general starting point:
- 16GB+ VRAM: Ultra textures become much more reasonable.
- 8–12GB VRAM: High textures are often the safer choice.
- Below 8GB VRAM: Medium or Low may provide a more consistent experience.
The exact result depends on resolution, other graphics settings, the game’s current optimization, and what else is consuming VRAM.
If Ultra textures cause blurry assets, pop-in, or severe hitching, try High textures instead.
That may sound backwards, but it can produce a cleaner real-world image because the engine isn’t constantly fighting for memory.
Settings Worth Lowering First
If your VRAM usage is excessive, I would experiment with these before sacrificing texture quality completely:
Shadow Quality: Move from Ultra to High or Medium.
Volumetrics / Detail Quality: Lower these if the game is struggling with dense atmospheric effects.
Post Processing: Reduce it by one level if the image appears excessively soft or your GPU is under heavy load.
The objective isn’t to make Dawnwalker look ugly.
It’s to free enough resources for the textures you actually care about.
Fix #5: Install the Game on an SSD
This one should not be ignored.
Modern Unreal Engine 5 games can stream enormous quantities of assets while you move through the world. A mechanical HDD can become a serious bottleneck when the game constantly requests new data.
If The Blood of Dawnwalker is installed on an old HDD, moving it to an SSD should be one of your first priorities.
An NVMe SSD is even better for systems that support it, although the improvement you actually see depends on the game’s asset streaming pipeline and the rest of your hardware.
A slow drive can contribute to:
- Delayed texture loading
- Asset pop-in
- Longer loading times
- Hitching during traversal
- Textures taking longer to reach their high-resolution state
Storage speed isn’t a magical cure for every blurry-texture issue, but if you’re running a modern UE5 game from an aging hard drive, you’re making life unnecessarily difficult for the streaming system.
Fix #6: Give Shader Compilation Time
After installing a new GPU driver or receiving a major game update, don’t immediately load into your save and start sprinting through the world.
Let the game’s shader preparation process finish.
Shader compilation and texture streaming are not exactly the same thing, but a freshly updated game can behave poorly while caches are being rebuilt.
If you’ve just updated:
- The game
- Windows
- Your GPU driver
- Or related graphics software
give the game a clean launch and allow its initial preparation process to complete.
This is one of those boring fixes that doesn’t feel impressive, but I’ve seen plenty of PC games behave dramatically better after caches have been rebuilt.
Fix #7: Check Your GPU Shader Cache
You can also check your graphics driver’s shader-cache configuration.
For NVIDIA users, open NVIDIA Control Panel → Manage 3D Settings and locate Shader Cache Size.
If available, you can test a larger cache allocation rather than leaving it extremely restricted.
AMD’s driver software also provides shader-cache-related functionality, although the exact controls and names can vary between driver versions.
Don’t expect a bigger shader cache to directly increase texture resolution. It doesn’t work that way.
The benefit is that properly cached shaders can reduce repeated compilation and some forms of stutter or rendering instability.
Fix #8: Clean Install Your Graphics Driver
If the blurry textures started immediately after a graphics driver update, the driver itself deserves suspicion.
Start with the latest stable driver available for your GPU.
If a normal update doesn’t help and the problem appeared directly after a driver change, consider performing a clean graphics-driver installation.
For advanced users, Display Driver Uninstaller (DDU) can be used to completely remove the existing driver before reinstalling a fresh version.
I wouldn’t use DDU every time a game has a graphical glitch. That’s overkill.
But when a game suddenly starts behaving strangely immediately after a driver update, a clean driver reinstall is a legitimate troubleshooting step.
The Settings I Would Actually Use
If I were setting up The Blood of Dawnwalker on a modern gaming PC and my priority was sharp textures without ridiculous VRAM usage, this would be my starting point:
| Graphics Option | Recommended Starting Setting |
|---|---|
| Texture Quality | High |
| Upscaling | DLSS Quality / FSR Quality |
| Resolution Scale | 100% baseline |
| Shadows | High |
| Volumetrics | Medium |
| Post Processing | High |
| Ray Tracing | Off while troubleshooting |
| Installation Drive | SSD / NVMe |
| Shader Compilation | Let it finish |
| VRAM Usage | Keep below the physical limit |
Once everything looks correct, increase individual settings.
Don’t change ten things at once. That’s how PC troubleshooting turns into a guessing game.
How to Fix The Blood of Dawnwalker Low FPS and Shader Compilation Stutter on PC
A Quick Way to Identify the Real Problem
Here’s the troubleshooting order I’d personally follow:
- Disable upscaling. Run native resolution at 100%.
- Check VRAM usage. If you’re hitting the GPU memory ceiling, reduce Texture Quality or other VRAM-heavy settings.
- Verify the game is installed on an SSD.
- Restart after changing major graphics settings.
- Let shaders compile after updates.
- Test your configuration files only after the simple fixes fail.
- Roll back or clean-install your GPU driver if the problem started after a driver update.
This order matters because it starts with reversible changes and only moves into configuration tweaking when necessary.
The Blood of Dawnwalker: Can You Save Coen’s Family in 30 Days? Time Mechanic Guide
Final Verdict
Blurry textures in The Blood of Dawnwalker can make an otherwise gorgeous dark-fantasy world look surprisingly rough, but don’t immediately assume that your GPU is dying or that you need a completely new graphics card.
The first thing I’d investigate is upscaling and internal resolution. After that, check VRAM usage and Texture Quality. If the game is constantly running out of graphics memory, lowering textures from Ultra to High can actually result in a sharper and more consistent experience.
Then look at the practical stuff: SSD installation, shader compilation, driver stability, and configuration files.
The Unreal Engine texture-streaming system is powerful, but it has to operate within the limits of your hardware. An .ini tweak can sometimes help with streaming behavior, but it cannot manufacture additional VRAM.
For most players, the winning combination is surprisingly simple: native or high-quality reconstruction, sensible texture settings, enough free VRAM, an SSD, and a clean shader/driver state.
Once those pieces are working together, the difference is immediately noticeable. Castle stone regains its texture, armor stops looking like a low-resolution placeholder, foliage becomes properly defined, and the world finally looks closer to the visual showcase this RPG is trying to be.
And honestly, that’s how I want to experience Dawnwalker. Not with every slider blindly slammed to Ultra, but with a stable image where the details actually load when I walk up to them.