Best City District Layout in Endless Legend 2: The Ultimate Urban Planning Guide
Endless Legend 2 is the kind of strategy game where a seemingly harmless decision on turn 20 can come back to punish you 50 turns later. City expansion is one of those systems that looks simple at first: place another district, grab another resource, keep growing. In practice, however, where you place each district can determine whether your city becomes an economic monster or an expensive mess that constantly fights against its own Approval penalty.
After spending time with 4X games, I’ve learned that the temptation to build wherever the next juicy resource happens to be is usually a trap. Endless Legend 2 rewards players who think several expansions ahead. Saiadha’s changing geography, Tidefalls, seasonal changes, resource locations, and faction mechanics make this even more important.
The good news is that you don’t need to calculate every hex like a mathematician. A few reliable district patterns can make city planning much easier. In this guide, I’ll break down the best city district layouts in Endless Legend 2, when each one makes sense, and when you should ignore the ‘perfect’ pattern because the map is telling you to do something else.
Endless Legend 2 Hero Skills Guide: Mastering the Counselor and Council System
Why City District Placement Matters So Much
Your city isn’t simply a collection of buildings sitting around a central tile. District placement determines how efficiently your settlement can exploit the surrounding territory while also affecting its Approval and long-term development potential.
Every additional district can increase your access to valuable FIDSIE resources — Food, Industry, Dust, Science, Influence, and Expansion-related benefits — but expansion also creates pressure. If you keep throwing districts onto the map without thinking about their relationship with neighboring districts, you can end up with a city that technically owns plenty of territory but performs surprisingly badly.
This is where district leveling becomes one of the most important concepts to understand.
A district can improve from Level 1 to Level 2 when it becomes sufficiently surrounded by other districts. The important practical takeaway is simple: dense city planning is generally much more efficient than scattering districts across the map.
Once districts begin reaching higher levels, the benefits can snowball. Better yields and improved Approval can compensate for the penalties associated with expansion, allowing a well-planned city to keep growing without dragging your entire empire’s economy down.
That leads to my favorite rule for city planning:
Don’t ask where you can place your next district. Ask where you will want your next five districts.
That small change in mindset makes a huge difference.

The Compact Triangle: My Favorite Early-Game Layout
If I had to recommend one layout to a player starting their first serious campaign, I’d choose the Compact Triangle.
It’s not necessarily the most spectacular design, but it’s reliable, efficient, and forgiving. Those qualities are extremely valuable during the early game, when you don’t yet know how aggressively your neighbors will expand or which parts of the map will become strategically important.
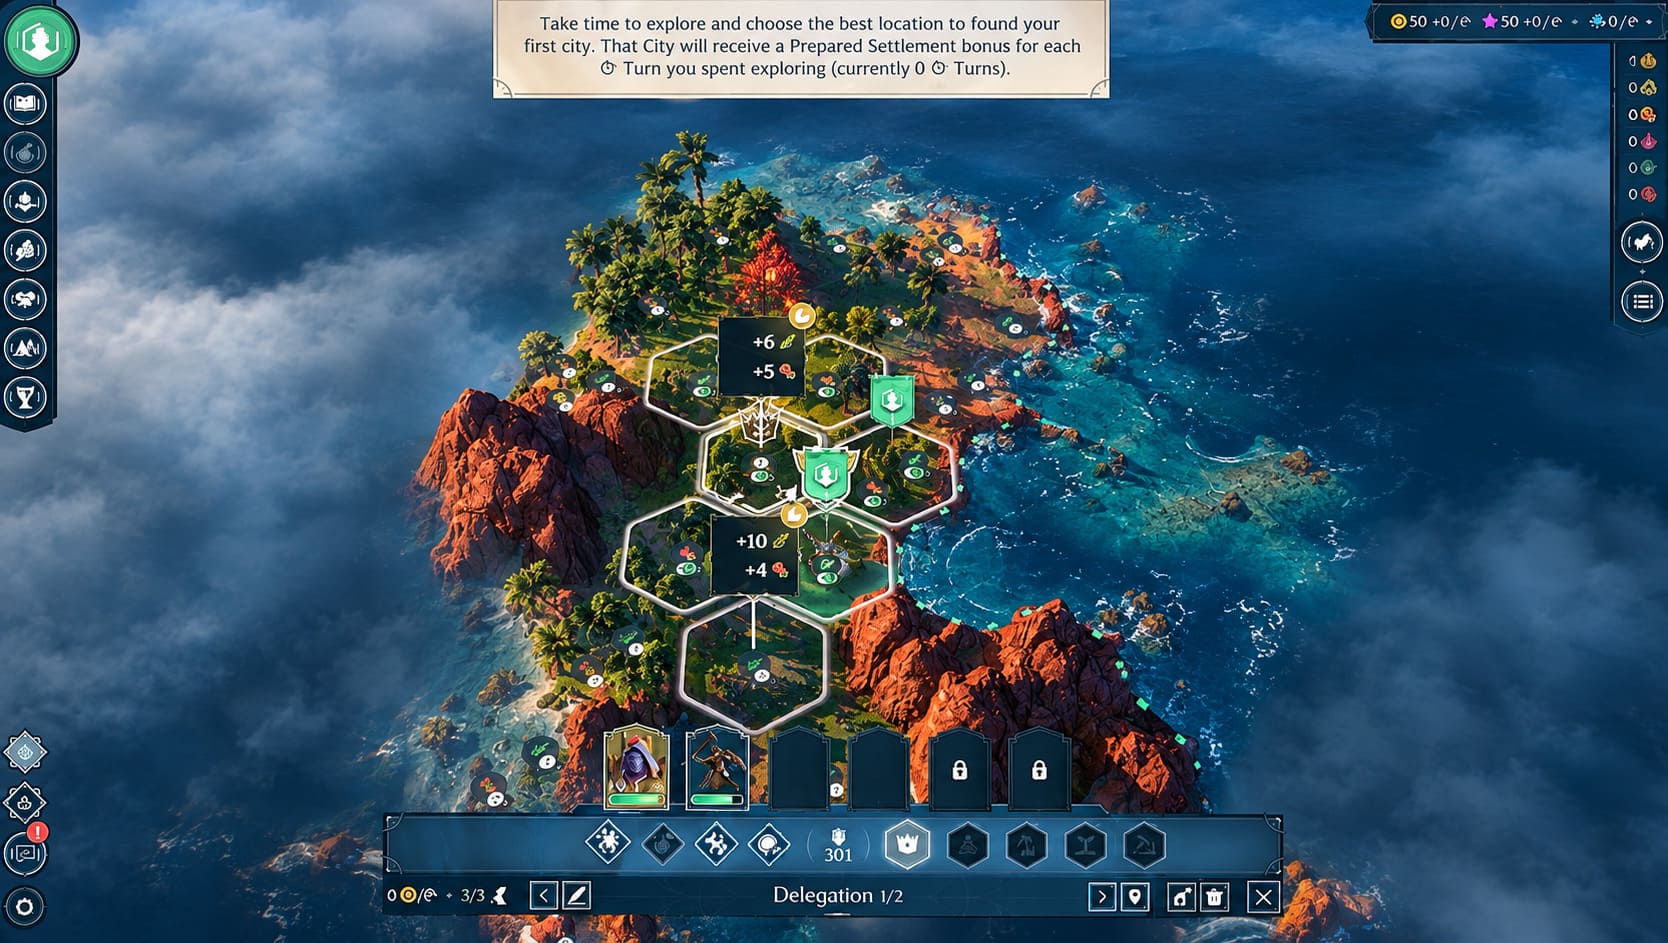
Start with your city center and place your first district directly beside it. For the next expansion, position the new district so that it connects with both the center and your first district. You now have the foundation of a compact triangular cluster.
From there, continue filling the surrounding hexes rather than immediately reaching for distant resources.
Why the Triangle Works
The biggest advantage is density.
When districts are close together, more of them can eventually satisfy the neighboring requirements needed for leveling. Instead of having several isolated Level 1 districts spread across a province, you’re gradually creating a stronger central core.
That has several advantages:
- Better Approval management
- Faster access to stronger district levels
- More efficient use of limited city space
- Easier defensive positioning
- A strong economic core that can support later expansion
I particularly like this setup for capitals and important frontier settlements that may become military targets. A compact city is simply easier to protect than a long, thin chain of districts stretching across the landscape.
The obvious downside is that you’re sacrificing some territorial reach. If the best resource deposit is several tiles away, the Triangle doesn’t always let you grab it efficiently.
Still, during the early game, I’d rather have a compact city that works extremely well than a sprawling settlement that looks impressive on the map but constantly struggles with Approval.
The Two-Row Ribbon: When Resources Matter More Than Perfection
The Stick Layout, which can also be thought of as a Two-Row Ribbon, is almost the opposite philosophy.
Instead of creating a dense blob around the city center, you gradually push your districts outward in a long formation. Two neighboring rows of hexes form a ribbon that can follow a coastline, valley, resource corridor, or other valuable geographical feature.
This is especially interesting on Saiadha because the map isn’t static in the way many traditional strategy-game maps are.
Tidefalls and changing terrain can completely alter the value of a region.
A resource that looked mediocre earlier in the game can suddenly become extremely attractive after the landscape changes. A rigid city layout can struggle to respond to that. A ribbon-style city, on the other hand, gives you more freedom to stretch toward newly valuable territory.
When I’d Use a Ribbon Layout
I’d seriously consider this approach when:
- Several valuable resources are positioned along the same route.
- You’re playing around a long coastline.
- A strategic chokepoint needs to be connected to your settlement.
- Your faction benefits heavily from a particular terrain type.
- The map makes compact expansion physically awkward.
The major problem is that long cities are harder to stabilize.
Some districts will remain exposed and may take longer to benefit from neighboring structures. You’re also creating a settlement that can be more awkward to defend. If an enemy army attacks from the wrong direction, the outer end of your city can become a liability.
So while I love the Ribbon for specialized resource cities, I wouldn’t blindly use it for every settlement.
The Hexagonal Ring: The End-Game Powerhouse
Once your city becomes enormous, the strategy changes again.
Early on, you’re trying to survive and establish an efficient foundation. Later, you’re trying to squeeze as much value as possible from a mature population center.
That’s where the Hexagonal Ring, or Flower Layout, becomes extremely attractive.
The idea is straightforward. You build a complete ring of six districts around your city center and then continue expanding outward with additional rings.
Visually, it starts looking like a flower or honeycomb.
More importantly, the geometry creates an incredibly dense network of neighboring districts.
Why the Flower Pattern Is So Strong
The central portion of the city becomes surrounded by developed districts, allowing the inner structures to benefit from the leveling system.
Instead of constantly expanding the city’s footprint without improving its existing infrastructure, you’re effectively building layers of economic efficiency.
A mature Flower Layout can turn a major city into an absurdly productive engine for:
- Industry
- Science
- Dust
- Food
- Influence
And that’s exactly what you want from a late-game capital.
The problem is that this layout is much more demanding. You need enough population to justify the expansion, and the surrounding terrain has to cooperate.
Mountains, cliffs, water, awkward resource placement, or enemy borders can destroy the clean geometry very quickly.
That’s why I wouldn’t try forcing a perfect Flower Layout from turn one. It’s a destination, not an opening move.
The Best Strategy Is Often a Hybrid Layout
Here’s where I think many district guides become too theoretical.
In a real campaign, the map rarely gives you a beautiful empty field where you can construct the perfect geometric city. You’ll have resources in inconvenient locations, hostile factions nearby, terrain blocking your expansion, and seasonal changes forcing you to rethink your plans.
So instead of treating the Triangle, Ribbon, and Flower as completely separate strategies, I’d use them as stages of development.
| Game Stage | Recommended Layout | Main Goal |
|---|---|---|
| Early Game | Compact Triangle | Stability and fast leveling |
| Mid Game | Triangle + Ribbon | Balance yields and territory |
| Late Game | Hexagonal Ring | Maximum city efficiency |
| Resource City | Ribbon | Reach valuable terrain |
| Military City | Compact Cluster | Defense and concentration |
| Capital | Flower / Hybrid | Maximum long-term output |
For me, this hybrid approach is the most practical way to play.
Start compact. Identify what the map is giving you. Then modify the city’s shape around your strategic needs.
Faction Differences Can Change Everything
There isn’t a single best city layout in Endless Legend 2 for every faction.
This is one of the reasons I enjoy the system. Your faction’s strengths should influence how aggressively you pursue a particular district pattern.
Military-Oriented Factions
Factions that benefit heavily from fortifications and military infrastructure generally appreciate dense cities.
For them, I’d lean toward the Compact Triangle or another tight cluster. You want important defensive structures and economic districts concentrated enough to support each other.
A city that is slightly less efficient economically but much harder to capture can be worth far more during a war.
Sandshapers
The Sandshapers encourage a very different way of looking at the map.
If you’re trying to take advantage of dry terrain and land revealed or transformed through the changing environment, I’d consider a modified Ribbon layout.
Instead of obsessing over a perfect geometric shape, follow the valuable terrain. If a newly accessible area contains several worthwhile exploitation opportunities, extending your city toward it may be much more valuable than completing another perfect ring.
This is one of those situations where geography beats mathematics.
Fast-Growth Factions
Factions capable of rapidly increasing their population can transition into large-scale layouts earlier.
For these factions, the Flower pattern becomes particularly appealing because they can generate the population needed to sustain aggressive district development.
The important thing is not to expand faster than your economy can support. A massive city with poor Approval isn’t automatically better than a smaller city with excellent production.
Approval Is the Trap New Players Miss
If there’s one thing I’d warn a new player about, it’s this: more districts do not automatically mean a better city.
It’s easy to see an empty hex next to a valuable resource and think, ‘I should claim that.’
Sometimes you absolutely should.
But every expansion has to be evaluated against the cost of maintaining the city and keeping its Approval healthy. If your expansion pushes the settlement into a state where its overall productivity starts suffering, you’ve effectively paid resources to make your city worse.
That’s why district leveling is so powerful.
Instead of endlessly adding disconnected districts, you’re using additional districts to strengthen the structures you’ve already built.
Think of your city as a snowball. The first few districts create the shape. The next ones make that shape more efficient. Eventually, a properly planned city can generate enough value that continued expansion becomes much easier to sustain.
Common District Planning Mistakes
I’ve made plenty of these mistakes in strategy games, and Endless Legend 2 is no exception.
Building Toward Every Resource
Not every resource needs to be connected to your city immediately. Sometimes the better option is to wait, develop your core, and expand later when you can do it efficiently.
Creating Long Single-Tile Lines
A single narrow chain can reach impressive distances, but it doesn’t necessarily create an efficient district network. If you’re using a Ribbon, think in two dimensions, not simply as one long road.
Ignoring Future Districts
Never place an important district without considering what you want beside it later. That one decision can determine whether your future inner districts reach their strongest levels.
Forcing Perfect Geometry
The perfect Flower Layout doesn’t matter if an enemy army is about to invade or a rare resource is about to become inaccessible.
A strategically useful ugly city is better than a beautiful city that loses you the game.
My Recommended City Planning Formula
If you’re unsure what to do during a campaign, I’d keep the process simple.
First, establish a compact core around the city center. Next, build enough districts to start taking advantage of the leveling system rather than immediately stretching outward.
Once the city’s foundation is stable, look at the surrounding terrain. If valuable resources are nearby, expand toward them without destroying the efficiency of your core.
Finally, as your population and economy grow, start filling the gaps and moving toward a more complete Hexagonal Ring or Flower-style city.
This approach gives you flexibility without sacrificing long-term efficiency.
Final Verdict: Build for the Map, Not the Screenshot
The best city district layout in Endless Legend 2 isn’t necessarily the one that produces the prettiest geometric pattern. It’s the one that gives your empire the resources, Approval, defensive strength, and strategic reach it actually needs at that moment.
For most campaigns, the Compact Triangle is the safest starting point. The Ribbon becomes valuable when geography and resource distribution demand a wider footprint, while the Hexagonal Ring is the ideal end-game direction for a large, developed capital.
The biggest lesson is to plan several expansions ahead. Don’t treat every district as an individual decision — treat the entire city as one evolving machine. Once you start looking at district placement this way, Saiadha becomes much easier to read, and you’ll spend far less time wondering why a seemingly huge city isn’t producing nearly as much as it should.