Graveyard Keeper Zombie Guide: How to Unlock & Automate Workstations
I have played a ridiculous number of management, survival, crafting, and simulation games, and there is one thing I always appreciate: the moment a game finally lets me stop doing every boring job myself. Graveyard Keeper is almost built around that feeling. Early on, you are constantly running between trees, furnaces, farms, corpses, workshops, and storage boxes, wondering where all your energy disappeared. Then the zombie system arrives, and suddenly the whole game starts playing by different rules.
The zombie mechanics are easily one of the most useful parts of the mid-to-late game. Instead of personally chopping every log, mining every piece of iron, harvesting crops, or standing at crafting stations, you can create a network of undead workers that keeps producing resources while you deal with quests, sermons, alchemy, dungeons, and the rest of the story. They are not perfect, and getting a really efficient zombie workforce takes some planning, but once the system starts working, the difference is enormous.
What I like most about it is that zombies are not simply a free shortcut. You still have to unlock the technology, prepare bodies, understand skull values, build the right stations, and solve the logistics problem. In other words, Graveyard Keeper zombie automation becomes its own management game inside the larger game.
Graveyard Keeper Achievements Guide: Ultimate 100% Completion Strategy
How to Unlock Zombies in Graveyard Keeper
You cannot simply walk into the morgue during the first few days and start assembling an undead workforce. The zombie storyline becomes available after you have progressed far enough through the main game and unlocked the necessary parts of the church and cellar.
The exact progression can feel a little obscure if you are playing without a guide. You generally need to reach around Day 19 or 20, have at least 20 relationship points with Gerry, and make enough progress through Snake’s storyline to open the relevant section of the church cellar.
Once those conditions are met, returning to the morgue triggers the conversation that introduces Gunter, the character who effectively becomes your zombie-management teacher. He explains that other zombies can be recovered and put to work, while also introducing the basic technology required to resurrect them.
From there, you can head into the church cellar and reach the sacrificial area. Gunter is locked away behind a barred section, and talking to him starts the important part of the system. He provides the initial technology, including the blueprint for the Resurrection Table, and introduces the basic process of creating Zombie Juice.
There is also a useful little reward nearby that is easy to miss. The broken bookcase beside Gunter contains several bottles of Zombie Juice, giving you the resources needed to get the system started without immediately having to build a complete alchemy production chain.
Finding Your First Free Zombie
After speaking with Gunter, the game sends you toward the first zombie location. You need to travel north from the area around your home workshop and continue toward the forest and apiary.
Near the area west of the apiary, you will find rubble and large stones blocking part of the route. This is not just environmental decoration. Use your magnifying glass on the appropriate debris and you can uncover a zombie buried underneath it.
That first worker is extremely useful because it gives you a chance to experiment with the system before spending resources on additional corpses. I would definitely recommend using the first zombie as a test subject rather than worrying about making it perfect. Early automation is more valuable than obsessing over maximum efficiency.
Zombie Efficiency Explained
This is where the zombie system gets surprisingly deep.
Unlike normal corpses that you bury for graveyard quality, zombies do not simply become worse because they have red skulls. Their efficiency is tied primarily to their white skull count, and that determines how quickly they perform assigned work.
The basic rule is simple: each white skull contributes 2.5% efficiency. That means a zombie with four white skulls sits around 10% efficiency, while a highly optimized 16-white-skull zombie can reach 40%.
| Zombie Efficiency | White Skulls | Best Use |
|---|---|---|
| 10% | 4 | Early basic production |
| 15–20% | 6–8 | General workshop tasks |
| 25–30% | 10–12 | Mining, farming, crafting |
| 35–40% | 14–16 | Porters and important automation |
The important thing is that red skulls are not the same thing as a direct efficiency penalty. They matter because you are working toward the best possible white-skull configuration. If you are serious about creating an optimized zombie workforce, autopsy and embalming become extremely important.
How to Make a High-Efficiency Zombie
Creating a strong zombie starts with choosing the right corpse. You want a body with a useful natural skull distribution rather than simply grabbing the first corpse that arrives at the morgue.
The Autopsy Table is your first major tool. Blood and fat are particularly useful because removing them changes the skull balance in your favor. Once you have the basic corpse prepared, you can move on to embalming and start using injections to manipulate the final result.
Several injections become especially important:
- Lye Injection: adds a red skull and a white skull.
- Silver Injection: removes a red skull and adds a white skull.
- Gold Injection: removes two red skulls and adds two white skulls.
- Glue Injection: adds a white skull directly.
Once you have access to the Cultist perk, corpse preparation becomes much more interesting because you can inspect individual organs and make better decisions about what belongs in your final zombie. High-quality organs can be used to push a corpse toward a much stronger white-skull total.
I would not waste your best bodies on low-priority workers, either. A 40% zombie is much more valuable carrying resources across the map than standing at a basic crafting station where a slow worker can perform the same job without creating a major bottleneck.
How to Make More Zombies
Eventually, your starting supply of Zombie Juice disappears. That is when the system becomes self-sustaining.
The basic production loop is straightforward. Save Blood from autopsies, produce Health Powder through alchemy, and combine the ingredients at the appropriate Alchemy Workbench to create more Zombie Juice. You can then take a prepared corpse to the Resurrection Table and spend Zombie Juice along with Faith to bring it back as a permanent worker.
This is one of those systems where everything starts feeding into everything else. Corpses provide materials for alchemy, alchemy creates Zombie Juice, sermons provide Faith, and prepared corpses become workers that automate the production of the materials you need.
Once you see that loop, the zombie system stops feeling like a side feature and starts looking like the backbone of the entire late game.
Zombie Technology You Should Unlock
The technology tree is another part that can slow you down if you spend your points randomly. Several zombie-related upgrades are particularly useful because they unlock completely different forms of automation.
Second Chance gives you access to the Resurrection Table, while Zombie Logistics opens up the Porter Station. From there, the specialized upgrades for woodcutting, mining, farming, and writing expand what your undead workforce can actually accomplish.
I would prioritize logistics relatively early. It is tempting to focus on flashy production stations, but transportation is where a lot of automation systems eventually get stuck. Producing thousands of logs at a remote location is not particularly useful if nobody is bringing those logs back home.
Automating Wood Production
The northern forest is one of the first places where zombie automation really starts to feel powerful.
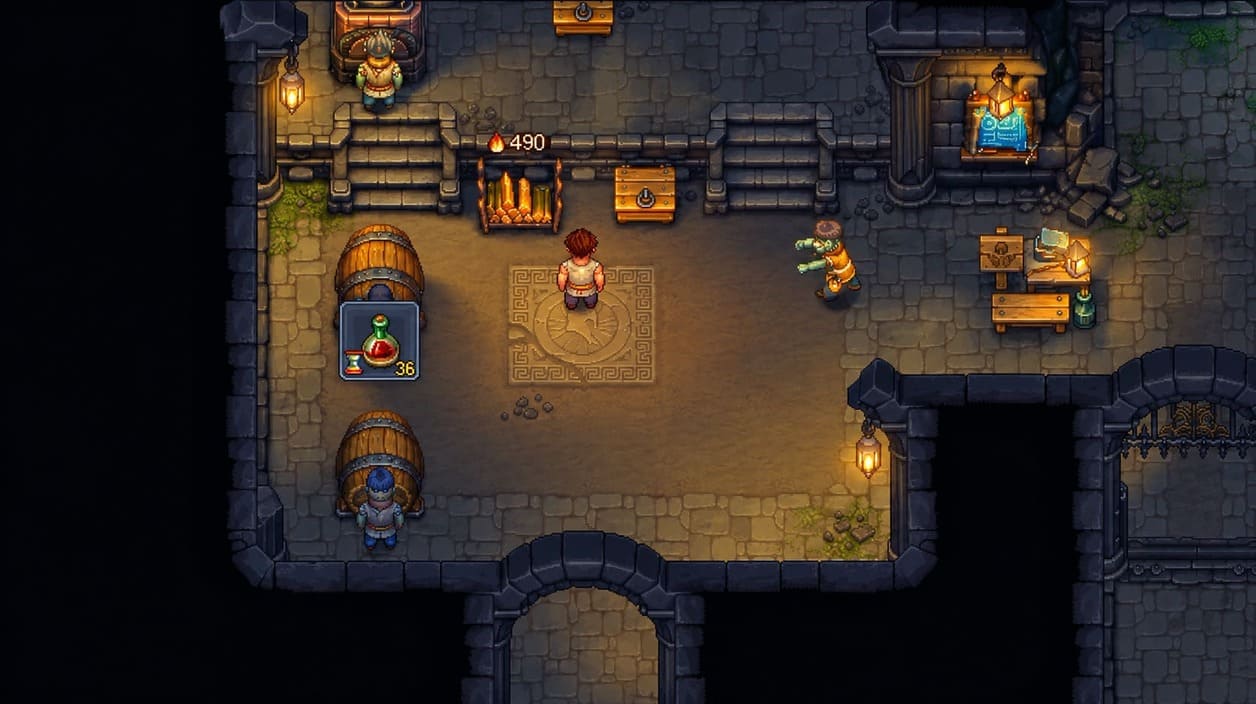
Build the Zombie Sawmill in the appropriate forest area and assign a worker. The zombie can then handle the repetitive woodcutting process while you are somewhere else doing much more interesting things.
The catch is storage. If your nearby log storage becomes full, the zombie has nowhere to put the results and production stops. This is why I recommend thinking about storage at the same time you think about production.
You can also automate processing at the forest camp and use a Porter Station to move materials back toward your main workshop. With a strong porter, the entire wood operation becomes almost hands-free.
Automating the Quarry
The quarry is another obvious target for zombie workers because manually collecting stone, iron, coal, and marble gets old very quickly.
Assign zombies to the relevant mining and quarrying positions and they can continuously generate resources while you focus on other objectives. You can even automate some processing at the quarry itself, reducing the amount of raw material that needs to be transported back to your main base.
The most important part is again the porter system. A mining zombie can produce resources incredibly efficiently, but if the output remains stranded at the quarry, your workshop will eventually run dry. Put storage and transportation into the design from the beginning rather than adding them as an afterthought.
Farming and Vineyard Automation
Zombie farming is another huge quality-of-life improvement. Instead of repeatedly planting and harvesting crops yourself, you can assign a zombie to suitable garden plots and provide the necessary seeds.
The same idea applies to the vineyard on Witch Hill. Once the system is established, you can maintain a steady supply of grapes without spending every farming cycle manually working the fields.
There is still some preparation involved. Seeds and other inputs have to be supplied, and storage needs to be available for the harvested crops. But compared with doing everything manually, it is a massive reduction in busywork.
Automating Crafting Stations
One of my favorite parts of the system is that zombies are not limited to outdoor resource gathering. Certain regular crafting stations can also accept zombie workers.
If you see the zombie-worker indicator on a station, you can assign a worker and let it process a production queue. This is especially useful for repetitive items such as nails, iron parts, and other components that you constantly need during construction.
The same principle works with writing and laboratory production. Instead of personally standing at a desk making notes, chapters, or stories, you can turn the process into passive production.
That is where the zombie system really starts paying for itself. You stop thinking about individual items and start thinking about production chains.
The Storage Problem That Can Break Everything
If your zombie automation suddenly stops working, check the storage before assuming the game is bugged.
This is probably the most common mistake players make. A porter cannot deliver materials to a destination that has no available storage space. A crafting zombie cannot continue production when its required resources are unavailable. A woodcutter can keep working only while there is somewhere for the resulting materials to go.
I like to organize storage by purpose rather than throwing everything into random chests. Keep raw materials near the machines that consume them, make sure remote production areas have enough room, and leave space for the materials that porters are supposed to deliver.
The infinity production queue is also extremely useful. Once you select an item and increase its production amount until the queue becomes infinite, the zombie can continue making it automatically as long as the required materials keep arriving.
Which Zombies Should Get the Best Efficiency?
This is where I would make one change from how many new players naturally approach the system.
Do not automatically put your best zombie on your most expensive crafting station.
Give your fastest zombies to porters. A slow crafter can still produce items while you are doing something else. A slow porter, however, can hold up an entire production chain because every remote resource has to travel back to your main base.
My rough priority would be:
- 35–40% zombies: Porters and important transportation routes.
- 25–35% zombies: High-volume mining, farming, and resource production.
- 10–25% zombies: Basic crafting and less important stations.
As you improve your embalming and alchemy skills, gradually replace your weakest workers. There is no reason to throw away early zombies immediately, though. Even a mediocre worker is useful when the alternative is you personally doing the job.
Final Thoughts on Graveyard Keeper Zombie Automation
The zombie system completely changes how I approach Graveyard Keeper. Before unlocking it, I am constantly thinking about stamina, travel time, and which resource needs to be collected next. After building a decent undead workforce, the game becomes much more about planning production chains and deciding where my attention is actually worth spending.
The biggest lesson is that automation is not just about putting zombies at machines. Production, storage, transportation, and efficiency all have to work together. A 40% mining zombie is useless if its output is sitting in a full chest, while a perfect porter cannot deliver anything if your workshop has nowhere to store it.
Start with the free zombies, learn how the skull system works, and gradually replace weak workers with better ones. Build remote storage, establish porter routes, keep your furnaces supplied, and automate the repetitive jobs that consume the most of your time.
Once the network is running properly, Graveyard Keeper feels completely different. You are no longer the guy doing every single job on the farm and in the workshop. You are running a bizarre little undead industrial empire, and honestly, that is one of the most satisfying parts of the game.