Control Resonant Best Graphic Configurations for 4K 60FPS: Complete PC Optimization Guide
I’ve spent enough time tweaking demanding PC games to know when a graphics menu is going to become a second game in itself. Control Resonant is exactly that kind of beast.
Remedy has pushed its Northlight technology considerably further here, with full path tracing, advanced geometric streaming, AI reconstruction and an enormous amount of lighting information being processed every frame. When everything is turned up, the game can look ridiculous in the best possible way. Reflections, indirect lighting, volumetric effects and environmental detail combine to create one of those scenes where you stop playing for a second just to stare at a hallway.
The problem? Your GPU is staring back at you while begging for mercy.
Even extremely powerful hardware can struggle with native 4K when maximum ray-traced or path-traced settings are enabled. Community testing and benchmark data indicate that an RTX 5090 can fall to around 48 FPS at native 4K with medium ray tracing, showing just how expensive the game’s rendering pipeline can become.
So, if your goal is a stable 4K 60FPS experience, simply selecting Ultra isn’t the answer.
I’ve put together the settings I’d actually use after spending hours tuning the game. The idea isn’t to make Control Resonant look worse. It’s to cut the settings that waste performance while protecting the visual features that make the game special.
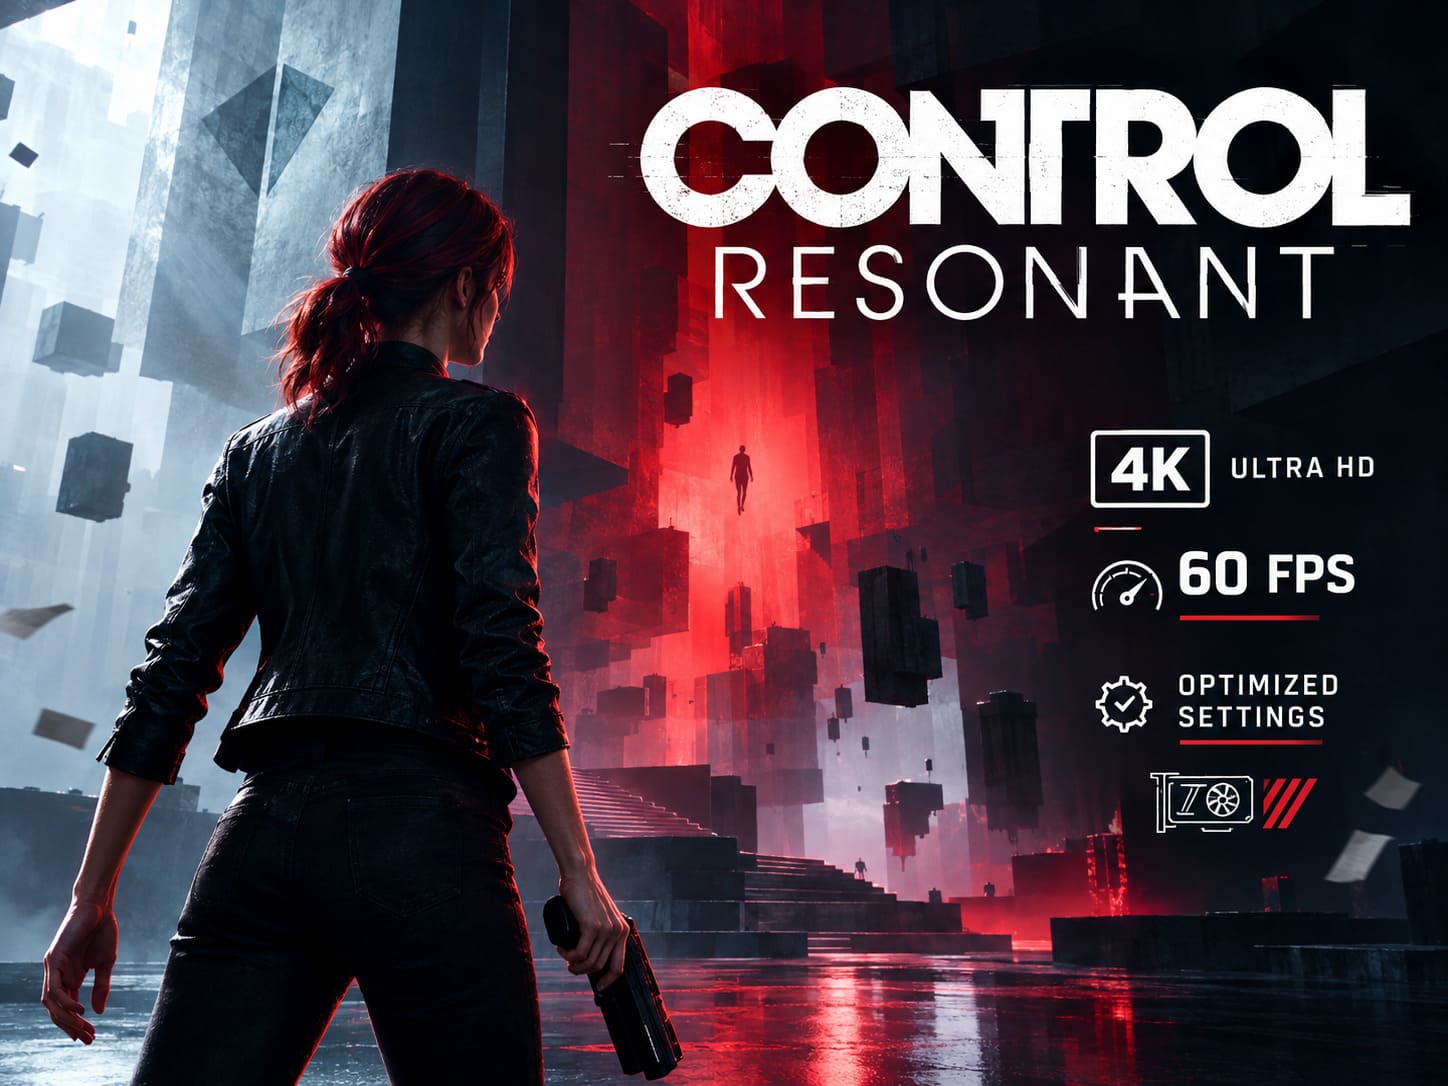
Control Resonant Official 4K PC Requirements
Before touching individual settings, it’s useful to understand what Remedy expects from a machine targeting high-end resolutions.
The standard 4K rasterized target is already demanding, requiring hardware around an RTX 3080 or RX 6800 XT. Once path tracing enters the picture, the requirements climb dramatically.
| Target | CPU | RAM | GPU | Storage |
|---|---|---|---|---|
| 4K / 60FPS Rasterized | Ryzen 7 3700X / Core i7-10700 | 16GB | RTX 3080 / RX 6800 XT | 120GB NVMe SSD |
| 4K / 60FPS Max Path Tracing | Ryzen 7 7800X3D / Core i9-14900K | 16–32GB | RTX 5080 / RX 9070 XT | 120GB Gen4 NVMe SSD |
That distinction matters.
A system capable of running the regular 4K preset isn’t automatically ready for maximum path tracing. Ray tracing changes the performance equation completely.
The Best Control Resonant Settings for 4K 60FPS
Let’s get into the settings that actually matter.
1. Resolution and Upscaling
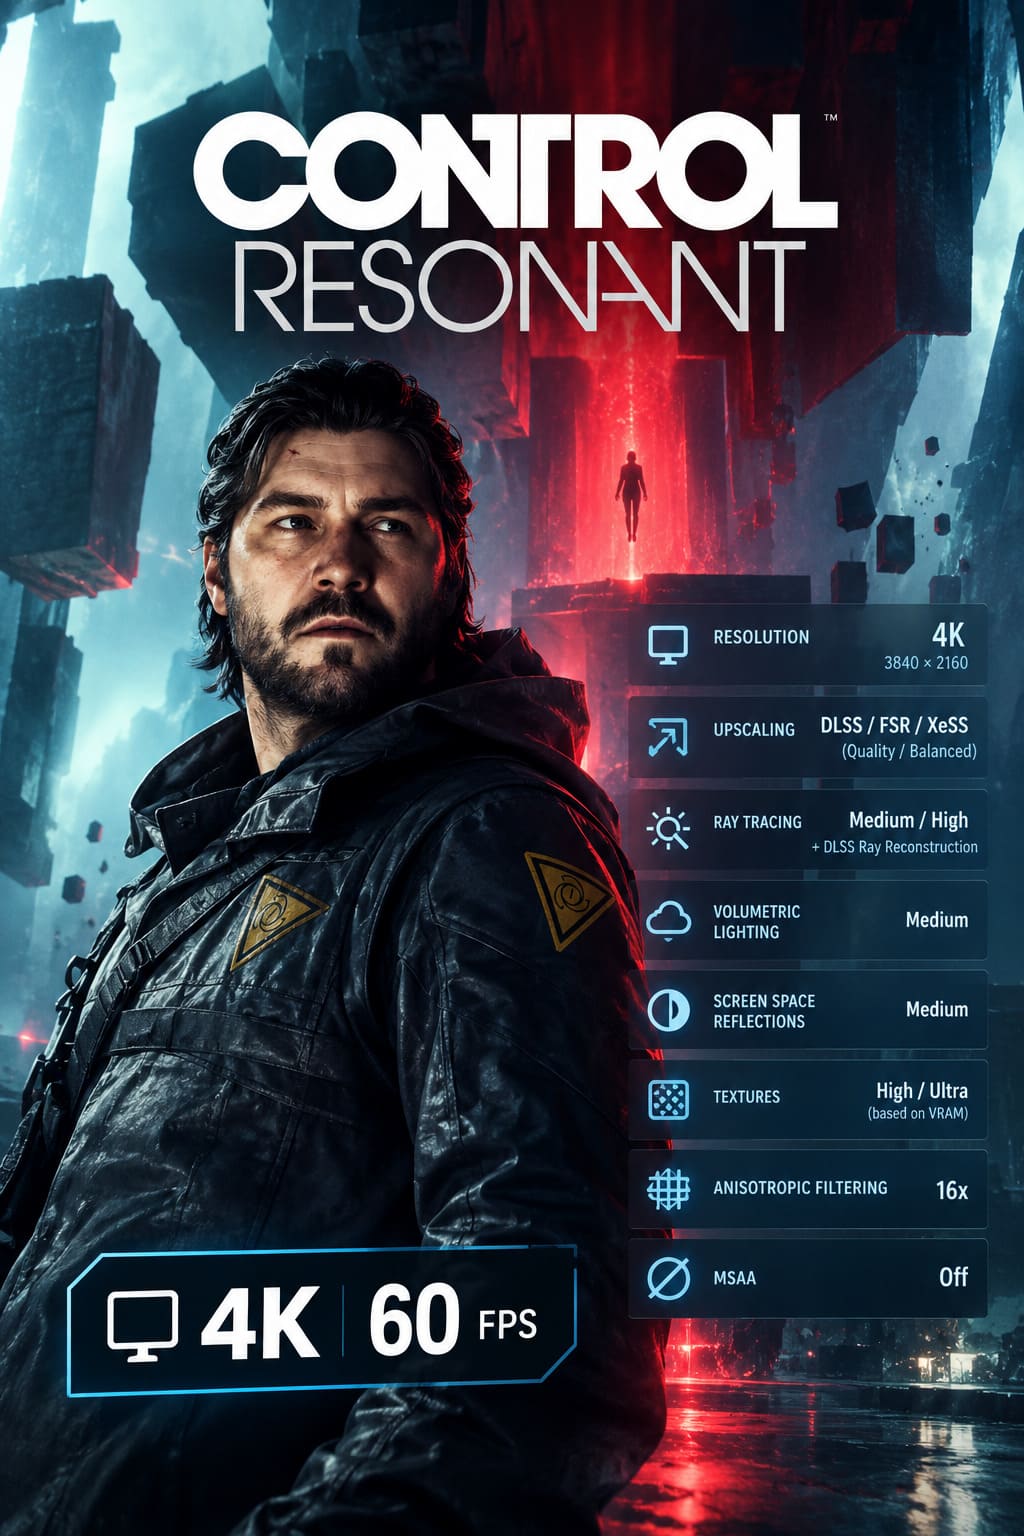
If you’re playing on a 4K monitor, keep the output resolution at 3840×2160, but don’t feel obligated to render every pixel natively.
Native 4K sounds great on paper, but it’s a performance monster. Upscaling technologies such as DLSS, FSR and XeSS can dramatically reduce the internal rendering workload while reconstructing an image that still looks excellent at 4K.
For most high-end systems, I’d start with:
- DLSS Quality for the best image quality/performance balance.
- DLSS Balanced if you’re struggling to hold 60FPS.
- DLSS Performance when using demanding path tracing on hardware below the flagship tier.
- FSR/XeSS Quality or Balanced for compatible AMD and Intel configurations.
Quality mode is particularly attractive because it gives you a much higher internal resolution than Performance mode while still cutting a huge amount of GPU workload.
If you’re chasing a locked 60FPS rather than screenshot-worthy native rendering, upscaling is not a compromise anymore. It’s part of the modern PC graphics pipeline.
2. Ray Tracing, Path Tracing and Ray Reconstruction
This is where Control Resonant gets seriously hungry.
Maximum path tracing can produce an enormous performance hit, potentially cutting frame rates by roughly 45–60% depending on hardware and scene complexity.
For Nvidia RTX 40- and 50-series GPUs, I’d keep ray tracing at Medium or High rather than automatically going straight to maximum.
The important companion setting is DLSS Ray Reconstruction.
Ray Reconstruction replaces traditional denoising techniques with an AI-powered reconstruction system designed to improve the quality of ray-traced effects. In practical terms, reflections can look cleaner, lighting noise can be reduced, and fine details can survive reconstruction better.
For RTX hardware, this combination makes far more sense than simply throwing every RT slider to maximum.
For AMD Radeon cards, I’d be more conservative. Keep ray tracing around Medium or disable it entirely if your priority is a stable 4K 60FPS target. Heavy path tracing can become extremely demanding, particularly during complex scenes.
And honestly, I’d rather have a locked frame rate with RT Medium than a gorgeous screenshot followed by 35 FPS during combat.
3. Volumetric Lighting and Fog
This is one of the easiest settings to optimize without destroying the game’s atmosphere.
Control Resonant uses dense volumetric effects to create its strange supernatural environments. Light shafts, fog and atmospheric depth can look fantastic, but the performance cost isn’t trivial.
The difference between Low and High can reach roughly 12–15%, depending on the scene.
My recommendation:
Set Volumetric Lighting to Medium.
The visual difference from High is relatively small during actual gameplay, while the performance improvement can help both average FPS and 1% lows.
This is exactly the type of setting I love to lower. You don’t spend your entire playthrough staring at volumetric fog, but your GPU is processing it constantly.
4. Screen Space Reflections
Screen Space Reflections become especially important when ray-traced reflections are disabled or reduced.
High SSR can look impressive in certain scenes, but it can also introduce shimmering and grain on rough surfaces.
I’d use:
SSR: Medium
The Medium setting provides a good compromise between reflection quality and frame pacing. During chaotic combat, stable frame delivery matters much more than squeezing every last reflection sample out of the engine.
If you are already using aggressive ray tracing, there’s even less reason to waste additional performance on unnecessarily expensive fallback reflection settings.
5. Textures and Anisotropic Filtering
Texture quality is one of those settings where VRAM capacity matters more than raw GPU horsepower.
If your card has 8GB VRAM, Medium textures are the safer choice.
With 12GB or more, High or Ultra becomes much more realistic, depending on your resolution and the rest of your graphics configuration.
A rough starting point:
| VRAM | Recommended Texture Quality |
|---|---|
| 8GB | Medium |
| 10GB | High |
| 12GB+ | High / Ultra |
| 16GB+ | Ultra |
I’d also leave Anisotropic Filtering at 16x.
Its performance impact is tiny, generally around the 1% range or less, while it helps preserve texture clarity when surfaces extend away from the camera.
There’s really no reason to sacrifice texture sharpness here.
6. MSAA: Just Turn It Off
This one is easy.
MSAA: Off.
Control Resonant already relies heavily on modern temporal reconstruction and anti-aliasing technologies. Adding MSAA on top of DLSS or FSR can hammer performance without providing a meaningful improvement to the final image.
If you’re hunting for extra FPS, this is one of the first switches I’d check.
My Recommended Control Resonant 4K Presets
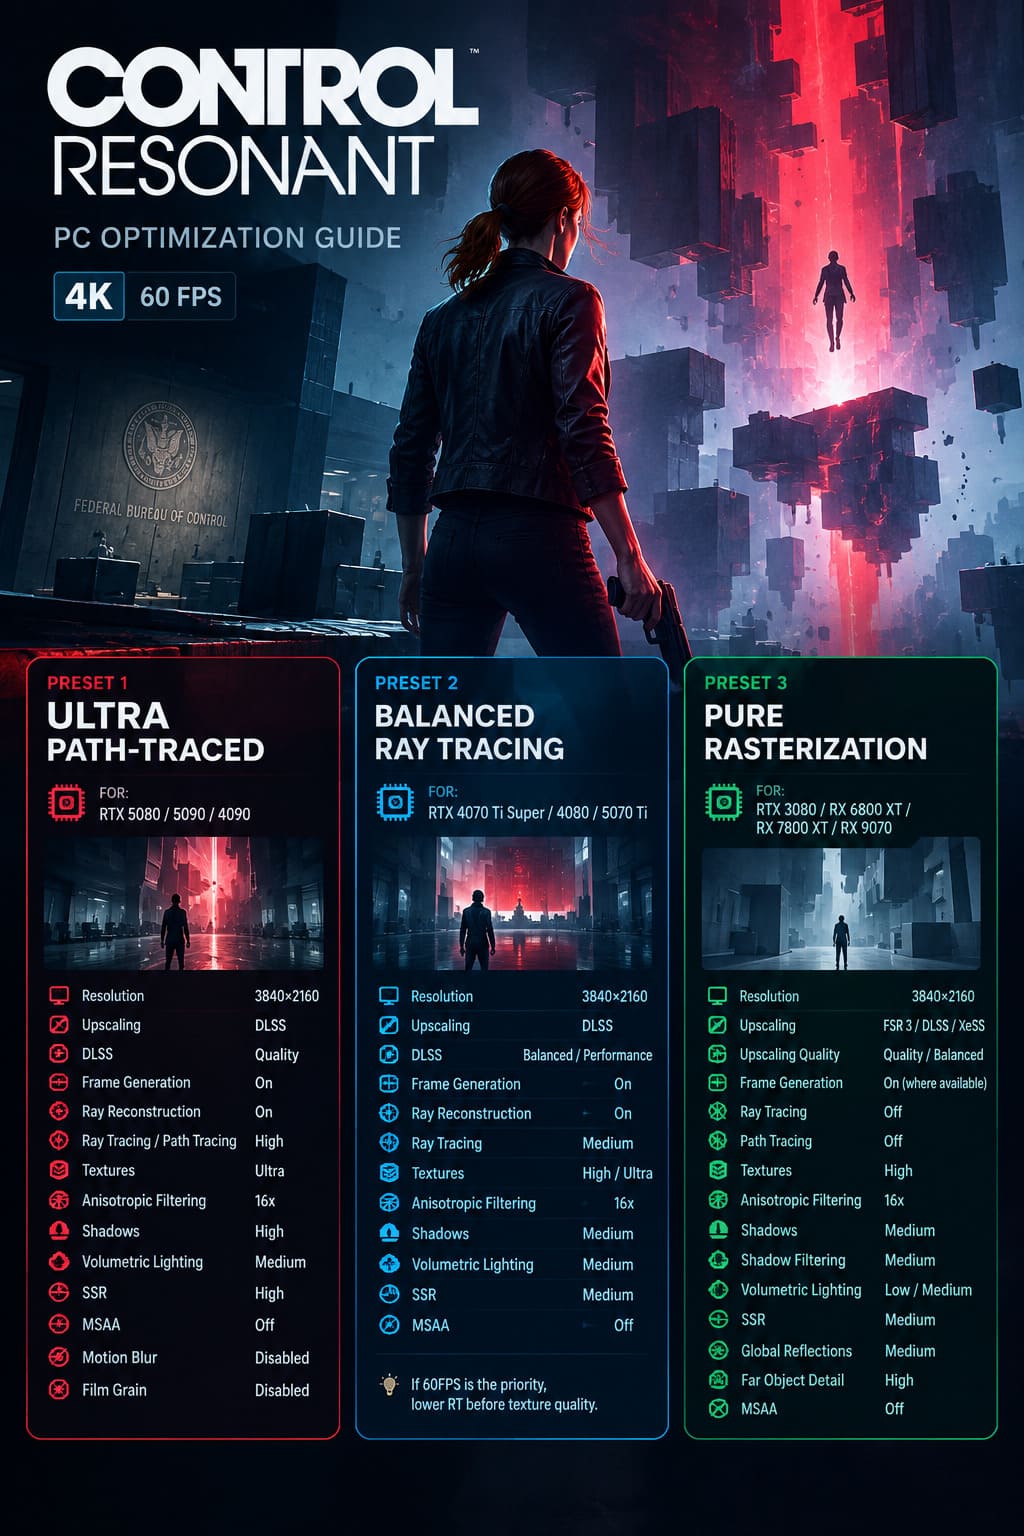
Different GPUs need different strategies. Trying to force the same settings onto an RTX 5090 and an RTX 3080 makes absolutely no sense.
Preset 1: Ultra Path-Traced
For: RTX 5080, RTX 5090, RTX 4090
This is the configuration I’d use when I want Control Resonant to look absolutely ridiculous while still maintaining a practical 4K experience.
- Resolution: 3840×2160
- Upscaling: DLSS
- DLSS: Quality
- Frame Generation: Enabled
- Ray Reconstruction: Enabled
- Ray Tracing / Path Tracing: High
- Textures: Ultra
- Anisotropic Filtering: 16x
- Shadows: High
- Volumetric Lighting: Medium
- SSR: High
- MSAA: Off
- Motion Blur: Disabled
- Film Grain: Disabled
For an RTX 4090, I’d be prepared to move DLSS from Quality to Balanced if demanding scenes start breaking the 60FPS target.
Preset 2: Balanced Ray Tracing
For: RTX 4070 Ti Super, RTX 4080, RTX 5070 Ti
This is probably the sweet spot for a lot of enthusiast PCs.
You still get the atmospheric lighting and reflections that make Control Resonant impressive, but you’re not sacrificing half your GPU’s performance to chase maximum RT settings.
- Resolution: 3840×2160
- Upscaling: DLSS
- DLSS: Balanced / Performance
- Frame Generation: Enabled
- Ray Reconstruction: Enabled
- Ray Tracing: Medium
- Textures: High / Ultra depending on VRAM
- Anisotropic Filtering: 16x
- Shadows: Medium
- Volumetric Lighting: Medium
- SSR: Medium
- MSAA: Off
If 60FPS is the priority, I’d rather lower RT before touching texture quality.
Preset 3: Pure Rasterization
For: RTX 3080, RX 6800 XT, RX 7800 XT, RX 9070
This is the configuration I’d choose when the objective is simple: make 4K 60FPS as stable as possible.
Turn the expensive ray-traced workload off and let the GPU focus on conventional rendering.
- Resolution: 3840×2160
- Upscaling: FSR 3 / DLSS / XeSS
- Upscaling Quality: Quality / Balanced
- Frame Generation: Enabled where available
- Ray Tracing: Off
- Path Tracing: Off
- Textures: High
- Anisotropic Filtering: 16x
- Shadows: Medium
- Shadow Filtering: Medium
- Volumetric Lighting: Low / Medium
- SSR: Medium
- Global Reflections: Medium
- Far Object Detail: High
- MSAA: Off
This setup should deliver a cleaner performance profile than trying to force heavy RT onto hardware that isn’t designed to process it efficiently at 4K.
Frame Generation: Useful, But Don’t Treat It as Magic
Frame Generation deserves a quick warning.
It can make the displayed frame rate look dramatically higher, but generated frames don’t replace the underlying responsiveness of genuinely rendered frames.
That’s why I recommend getting your base FPS into a healthy range first.
If the game is rendering at 35FPS and Frame Generation pushes the displayed number much higher, the experience isn’t suddenly equivalent to native 60FPS rendering.
For a 4K 60FPS target, I’d first optimize the actual GPU workload, then use Frame Generation to improve smoothness.
For RTX 50-series owners, NVIDIA Multi-Frame Generation can provide additional benefits, while compatible AMD systems can use technologies such as FSR-based frame generation where supported.
Nvidia Control Panel and Windows Tweaks
Graphics settings aren’t the entire story.
Hardware-Accelerated GPU Scheduling
Enable Hardware-Accelerated GPU Scheduling (HAGS) in Windows if your configuration supports it.
This is particularly relevant when using modern frame-generation technologies.
Nvidia Control Panel
For Nvidia GPUs, these are reasonable starting points:
- Low Latency Mode: Ultra, unless in-game NVIDIA Reflex is handling latency.
- Texture Filtering – Quality: High Performance.
- Power Management Mode: Prefer Maximum Performance.
I wouldn’t expect miracles from these settings. We’re talking about small optimization gains, not a secret 30FPS button.
The biggest improvements still come from the in-game graphics menu.
Control Resonant Low End PC Optimization Guide: Best FPS Configs for Weak Laptops (2026)
Install Control Resonant on an SSD
This isn’t optional in my book.
Control Resonant relies heavily on continuous asset streaming. Its detailed environments and geometry systems are designed around fast storage.
A mechanical HDD is simply the wrong place for this game.
Use a high-speed NVMe SSD, preferably a modern Gen4 drive if your system supports it.
A slow storage device can contribute to:
- Asset pop-in
- Traversal stutter
- Delayed texture loading
- Frame-time spikes
- Noticeable streaming problems
When a game is constantly pulling high-detail geometry from storage, storage speed becomes part of the performance equation.
Control Resonant Best PC Settings: Maximize FPS for 144Hz Smooth Gameplay
My Final 4K 60FPS Setup
If I were sitting down to play Control Resonant tonight, this is where I’d start:
4K / 60FPS Target
- 3840×2160 output
- DLSS Quality
- Ray Reconstruction enabled
- Ray Tracing Medium/High
- Path Tracing disabled unless using flagship hardware
- Textures High or Ultra according to VRAM
- Volumetric Lighting Medium
- SSR Medium
- Shadows Medium/High
- 16x Anisotropic Filtering
- MSAA Off
- Motion Blur Off
- Film Grain Off
- Frame Generation enabled after establishing a solid base FPS
- Game installed on NVMe SSD
The biggest mistake is obsessing over Ultra across every category.
Ultra isn’t a performance target. It’s a graphics preset.
For a game as demanding as Control Resonant, smart compromises produce a much better experience. I’d happily drop volumetric lighting from High to Medium and RT from maximum to High if it means keeping frame times stable during combat.
That is what PC optimization should be about: not making the settings menu look impressive, but making the game itself feel right.
Control Resonant clearly wants to show off what modern rendering hardware can do. You don’t need to let it bully your GPU into submission. With the right combination of DLSS, Ray Reconstruction, sensible RT settings, reduced volumetrics and careful VRAM management, a 4K 60FPS setup becomes far more realistic.
And once you’ve got that locked frame-time rhythm, the game really starts to shine. That’s when the insane lighting, reflections and supernatural atmosphere stop being benchmark bait and become what they were meant to be: part of an incredibly immersive Remedy experience.