How to Fix Honeycomb: The World Beyond Black Screen at Launch (2026 PC Guide)
There are few things more annoying than booting up a game you have been waiting to play, seeing it appear in Task Manager, hearing a few seconds of ambient audio—and getting absolutely nothing on your monitor.
That is exactly the kind of headache some Honeycomb: The World Beyond PC players can run into when the game refuses to get past its startup sequence. Instead of landing in the alien world of Sota7, you are left staring at a black screen. Sometimes the game eventually crashes to desktop. Sometimes it stays frozen indefinitely. And, because there may be no useful error message, figuring out what actually went wrong can feel like taking random shots in the dark.
I have dealt with enough stubborn PC launches to know that the usual “just restart your PC” advice rarely gets you anywhere with problems like this. A modern Unreal Engine title can fail before you even reach the main menu because of a bad shader cache, a broken configuration file, an overlay hook, a display-mode conflict, or a graphics driver that decided to have a bad day.
The good news? A black screen at launch does not automatically mean your GPU is dying or that you need to reinstall Windows.
There are several practical fixes worth trying, and you should work through them from the least invasive options toward the heavier solutions.
Why Honeycomb: The World Beyond Can Get Stuck on a Black Screen
Before deleting files and reinstalling drivers, it helps to understand what is happening behind the scenes.
 3
3
When Honeycomb starts, the game has to initialize a surprisingly long chain of systems. It needs to communicate with your GPU, load rendering settings, compile or access shaders, establish the correct display mode, load configuration data, initialize multimedia components, and prepare the game world.
If even one of those steps fails, the result can be a black screen.
The most likely culprits include:
- Corrupted shader caches after a driver update or interrupted shutdown.
- Invalid resolution or display-mode settings that the monitor cannot properly handle.
- Broken GameUserSettings.ini configuration data.
- Discord, Steam, NVIDIA, RTSS, or other overlays interfering with rendering.
- Damaged game files, including startup assets or cinematic files.
- Graphics driver corruption rather than simply an outdated driver.
- DirectX compatibility problems on specific hardware configurations.
- Missing or damaged Visual C++ runtime components.
- Windows permissions preventing the game from properly accessing required folders.
One important rule: do not start with DDU unless you actually need it. If forcing windowed mode solves the problem, there is no reason to spend half an hour reinstalling your graphics driver.
1. Force Honeycomb Into Windowed Mode
This is the first thing I would try.
A black screen that still produces sound is particularly suspicious because it can mean the game itself is running while the rendering output is getting stuck. In that situation, forcing a safer display configuration can sometimes get you straight into the menu.
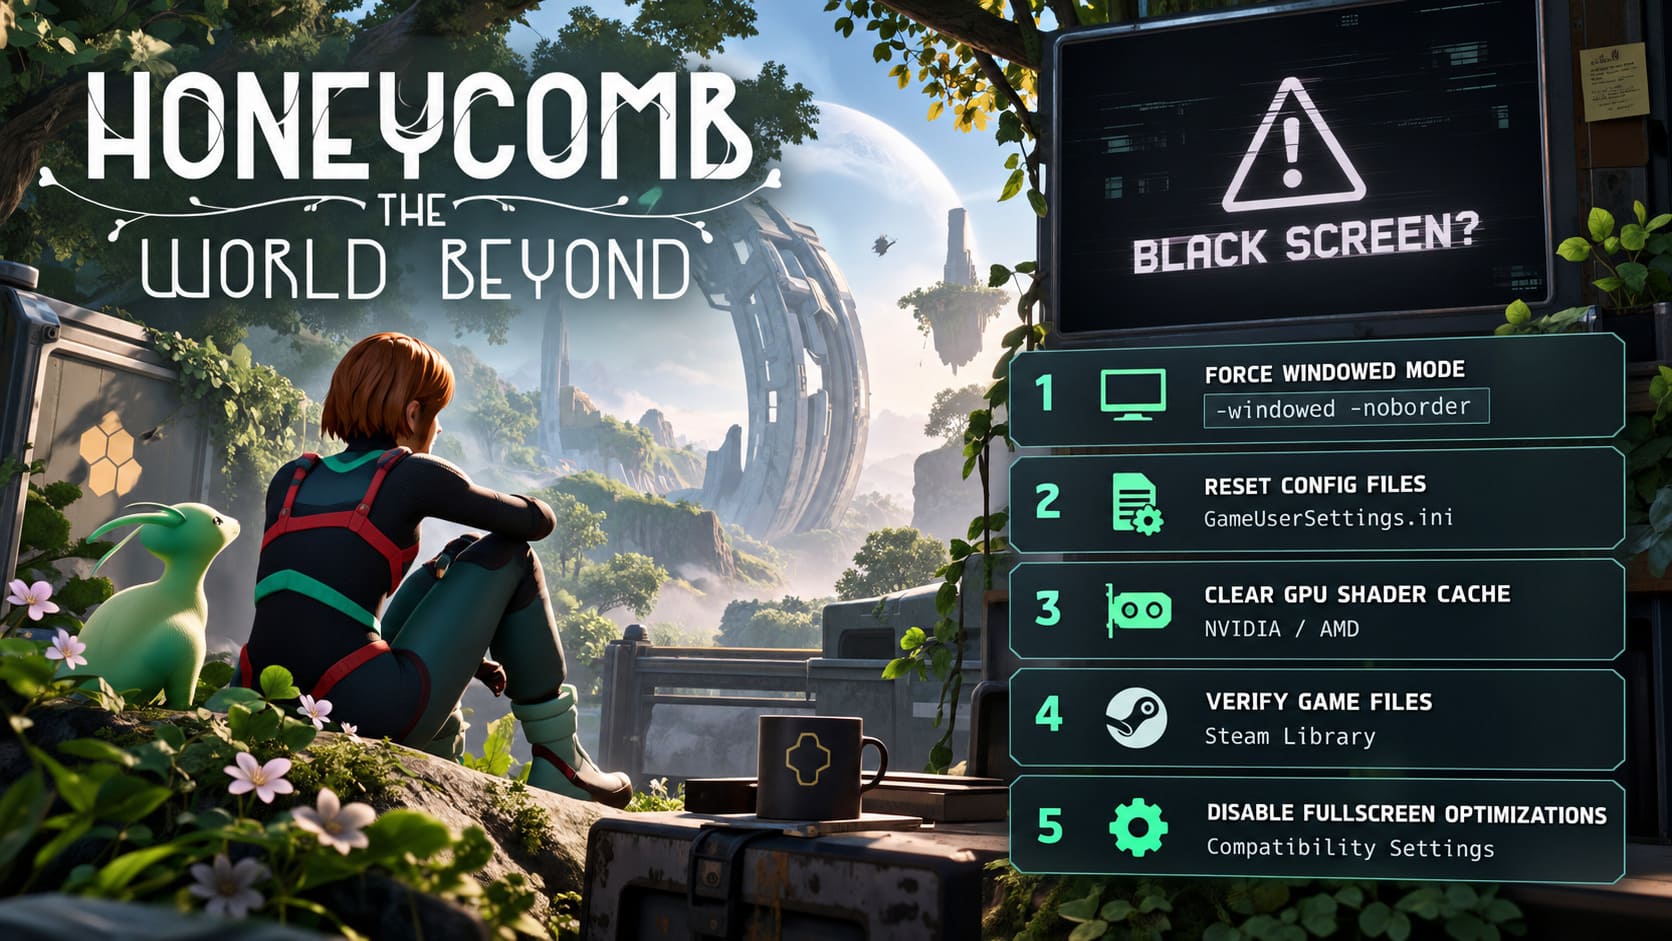
If you own the game on Steam:
- Open Steam and go to your Library.
- Right-click Honeycomb: The World Beyond.
- Select Properties.
- Stay in the General tab.
- Find the Launch Options field.
- Enter the following command:
-windowed -noborderLaunch the game again.
If that does not work, try forcing a more conservative resolution:
-windowed -noborder -w 1920 -h 1080You can replace 1920×1080 with another resolution supported by your monitor.
Why This Can Work
The game may be trying to initialize with a fullscreen resolution, refresh rate, or display configuration that is currently causing problems. Borderless windowed mode removes some of those variables.
Once you successfully reach the main menu, go into the graphics settings and manually choose your preferred resolution and display mode.
If you are launching the game through another client, you can also try adding -windowed to the game’s shortcut or executable launch parameters where supported.
2. Reset Honeycomb’s Configuration Files
This is another fix I would take seriously, especially if Honeycomb previously worked perfectly and suddenly stopped launching.
A configuration file can become corrupted after a crash, forced shutdown, update, or settings change. The game then keeps loading the same broken settings every time you launch it.
The easiest target is usually GameUserSettings.ini.
Press:
Windows Key + R
Enter:
%localappdata%Press Enter.
Look for a folder associated with Honeycomb or Frozen Way. Depending on the game’s current folder structure, you may find the configuration under a path similar to:
Saved\Config\WindowsNoEditoror:
Saved\Config\WindowsFind:
GameUserSettings.iniInstead of immediately deleting it, I recommend renaming it:
GameUserSettings.oldThat gives you a backup.
Launch Honeycomb again.
If the game starts normally, you have found the culprit. The game should generate a fresh configuration file automatically.
This is one of those boring PC fixes that looks almost too simple, yet it can save you from an unnecessary driver reinstall.
3. Clear Your GPU Shader Cache
Shader compilation is one of the more common sources of strange behavior in modern PC games. A damaged cache can cause anything from stuttering to crashes—and occasionally a game can simply refuse to render correctly.
NVIDIA GPUs
Open NVIDIA Control Panel and go to:
Manage 3D Settings → Global Settings
Find Shader Cache Size.
You can temporarily disable it, apply the change, and restart Windows.
After rebooting, navigate to the NVIDIA DX cache location:
C:\Users\YourUsername\AppData\Local\NVIDIA\DXCacheDelete the contents of the folder.
Do not delete random NVIDIA folders elsewhere. We are targeting the cache, not performing digital surgery on your entire graphics installation.
Afterward, restore Shader Cache Size to the normal driver default or another appropriate value.
AMD GPUs
Open AMD Software: Adrenalin Edition.
Go to:
Gaming → Graphics → Advanced
Look for the Reset Shader Cache option and perform the reset.
After clearing the cache, launch Honeycomb again and give the game a little time to rebuild its shaders.
4. Verify the Game Files Through Steam
Before blaming Windows, your GPU, or your motherboard, make sure the actual game installation isn’t damaged.
Steam makes this ridiculously easy.
- Open your Steam Library.
- Right-click Honeycomb: The World Beyond.
- Select Properties.
- Open Installed Files.
- Click Verify integrity of game files.
Steam will compare your installation against its current file manifest.
If something is missing or corrupted, Steam should download a replacement.
This is particularly worth doing if the black screen appeared immediately after an update. An interrupted download or damaged asset can leave you with a game that technically launches but cannot complete its startup sequence.
5. Disable Fullscreen Optimizations
Windows’ fullscreen behavior can occasionally clash with modern games, especially when multiple display utilities or overlays are involved.
Open Honeycomb’s installation directory through Steam’s Installed Files → Browse option.
Find the primary executable, commonly somewhere inside a Binaries\Win64 folder.
Right-click the executable and choose:
Properties → Compatibility
Enable:
- Disable fullscreen optimizations
- Run this program as an administrator
Click Apply, then OK.
Try launching the game again.
I would not blindly keep compatibility settings enabled forever if they make no difference. Treat them as troubleshooting switches. If one of them fixes your black screen, great. If not, move on.
6. Try a Different DirectX Mode
Honeycomb is designed around modern graphics technology, and DirectX 12 is the natural choice for a game of this type. Still, PC hardware combinations are weird.
A graphics card can be perfectly capable of running DX12 games while a specific driver, Windows installation, or hardware configuration has trouble with one particular title.
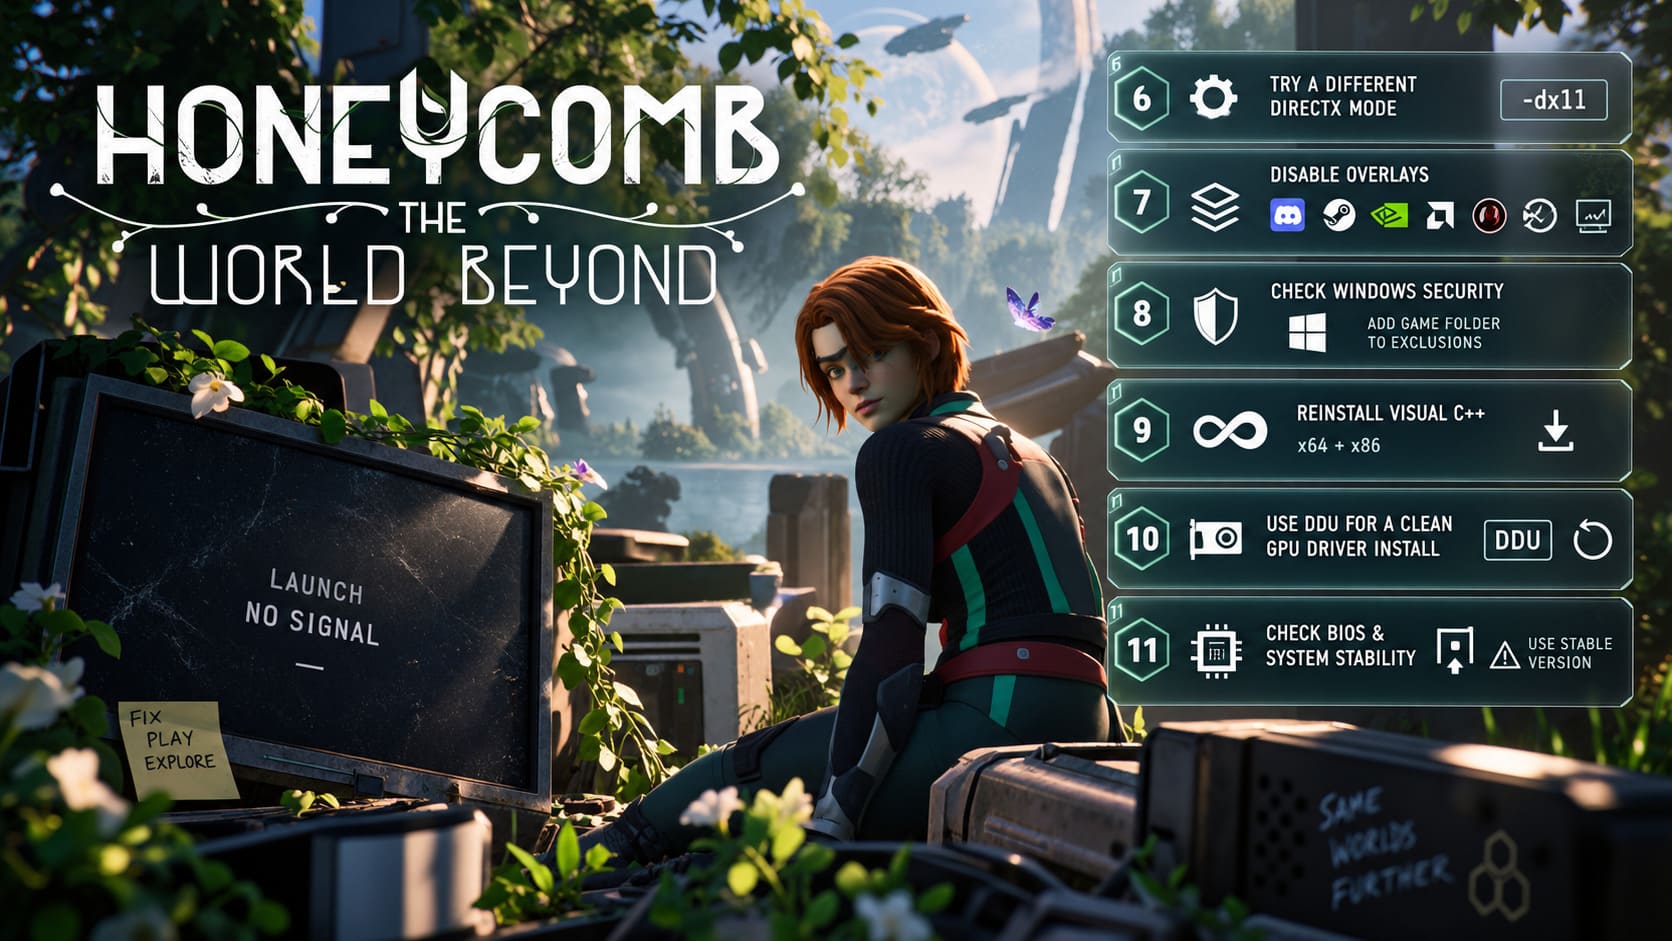
If the game supports the relevant fallback launch parameter on your installation, try:
-dx11Add it through Steam’s Launch Options and start the game.
If Honeycomb suddenly launches, that is valuable information. It suggests the issue may be related to the DX12 rendering path rather than the entire installation.
Do not consider DX11 the ultimate solution. If it works, use it as a diagnostic step and then investigate your GPU drivers, Windows updates, and hardware stability.
7. Kill Every Overlay You Can Find
This is the fix that experienced PC gamers sometimes skip because overlays are so normal that we forget they are even running.
Honeycomb has to initialize its rendering window. Meanwhile, other programs may be trying to inject their own interfaces into that exact process.
That can become a messy little tug-of-war.
Temporarily disable:
- Discord Overlay
- Steam Overlay
- NVIDIA overlay features
- AMD overlay features
- RTSS
- MSI Afterburner monitoring hooks
- Other FPS counters, recording tools, or hardware-monitoring overlays
For RivaTuner Statistics Server, temporarily closing it completely is preferable to simply minimizing it. If you want to keep it open, set Honeycomb’s application detection behavior to a non-intrusive level where appropriate.
I would especially test the game with MSI Afterburner and RTSS completely closed. These utilities are fantastic when everything works, but when a game refuses to render, you want as few variables as possible.
8. Check Windows Security and Antivirus Interference
Security software can occasionally interfere with a newly installed game, particularly when the title is creating configuration files, caches, or communicating with online services during its first launch.
Windows Defender and third-party security suites can quarantine or block files without making the situation obvious.
Check your antivirus quarantine and protection history.
If you are confident the game installation is legitimate, consider adding the Honeycomb installation directory as an exclusion for testing.
Do not permanently disable your entire antivirus stack just because a game has a black screen. That is overkill. Use targeted exclusions and only for trusted files.
9. Reinstall Microsoft Visual C++ Redistributables
Sometimes the game is perfectly fine. The supporting Windows components are not.
Modern PC games frequently depend on Microsoft Visual C++ runtime packages. If those components are missing or damaged, the game can fail during startup without giving you a useful explanation.
Install or repair the current Microsoft Visual C++ Redistributable packages appropriate for your Windows installation, including both x64 and x86 variants where applicable.
Restart your computer afterward.
It is not the most exciting troubleshooting step in the world, but it is considerably less painful than reinstalling a 100+ GB game.
10. Use DDU for a Truly Clean GPU Driver Install
If nothing above has worked, now I would consider using Display Driver Uninstaller.
A normal driver update is not always the same thing as a genuinely clean driver installation. Old components, profiles, or damaged files can survive and continue causing problems.
Download the latest appropriate driver directly from your GPU manufacturer before starting.
Then:
- Hold Shift while selecting Restart from Windows.
- Enter Troubleshoot → Advanced Options → Startup Settings.
- Restart into Safe Mode.
- Launch DDU.
- Select your GPU manufacturer.
- Choose Clean and Restart.
- Allow Windows to boot normally.
- Install the fresh GPU driver package you downloaded earlier.
- Restart once more.
For the cleanest test, avoid immediately installing every GPU companion feature, overlay, recording tool, and performance monitor.
Get the game working first.
Then add your usual utilities back one at a time.
11. Do Not Ignore BIOS and Hardware Stability
This is the nuclear-adjacent option—not because updating BIOS is inherently dangerous, but because it is something you should never do casually.
If you are running a very modern platform with a newer-generation CPU and GPU, motherboard firmware can have a significant impact on system stability.
Check your motherboard manufacturer’s support page for the latest stable BIOS.
If you decide to update:
- Follow the motherboard manufacturer’s instructions exactly.
- Avoid beta firmware unless you specifically need it.
- Do not interrupt the update process.
- Make sure your system has stable power.
- Restore sensible hardware settings if you are running aggressive overclocks or undervolts.
A game black-screening is not automatically a BIOS problem. Treat this as a deeper system-stability investigation rather than your first troubleshooting move.
Honeycomb: The World Beyond Beginner’s Guide – Tips, Tricks, and Bioengineering Strategies for Sota7
Quick Fix Checklist
| Problem | First Fix To Try | Difficulty |
|---|---|---|
| Black screen with audio | -windowed -noborder | Easy |
| Game suddenly stopped launching | Reset GameUserSettings.ini | Easy |
| Crashes after GPU update | Clear shader cache | Easy |
| Missing or corrupted assets | Verify Steam files | Easy |
| Fullscreen startup failure | Disable fullscreen optimizations | Easy |
| DX12-related crash | Test -dx11 | Easy |
| Black screen with monitoring tools | Disable overlays/RTSS | Easy |
| Runtime-related launch failure | Repair Visual C++ | Medium |
| Persistent driver corruption | DDU clean install | Advanced |
| Broader system instability | BIOS/firmware investigation | Advanced |
Honeycomb The World Beyond System Requirements: Download Size and PC Storage Guide
Final Thoughts
A Honeycomb: The World Beyond black screen at launch is frustrating because the game often gives you very little information about what actually failed. You can sit there watching the executable consume CPU and memory while the display remains completely dead, which makes the problem feel much more serious than it may actually be.
Start simple.
Force windowed mode. Reset the game’s configuration. Clear shader caches. Verify the Steam installation. Disable overlays.
Those steps cover a surprising number of startup problems without touching anything dangerous.
If the issue survives all of that, move toward the heavier solutions: Visual C++ repairs, a clean GPU driver installation with DDU, DirectX troubleshooting, and finally deeper hardware or BIOS investigation.
Personally, I would resist the temptation to start changing ten things at once. That is how you fix one problem and create three new ones. Change one variable at a time, launch Honeycomb, and see what happens. Once you find the culprit, you will know exactly what solved it.
And when that black screen finally disappears and Sota7 loads in front of you, the relief is real. After fighting through driver folders, launch arguments, shader caches, and Windows settings, getting back into the alien wilderness feels less like launching a game and more like finally winning a boss fight.
If Honeycomb launches successfully after one of these fixes, keep a note of what changed. PC games evolve quickly through patches and driver updates, and the same problem can return after a future update. Knowing the exact fix saves a lot of frustration the second time around.