Dune Awakening Best Vehicle Combat Weapons For Solo Players (2026 Guide)
There is a big difference between driving around Arrakis with a vehicle and actually knowing how to fight with one.
When you’re playing Dune: Awakening solo, that difference becomes painfully obvious the moment an enemy patrol spots you, an Ornithopter starts circling overhead, or another player decides your carefully collected resources look easier to steal than theirs. You don’t have a second player sitting in the gunner position. Nobody is repairing your vehicle while you shoot. There is no teammate watching your blind spot.
You’re doing everything yourself.
That makes vehicle weapon selection incredibly important for solo players. The best setup isn’t necessarily the weapon with the highest theoretical damage. You want something that gives you burst damage, crowd control, shield pressure, and enough flexibility to disengage when the situation gets ugly.
After spending a ridiculous amount of time thinking about how these encounters actually play out, my biggest takeaway is simple: solo vehicle combat in Dune: Awakening is about controlling the first few seconds of the fight. Hit hard, strip defenses, reposition, and never give a larger group the comfortable engagement they want.
Here are the weapons and tactics that make that playstyle work.

Best Solo Vehicle Combat Weapons at a Glance
| Weapon | Best Use | Solo Strength |
|---|---|---|
| Rocket Pods | Infantry, camps, resource runs | Massive AoE burst |
| Regis Missile Launcher | Heavy vehicles and armored targets | Long-range burst damage |
| The Ancient Way | Anti-air and anti-vehicle combat | Excellent against mobile threats |
| Black Market K-28 Lasgun | Unshielded vehicles and structures | Extreme structural damage |
| Starburst / Burning Attachments | Shield and health pressure | Strong sustained damage |
The important thing is that these weapons don’t all fill the same role. Trying to build a solo loadout around one damage type is asking to get caught with the wrong tool at the worst possible moment.
1. Rocket Pods: The Solo Ground-Fighting Workhorse
If you’re mostly fighting on the ground, Rocket Pods are one of the most useful weapons a solo player can put on a Buggy.
Their biggest advantage isn’t simply raw damage. It’s the fact that rockets are incredibly forgiving when you’re already trying to drive, aim, manage cooldowns, and keep track of everything happening around you.
Solo players constantly run into situations where enemies are grouped together. Sentinel camps, hostile infantry, patrols, resource locations and contested areas can turn into absolute chaos very quickly. Rocket Pods let you punish that density instead of wasting time trying to pick targets one by one.
And honestly, that’s where they feel fantastic.
You don’t need to sit perfectly still and land precision shots. You can roll into an enemy position, fire a volley into the group, and immediately start moving again.
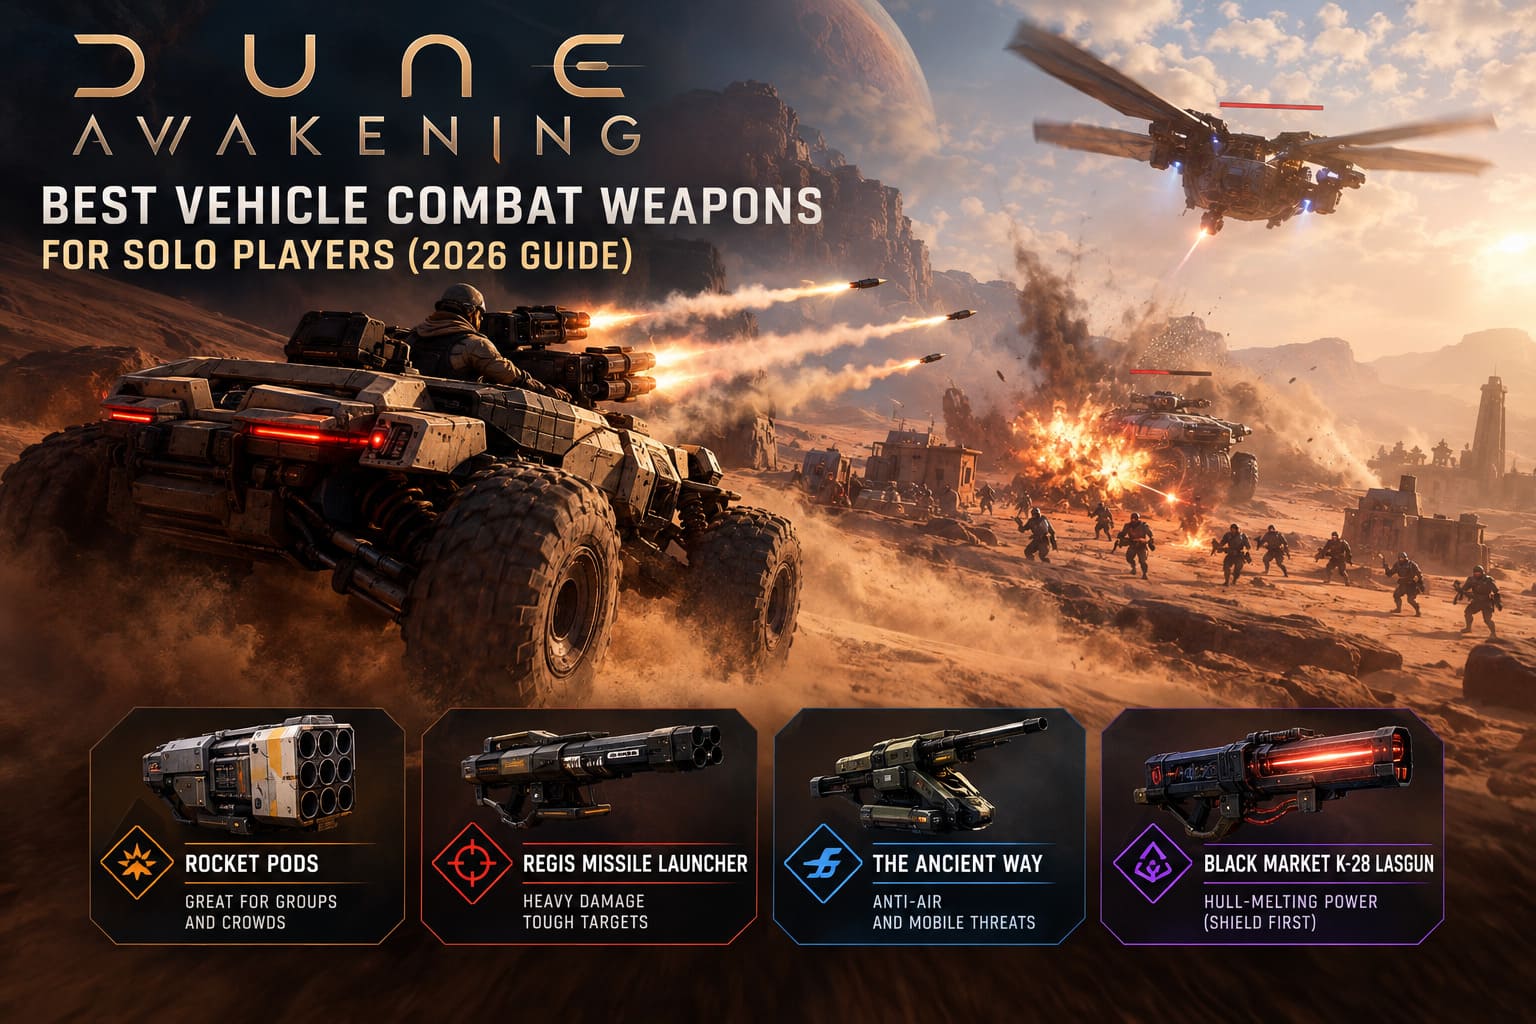
Why Rocket Pods Work So Well for Solo Players
- High area-of-effect damage against clustered enemies.
- Excellent for clearing hostile NPC groups quickly.
- Forgiving when you’re driving and fighting simultaneously.
- Useful during resource runs and corpse-recovery trips.
- Strong for creating an opening when you’re suddenly ambushed.
- Works particularly well with a mobile Buggy setup.
One of my favorite applications for this type of weapon is the classic hit-the-camp-and-leave approach.
You don’t have to completely conquer an area. You only need to create enough breathing room to grab what you came for.
Drive in, dump rockets into the highest-density group, immediately reposition, and use the resulting confusion to finish off isolated targets or collect your resources. If reinforcements start appearing, you’re already moving.
That last part matters enormously.
A solo player who stops to admire their damage numbers is usually a solo player about to get surrounded.
2. Regis Missile Launcher: Heavy Firepower Without a Squad
When the fight involves armored targets or enemy vehicles, the Regis Missile Launcher becomes much more attractive.
Rocket Pods are fantastic for general-purpose ground combat, but the Regis Missile Launcher is the kind of weapon you bring when something significantly more expensive is trying to ruin your afternoon.
The biggest advantage here is burst potential at range.
Solo players should avoid prolonged vehicle exchanges whenever possible. A coordinated group can rotate positions, cover damaged vehicles, repair, and attack from multiple directions. You can’t. If you get dragged into a long firefight, the odds of something going wrong increase with every second.
The Regis Missile Launcher gives you a way to make the opening exchange count.
Best Regis Missile Launcher Uses
PvE:
Use it against elite camps, patrol vehicles and tougher targets where conventional weapons take too long to finish the job.
PvP:
Use the launcher to punish vehicles that expose themselves or commit to a predictable chase. Even when an opponent manages to avoid the center of an explosion, the area damage can still make the attack worthwhile.
The trick is not to treat the Regis as a weapon for standing your ground.
Fire, reposition, fire again.
If an enemy starts chasing you, make them work for every shot. Use terrain, elevation changes and rocks to disrupt their approach. A solo player doesn’t win by becoming the toughest tank in the desert. You win by making yourself incredibly annoying to kill.
3. The Ancient Way: Your Answer to Ornithopter Problems
Nothing changes the mood of a solo expedition faster than an enemy Ornithopter appearing overhead.
You’re driving across the Deep Desert, minding your own business, and suddenly the sky starts making engine noises. At that point, the entire encounter can become a survival exercise.
This is where The Ancient Way becomes particularly valuable.
Its role is much more specialized than Rocket Pods or the Regis Missile Launcher. It is particularly relevant when you’re dealing with airborne threats and heavily mobile vehicles.
For solo players, specialization can actually be a strength.
You don’t need every weapon to do everything. You need your loadout to cover the situations that can realistically end your run.
Why Anti-Air Capability Matters
An Ornithopter has a massive mobility advantage over a ground vehicle. It can approach from different angles, disengage quickly and keep pressure on you from above.
Without a suitable counter, you can spend the entire encounter simply trying to survive.
The Ancient Way gives you a way to push back.
If an enemy pilot becomes too aggressive and starts making repeated attack runs, disciplined use of an anti-vehicle weapon can force them to reconsider the engagement.
That psychological pressure is useful too.
A pilot who knows you can seriously punish their aircraft has to respect your position. That can buy you the few seconds you need to reach cover, finish your objective or escape the area entirely.
For late-game solo players spending serious time in dangerous regions, having a dedicated answer to airborne threats isn’t something I’d treat as optional.
4. Black Market K-28 Lasgun: The Hull-Melting Option
Now we get to the slightly weird one.
The Black Market K-28 Lasgun isn’t technically a conventional vehicle-mounted weapon, but its importance in vehicle combat makes it impossible to ignore when discussing solo strategies.
The Lasgun’s big selling point is brutally simple:
If the target is unshielded, it can do terrifying structural damage.
That’s exactly why it becomes so interesting for unconventional solo builds.
The important limitation is equally simple. An active Holtzman shield changes the equation completely.
You don’t want to waste your Lasgun attack against a target whose defenses haven’t been properly stripped.
That means the K-28 works best as part of a sequence rather than as your first button.
The Solo Lasgun Sequence
Step 1: Pressure or strip the enemy’s shield.
Step 2: Force the target into a vulnerable position.
Step 3: Switch to the K-28 Lasgun.
Step 4: Hammer the exposed hull or structure.
Step 5: Immediately reposition before the enemy can organize a counterattack.
This is where a fast Buggy or Sandbike-style approach becomes interesting. Mobility lets you choose where the engagement happens instead of simply accepting whatever position the enemy gives you.
The classic group strategy of using an Ornithopter as a platform for a Lasgun is obviously much harder to reproduce alone. But the underlying principle still works: remove the shield, expose the structure, then apply overwhelming damage before the opponent can recover.
Used correctly, the K-28 feels less like a normal weapon and more like a demolition tool.
Solo Vehicle Combat Tactics That Actually Matter
Having good weapons is only half the battle. A fantastic weapon attached to a terrible combat philosophy will still get you killed.
Solo vehicle combat rewards players who understand when not to fight.

1. Strip Shields Before Committing Heavy Damage
This is probably the biggest mistake inexperienced players make.
Don’t throw your strongest anti-vehicle attack into an active Holtzman shield just because the target is standing in front of you.
Build your attack around shield pressure first.
Burning effects and weapons such as Starburst or other suitable burning vehicle attachments can be useful because sustained damage gives you another way to pressure the enemy rather than relying entirely on one huge attack.
Once the target’s defenses are compromised, that’s when your heavier weapons become much more valuable.
Think of the fight as two separate phases:
Defense removal → Hull destruction.
That simple mental model makes weapon selection much easier.
2. Mobility Is Your Real Armor
This is the part that gets overlooked constantly.
A solo player doesn’t have a teammate repairing the vehicle while they continue shooting. You don’t have someone watching behind you. You can’t afford to sit in one location and trade damage indefinitely.
Speed is defense.
The Sandbike is extremely useful during earlier stages because of its excellent ground mobility. It isn’t designed to carry the same combat burden as a heavier vehicle, but that speed can save your life when you’re trying to cross dangerous territory.
As you progress, the Buggy becomes a much more attractive all-round platform.
You gain a better combination of mobility, storage and combat flexibility, while weapon options such as Rocket Pods give you considerably more offensive utility.
For a solo player, that balance is extremely valuable.
You don’t necessarily need the biggest vehicle available.
You need the vehicle that lets you choose when the fight starts and when it ends.
3. Master the Hit-and-Run
Do not turn every encounter into a turret duel.
Seriously.
If three enemies are sitting together with better firepower than you, parking your vehicle in front of them and trading shots is not bravery. It’s a donation.
Instead, think in short combat cycles:
Approach → burst damage → reposition → evaluate → attack again or escape.
Terrain is your best friend here.
Rock formations, ruins, cliffs and other line-of-sight obstacles can completely change an engagement. If an enemy vehicle has a lock or clear firing lane on you, disappear behind cover.
Make them move.
Make them search.
Make them waste time.
Then attack from another angle if the opportunity appears.
If it doesn’t, leave.
There is no shame in abandoning a fight when you’re carrying a backpack full of valuable materials. Arrakis is enormous, and there is almost always another angle, another rock formation or another route out.
Recommended Solo Loadout Philosophy
Rather than thinking about one “perfect” weapon, build your setup around complementary roles.
| Combat Role | Recommended Option | Purpose |
|---|---|---|
| Ground AoE | Rocket Pods | Clear infantry and dense NPC groups |
| Heavy Burst | Regis Missile Launcher | Punish armored and vehicle targets |
| Anti-Air | The Ancient Way | Pressure hostile Ornithopters |
| Hull Damage | Black Market K-28 Lasgun | Destroy exposed structures |
| Shield/Pressure | Starburst / Burning Attachments | Prepare targets for heavy attacks |
This gives you a much more flexible approach than simply stacking the highest damage numbers you can find.
The important question isn’t “Which weapon has the biggest number?”
It’s “What happens when the enemy does something I didn’t expect?”
That’s the question every good solo build should answer.
Final Verdict: Build for Control, Not Just Damage
Solo vehicle combat in Dune: Awakening is at its best when you stop trying to fight like a squad.
You don’t have the manpower to dominate every engagement through sustained fire. What you do have is control over your positioning, your timing and your ability to disappear into the desert when things go sideways.
Rocket Pods are fantastic for ground clearing and dense PvE encounters. The Regis Missile Launcher gives you the heavy burst needed when tougher vehicles enter the picture. The Ancient Way provides an important answer to airborne threats, while the Black Market K-28 Lasgun becomes devastating once an enemy’s shield has been removed.
But weapons alone won’t make a solo player dangerous.
The real advantage comes from combining mobility, shield stripping, burst damage and aggressive repositioning.
Hit first. Hit hard. Don’t sit still.
If the enemy survives the opening attack and starts turning the fight into a numbers game, break contact. Arrakis is enormous, and there is almost always another angle, another rock formation or another route out.
That is the solo mindset.
You’re not trying to prove that your vehicle can survive anything.
You’re trying to make sure it never has to.